WATCH THE FULL LOOM WALKTHROUGH HERE:
https://www.loom.com/share/6945b6e64c1d4605bd28e3a8c6473d56?sid=64a836d2-8d40-4e99-940e-47473bcf11da
Step 1: Log into the CRM platform and navigate to the "Phone Numbers" section.
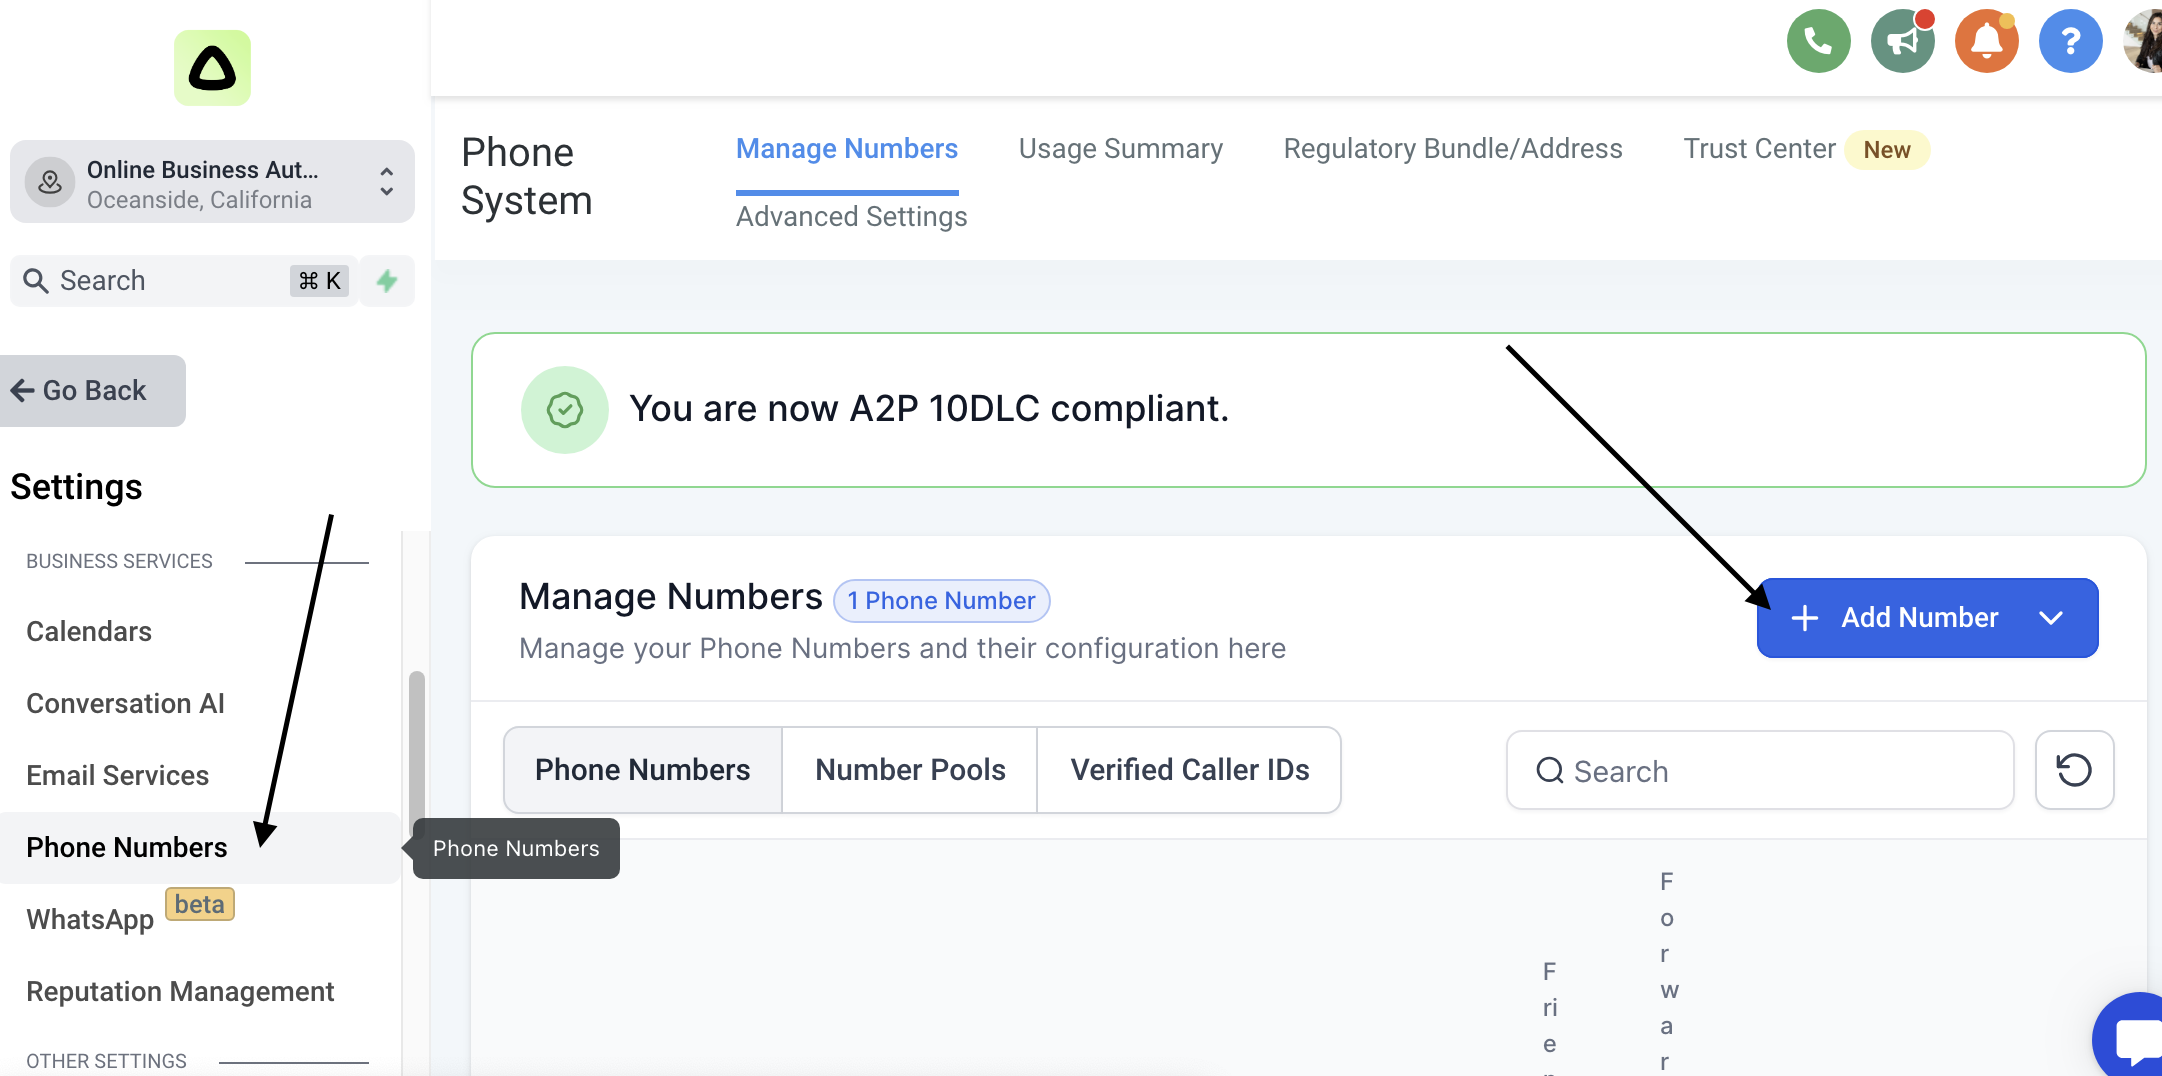
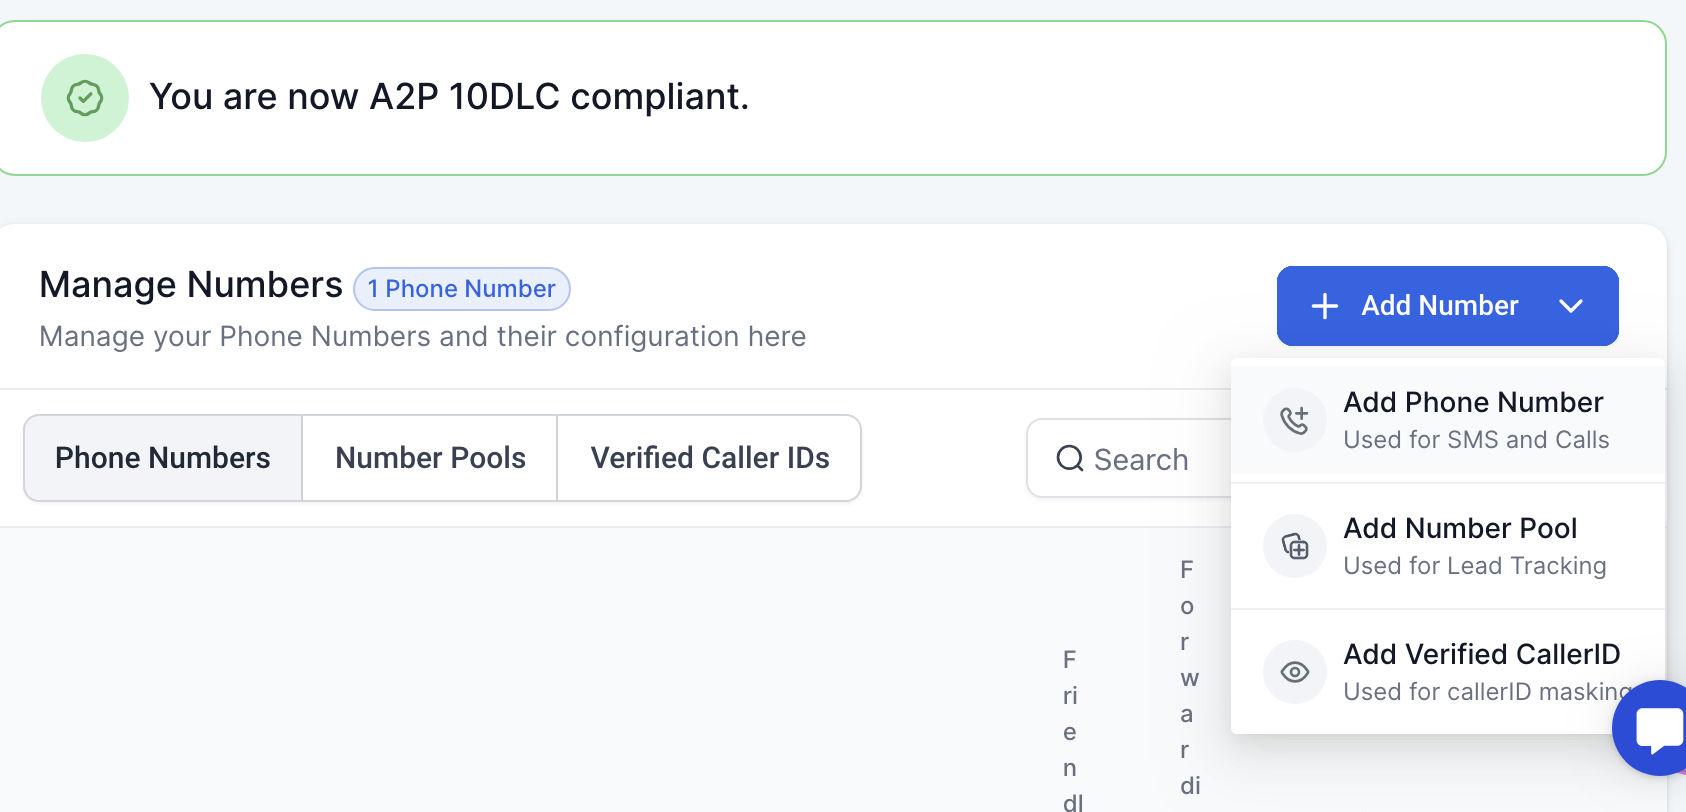
Step 2: Click on the "Purchase New Number" button.
Step 3: Choose your desired country and area code for the phone number.
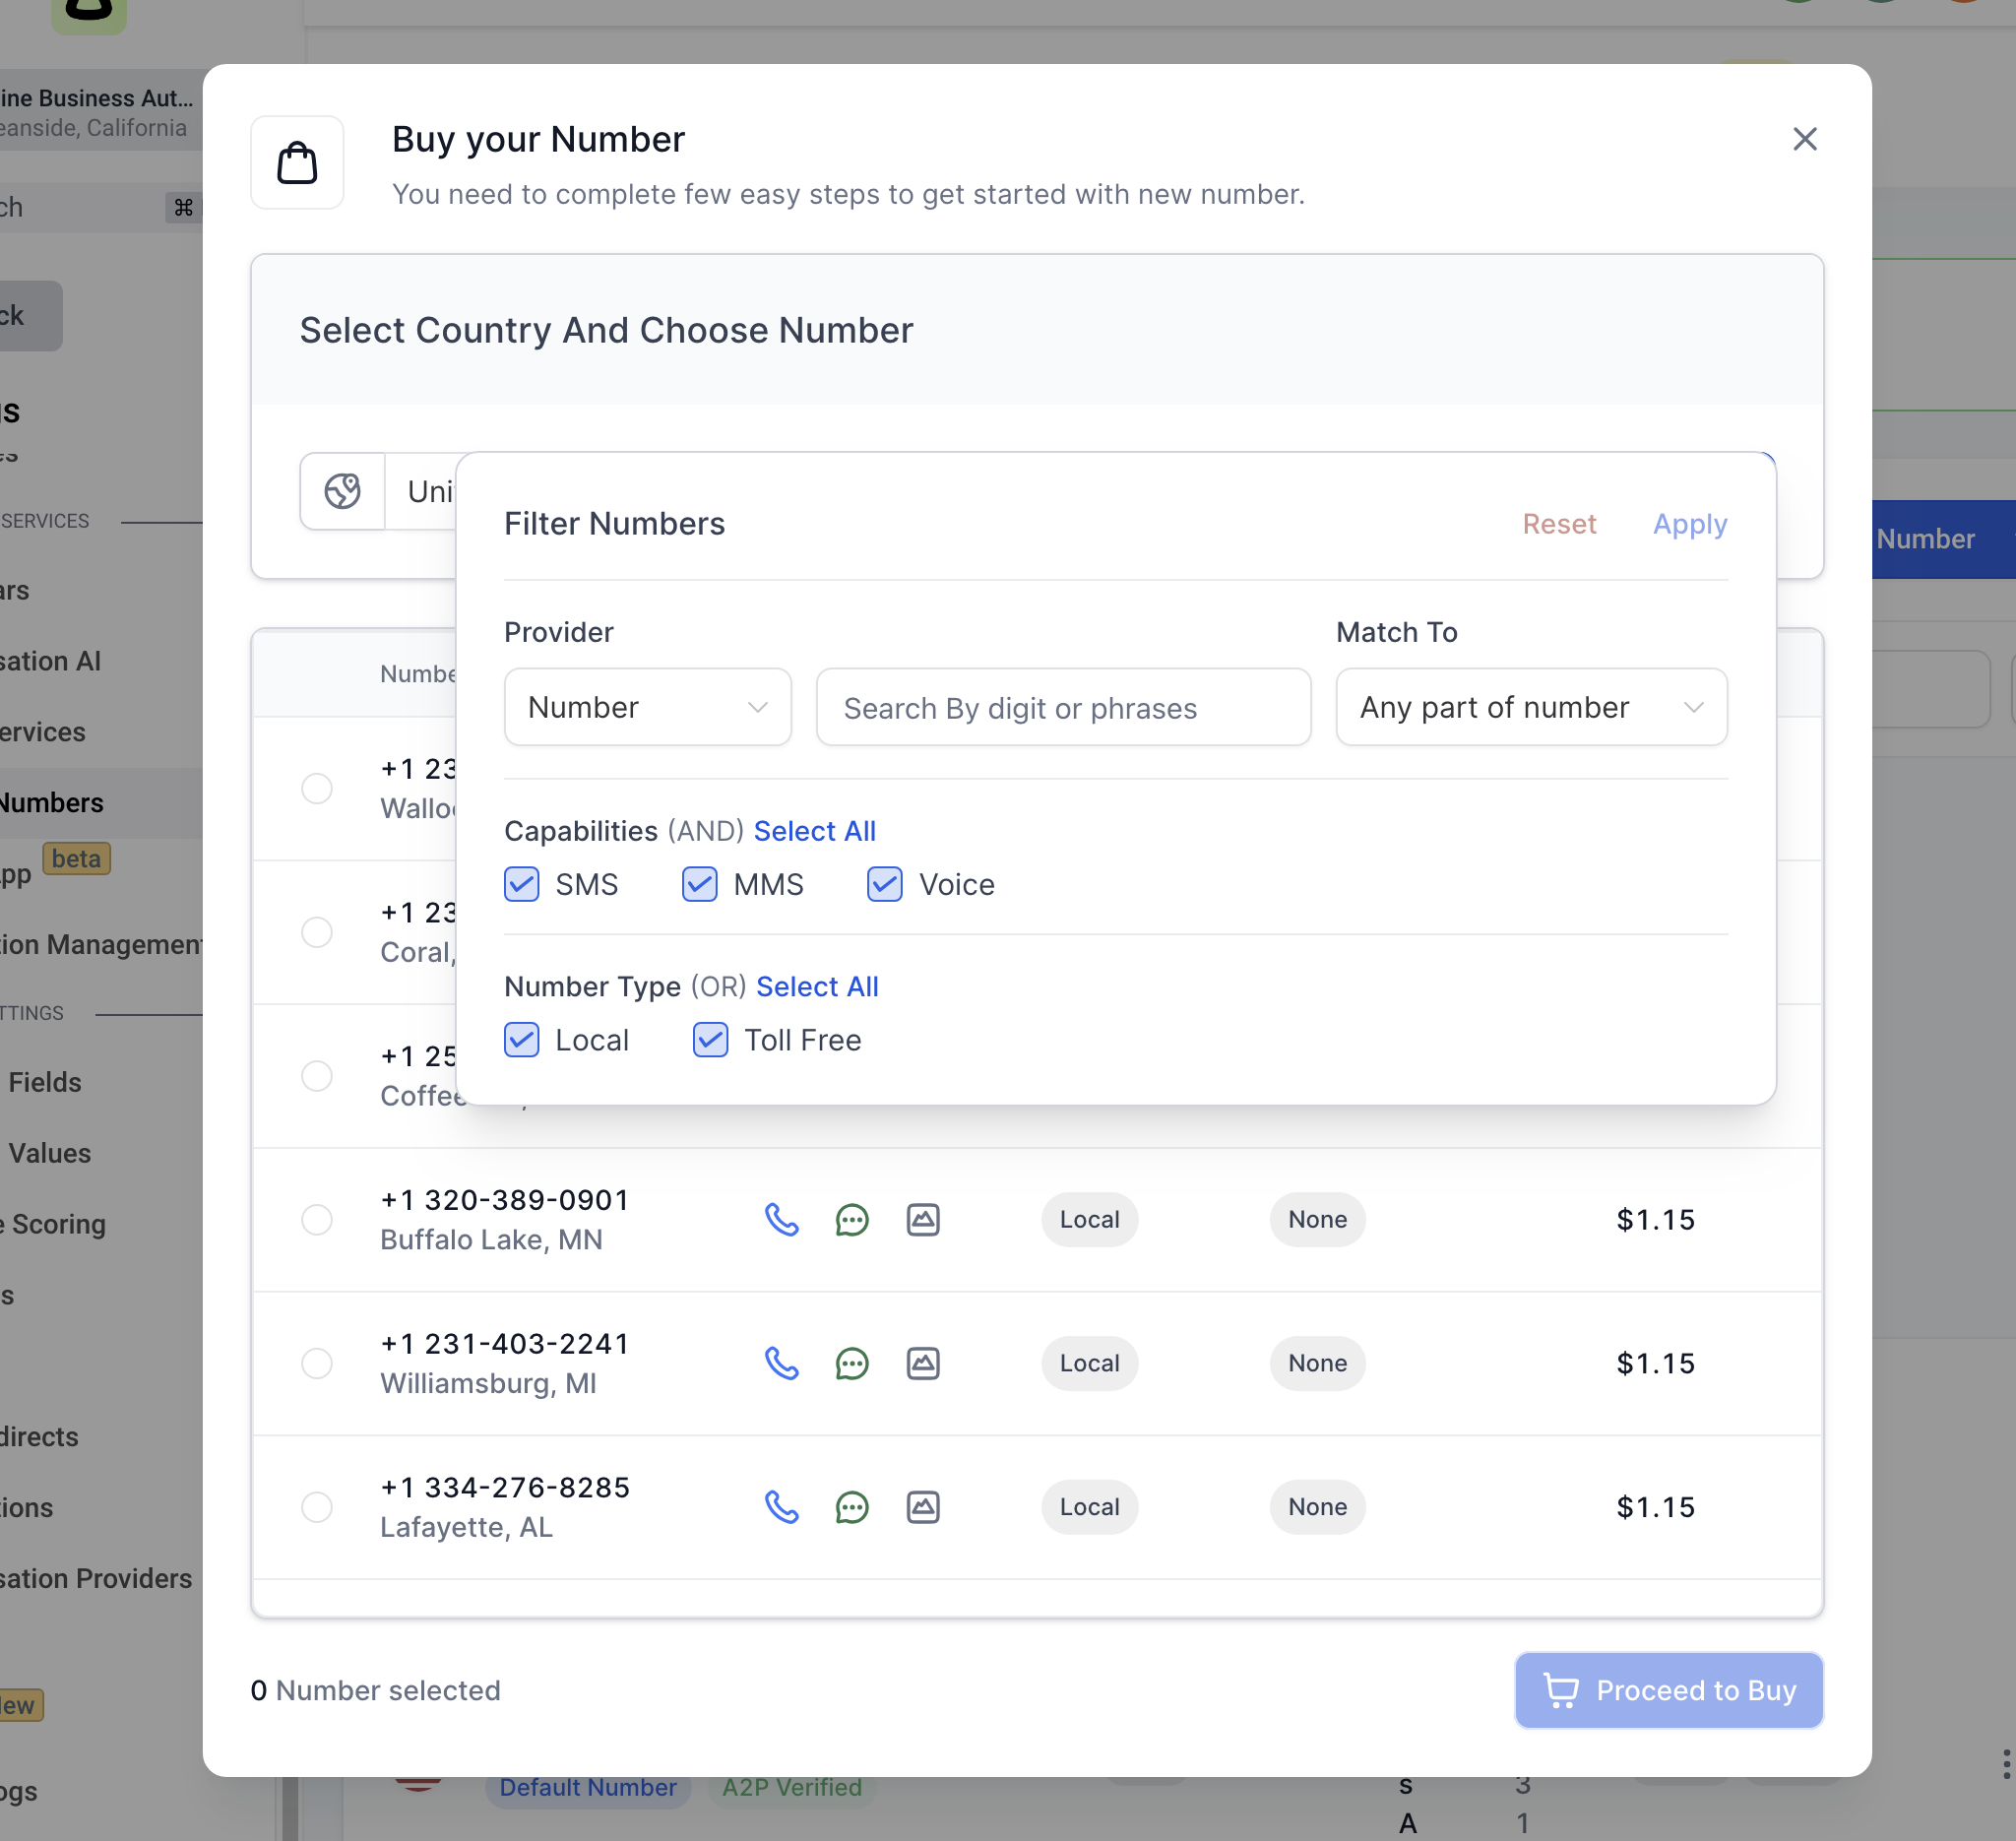
Step 4: Select a number from the available list and Review the pricing and terms of service for the selected number. If you agree, click on "proceed to buy".
Hit "exit" then go to the "Manage Numbers" Section on the top menu for part 2
Be sure you've toggled to the settings > Phone numbers > then click on the "manage Numbers" tab on the top sub menu where you can then see your newly purchased numbers
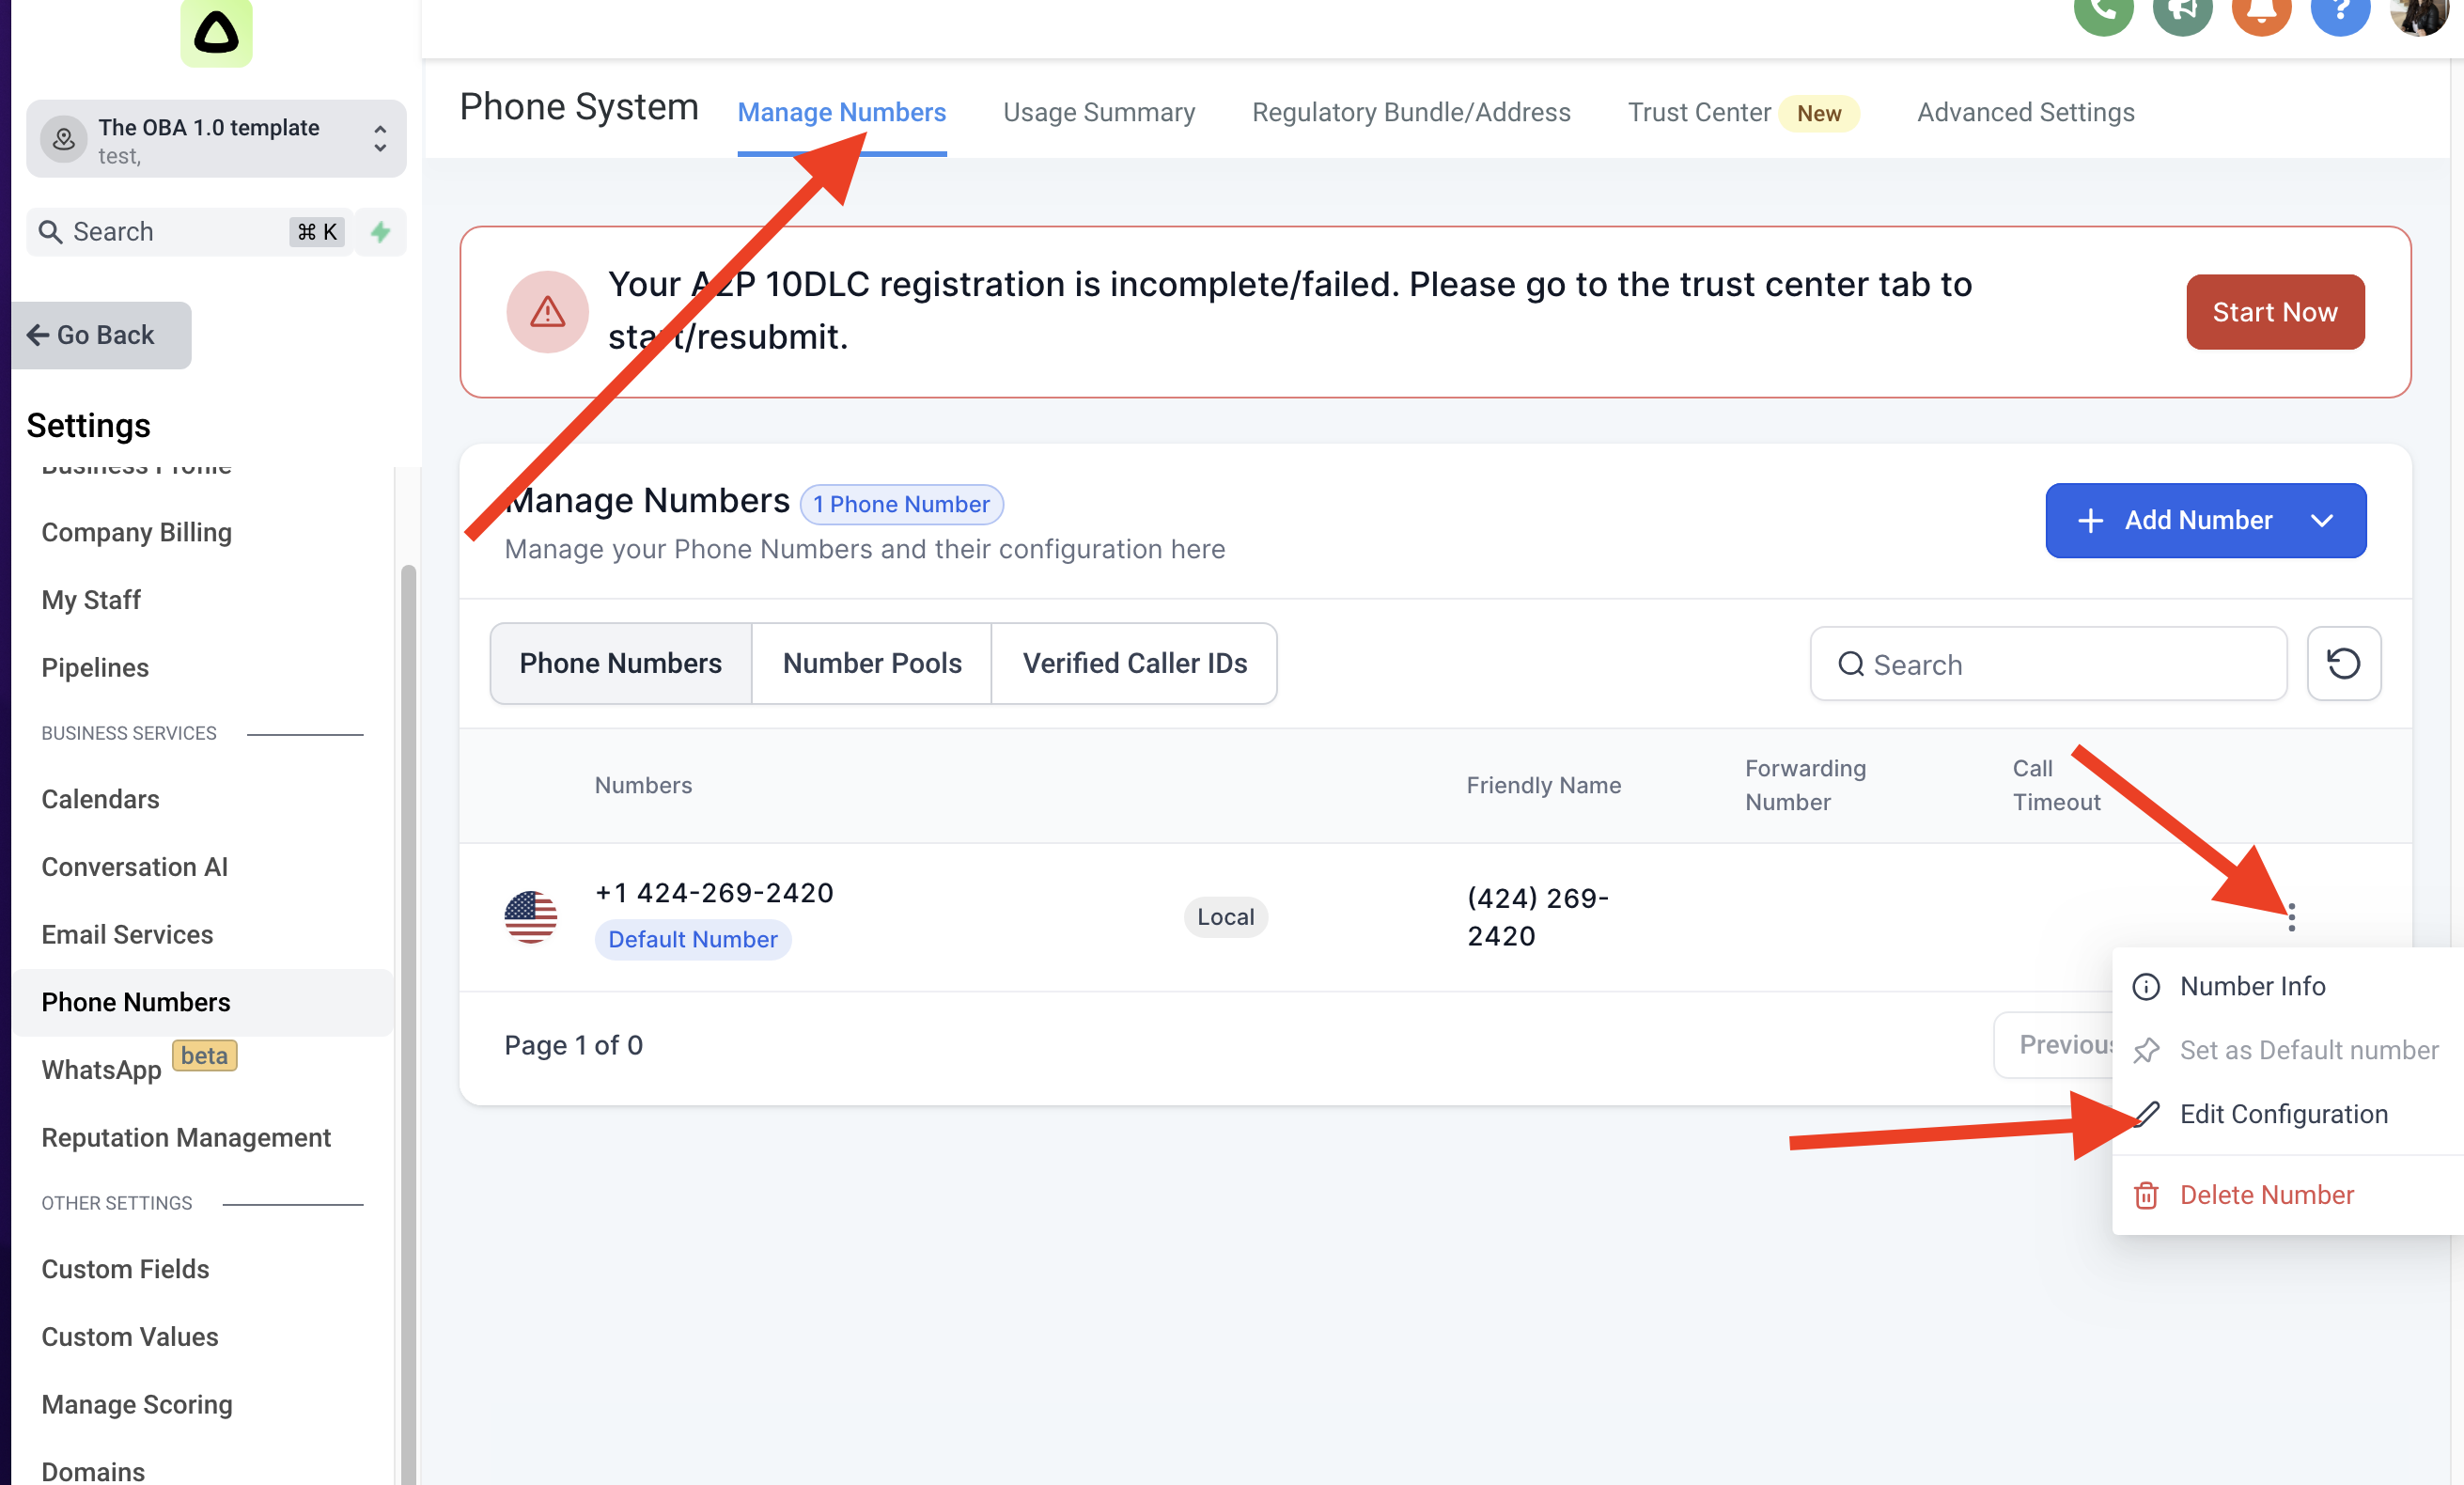
Toggle to your new number and click on the 3 dots on the far right, then click on "edit configuration to open the pop up settings
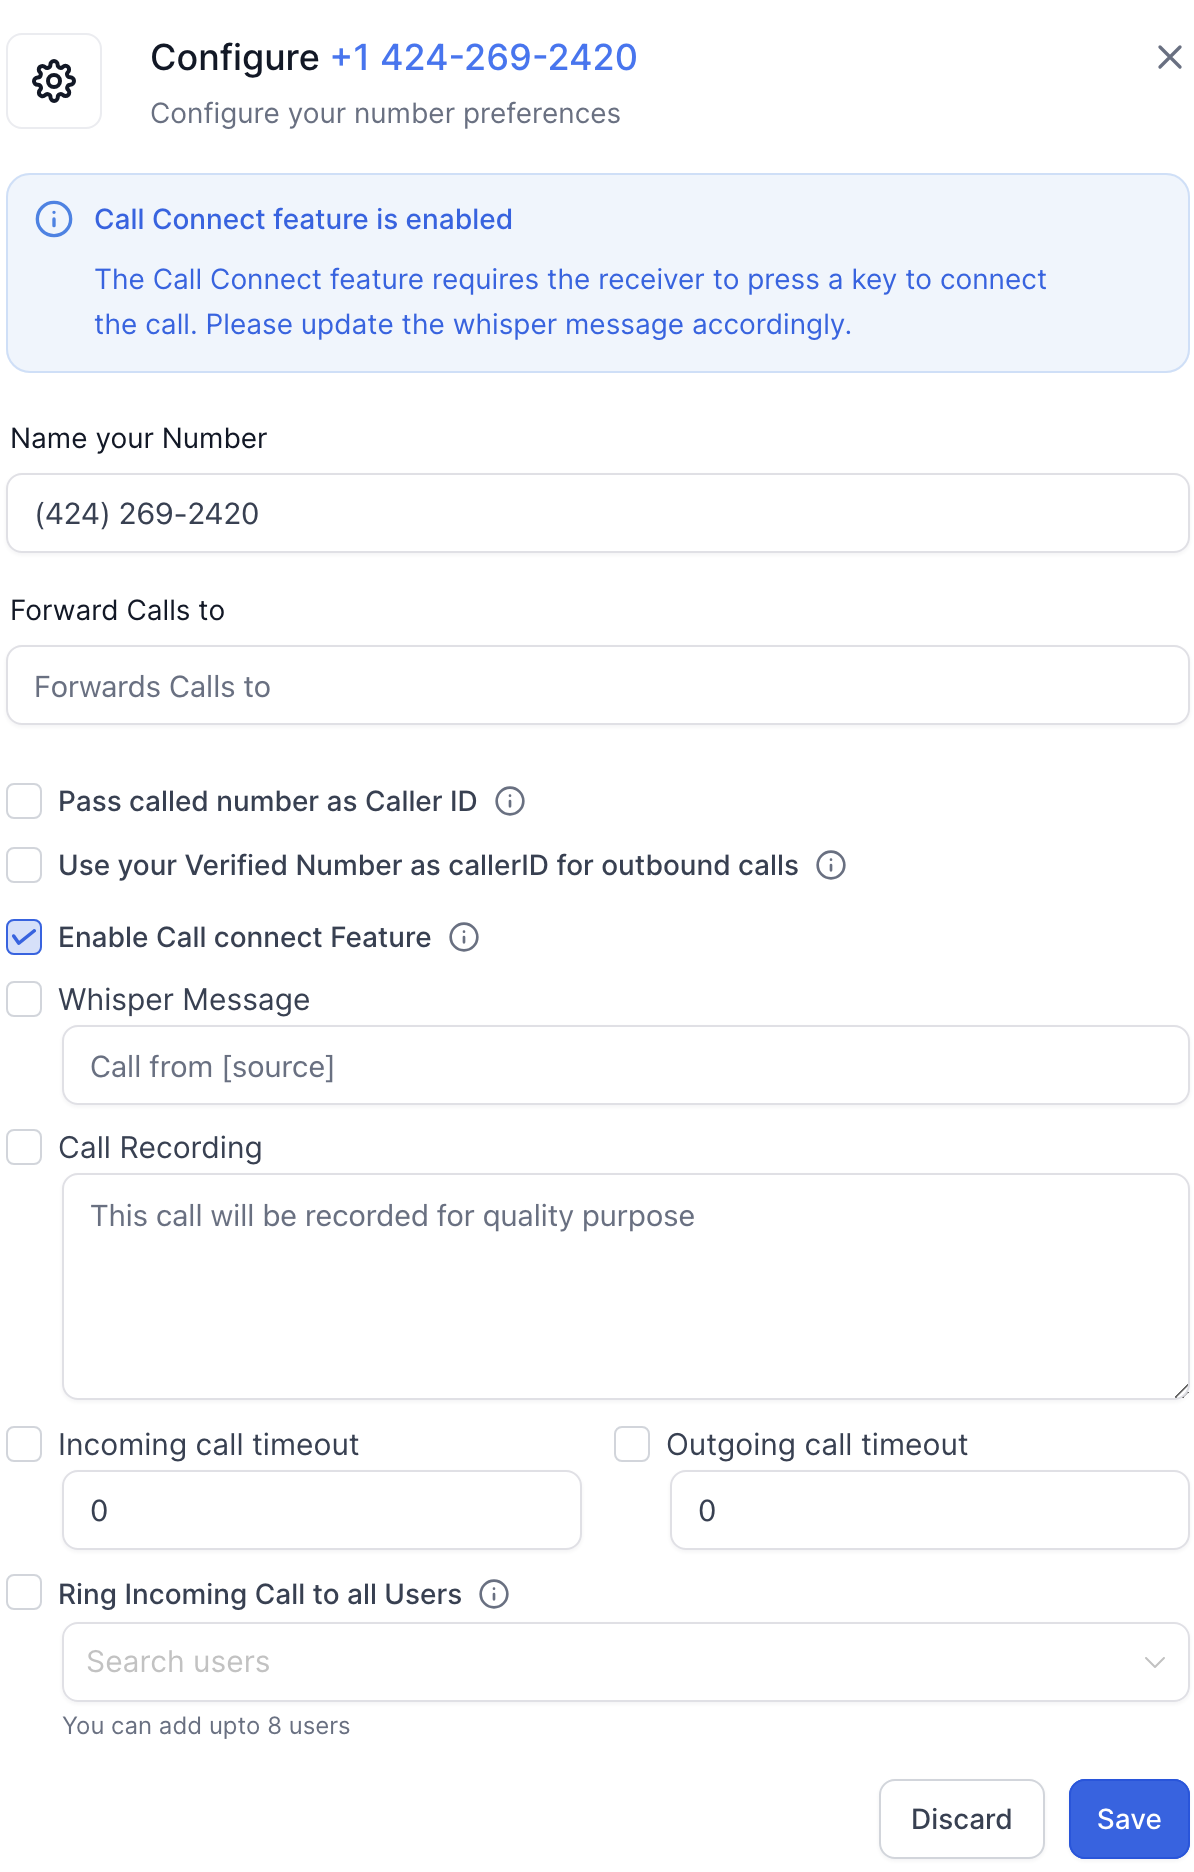
Customize the Number settings by:
Naming your number with Your name or the company name i.e. John Smith Work
Provide the phone number you would like phone calls to forward to, i.e. if you want the calls to be forwarded to your personal cell, enter your cell number here
Check the "whisper message" so you can enable the ability to have the system tell you when a call is comin g from the system
Choose to toggle on or off the "call recording" feature and message
Toggle the Incoming and outgoing call timeout features and set to at least 30-60 seconds to ensure calls can go to voicemail
Toggle "ring incoming call to users" to select which users you'd like to also get notified when incoming calls are made
Once complete, hit save.
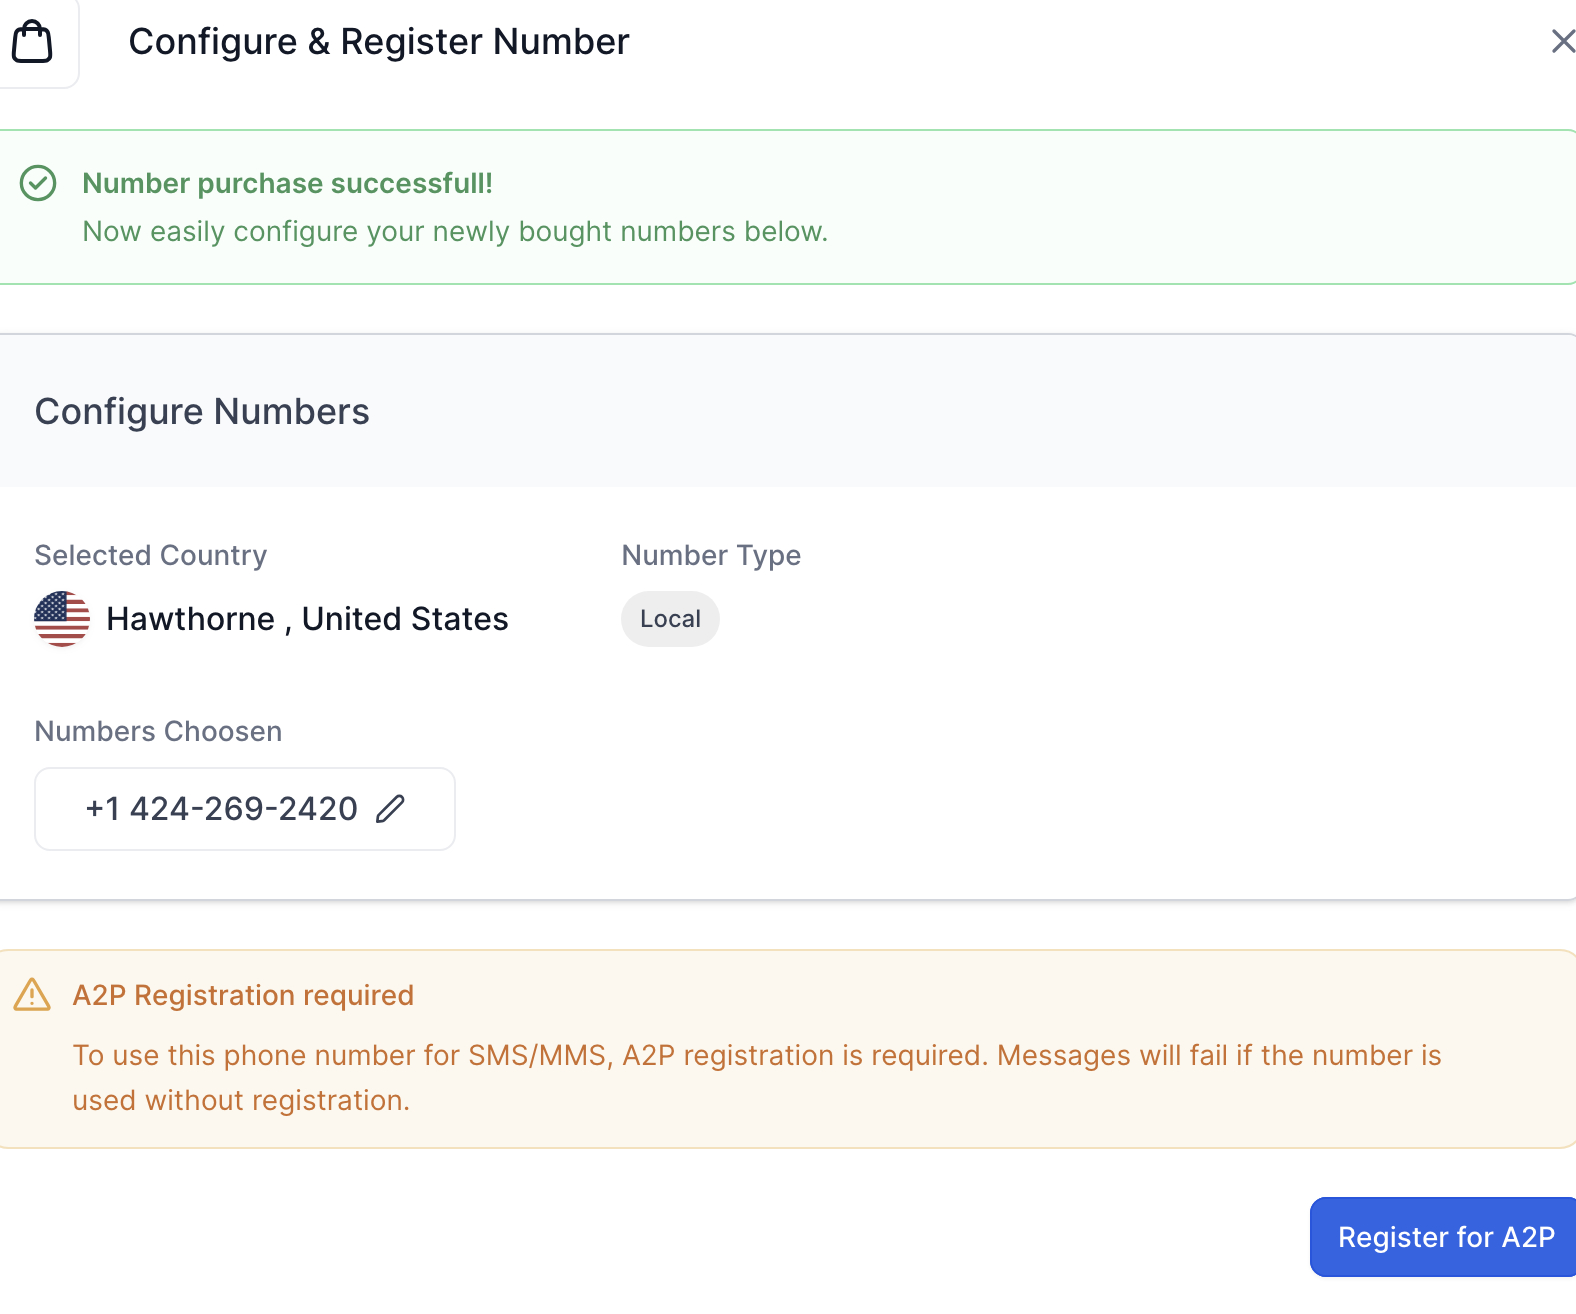
Now you're ready to dive into the A2P Compliance setup process
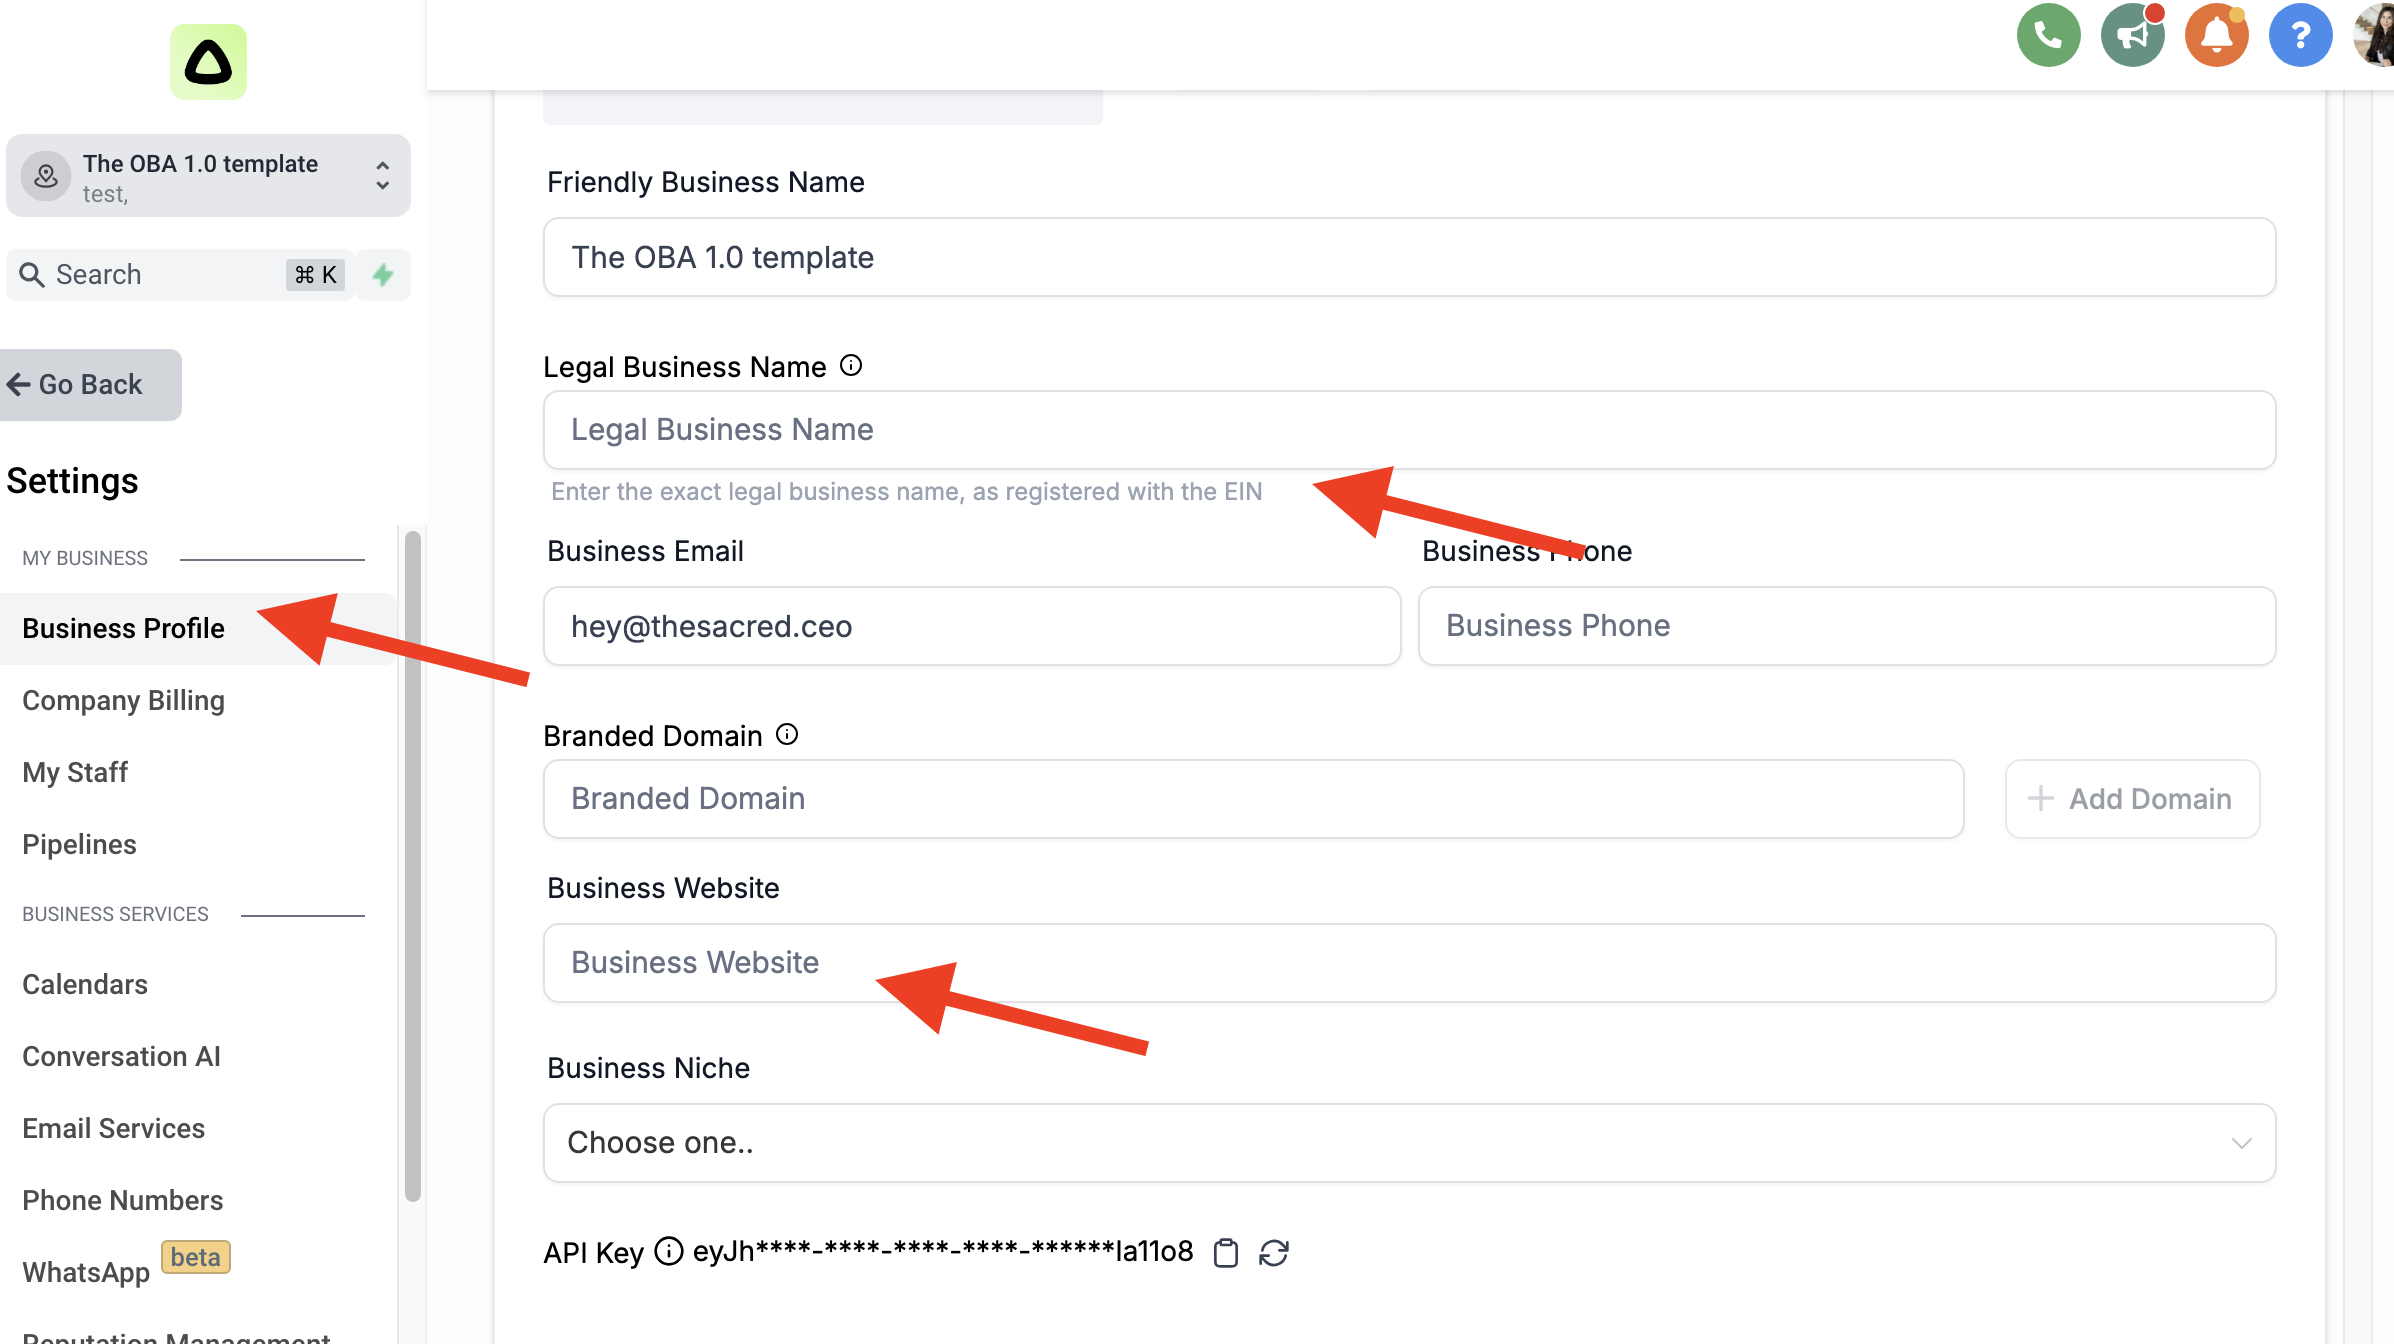
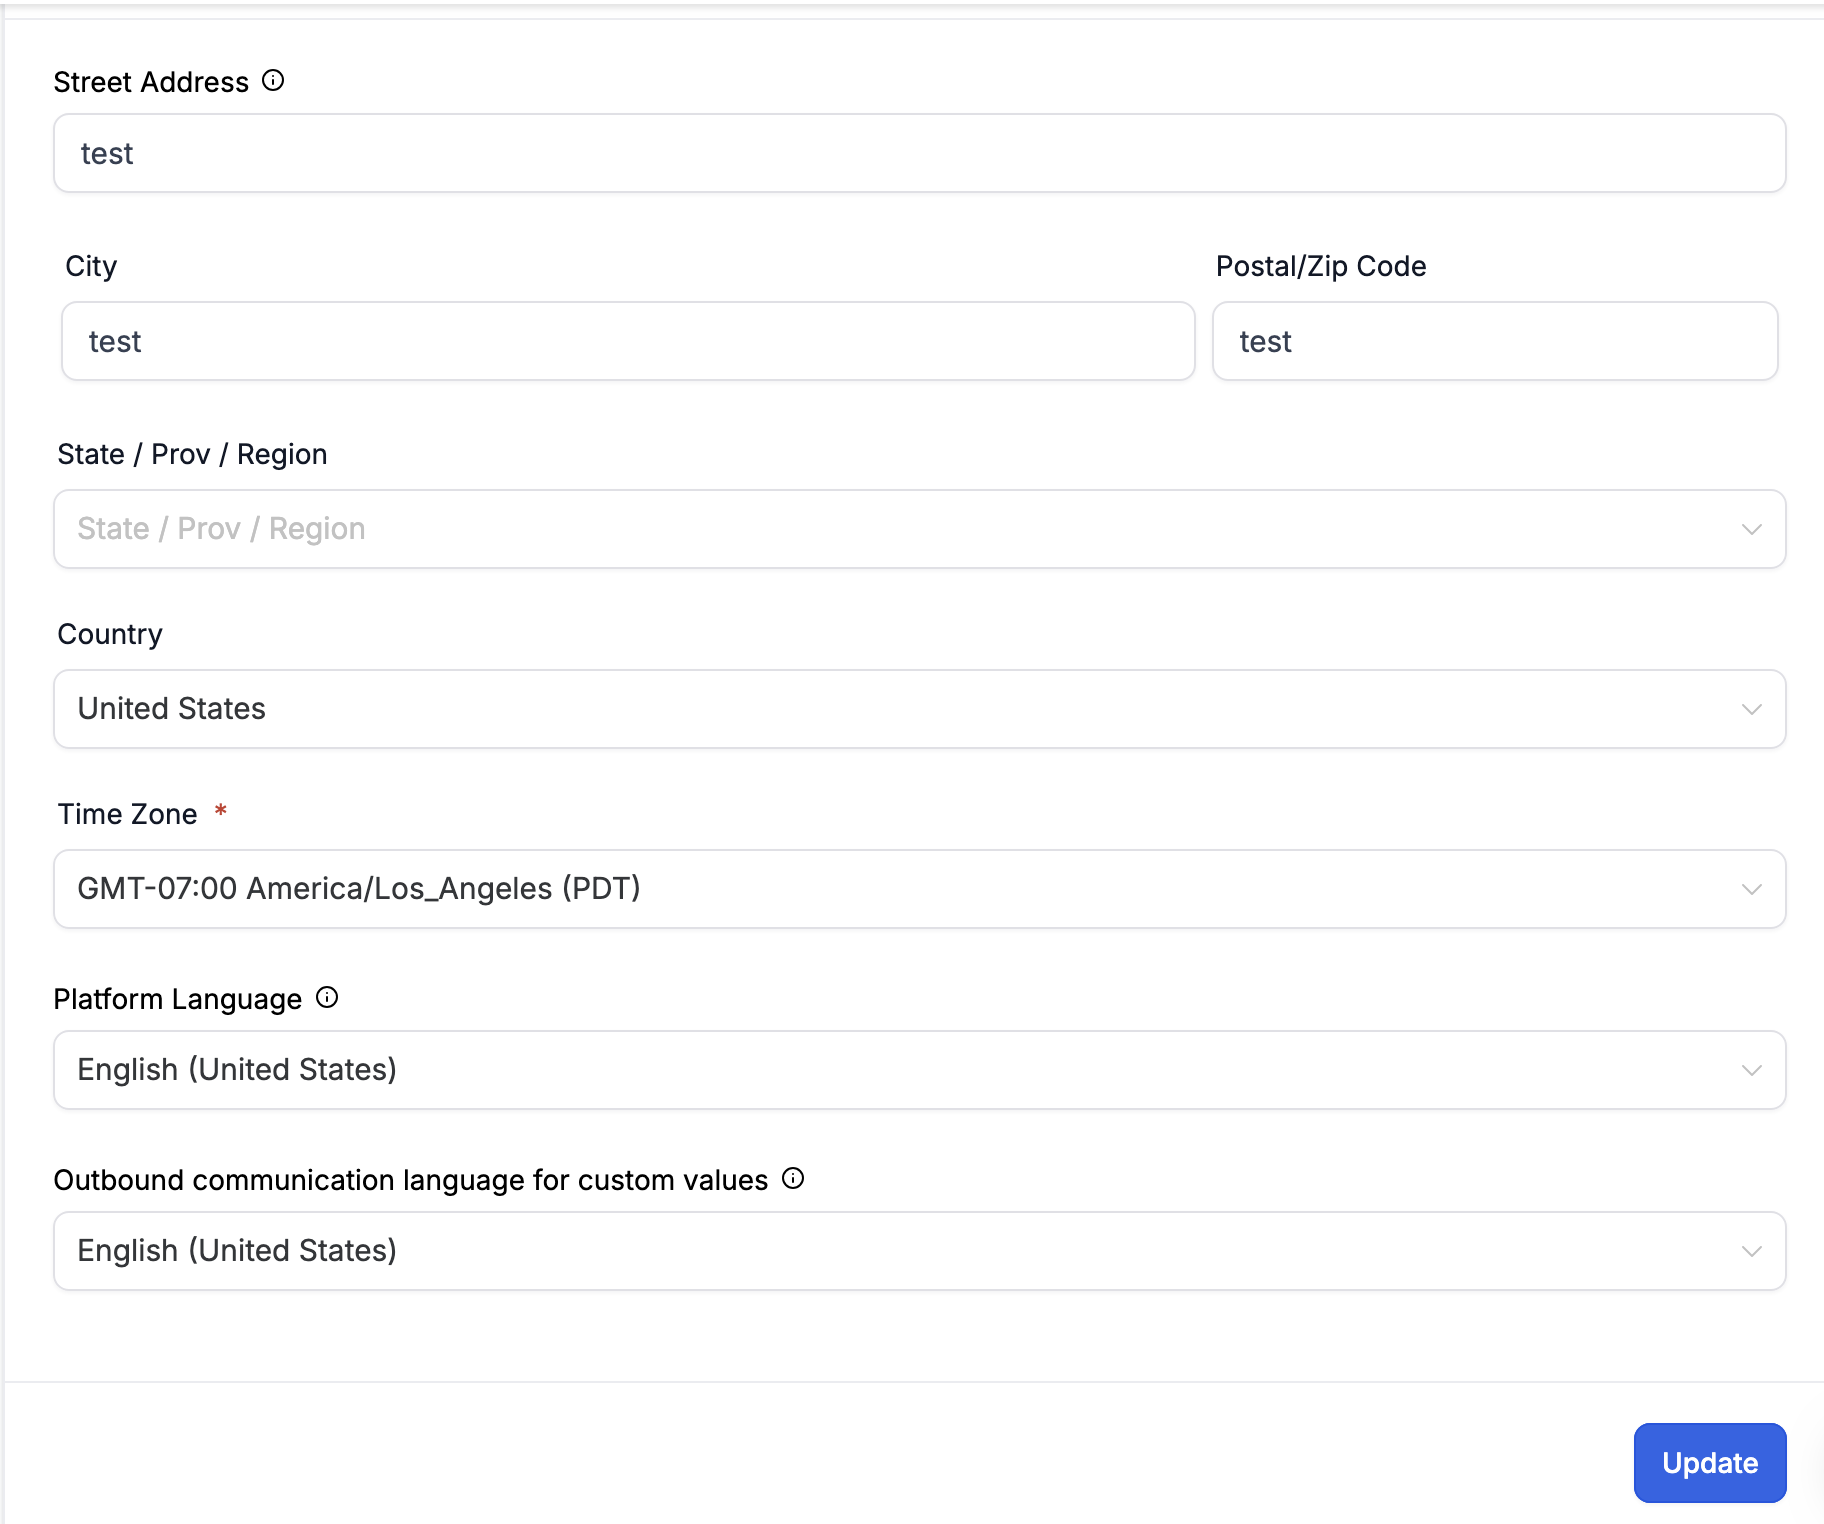
Registered EIN Number for your business and business legal name and address updated on the "Business Profile" under settings- be sure you update these details to have all of the proper legal business information be sure to hit UPDATE INFORMATION to save your settings
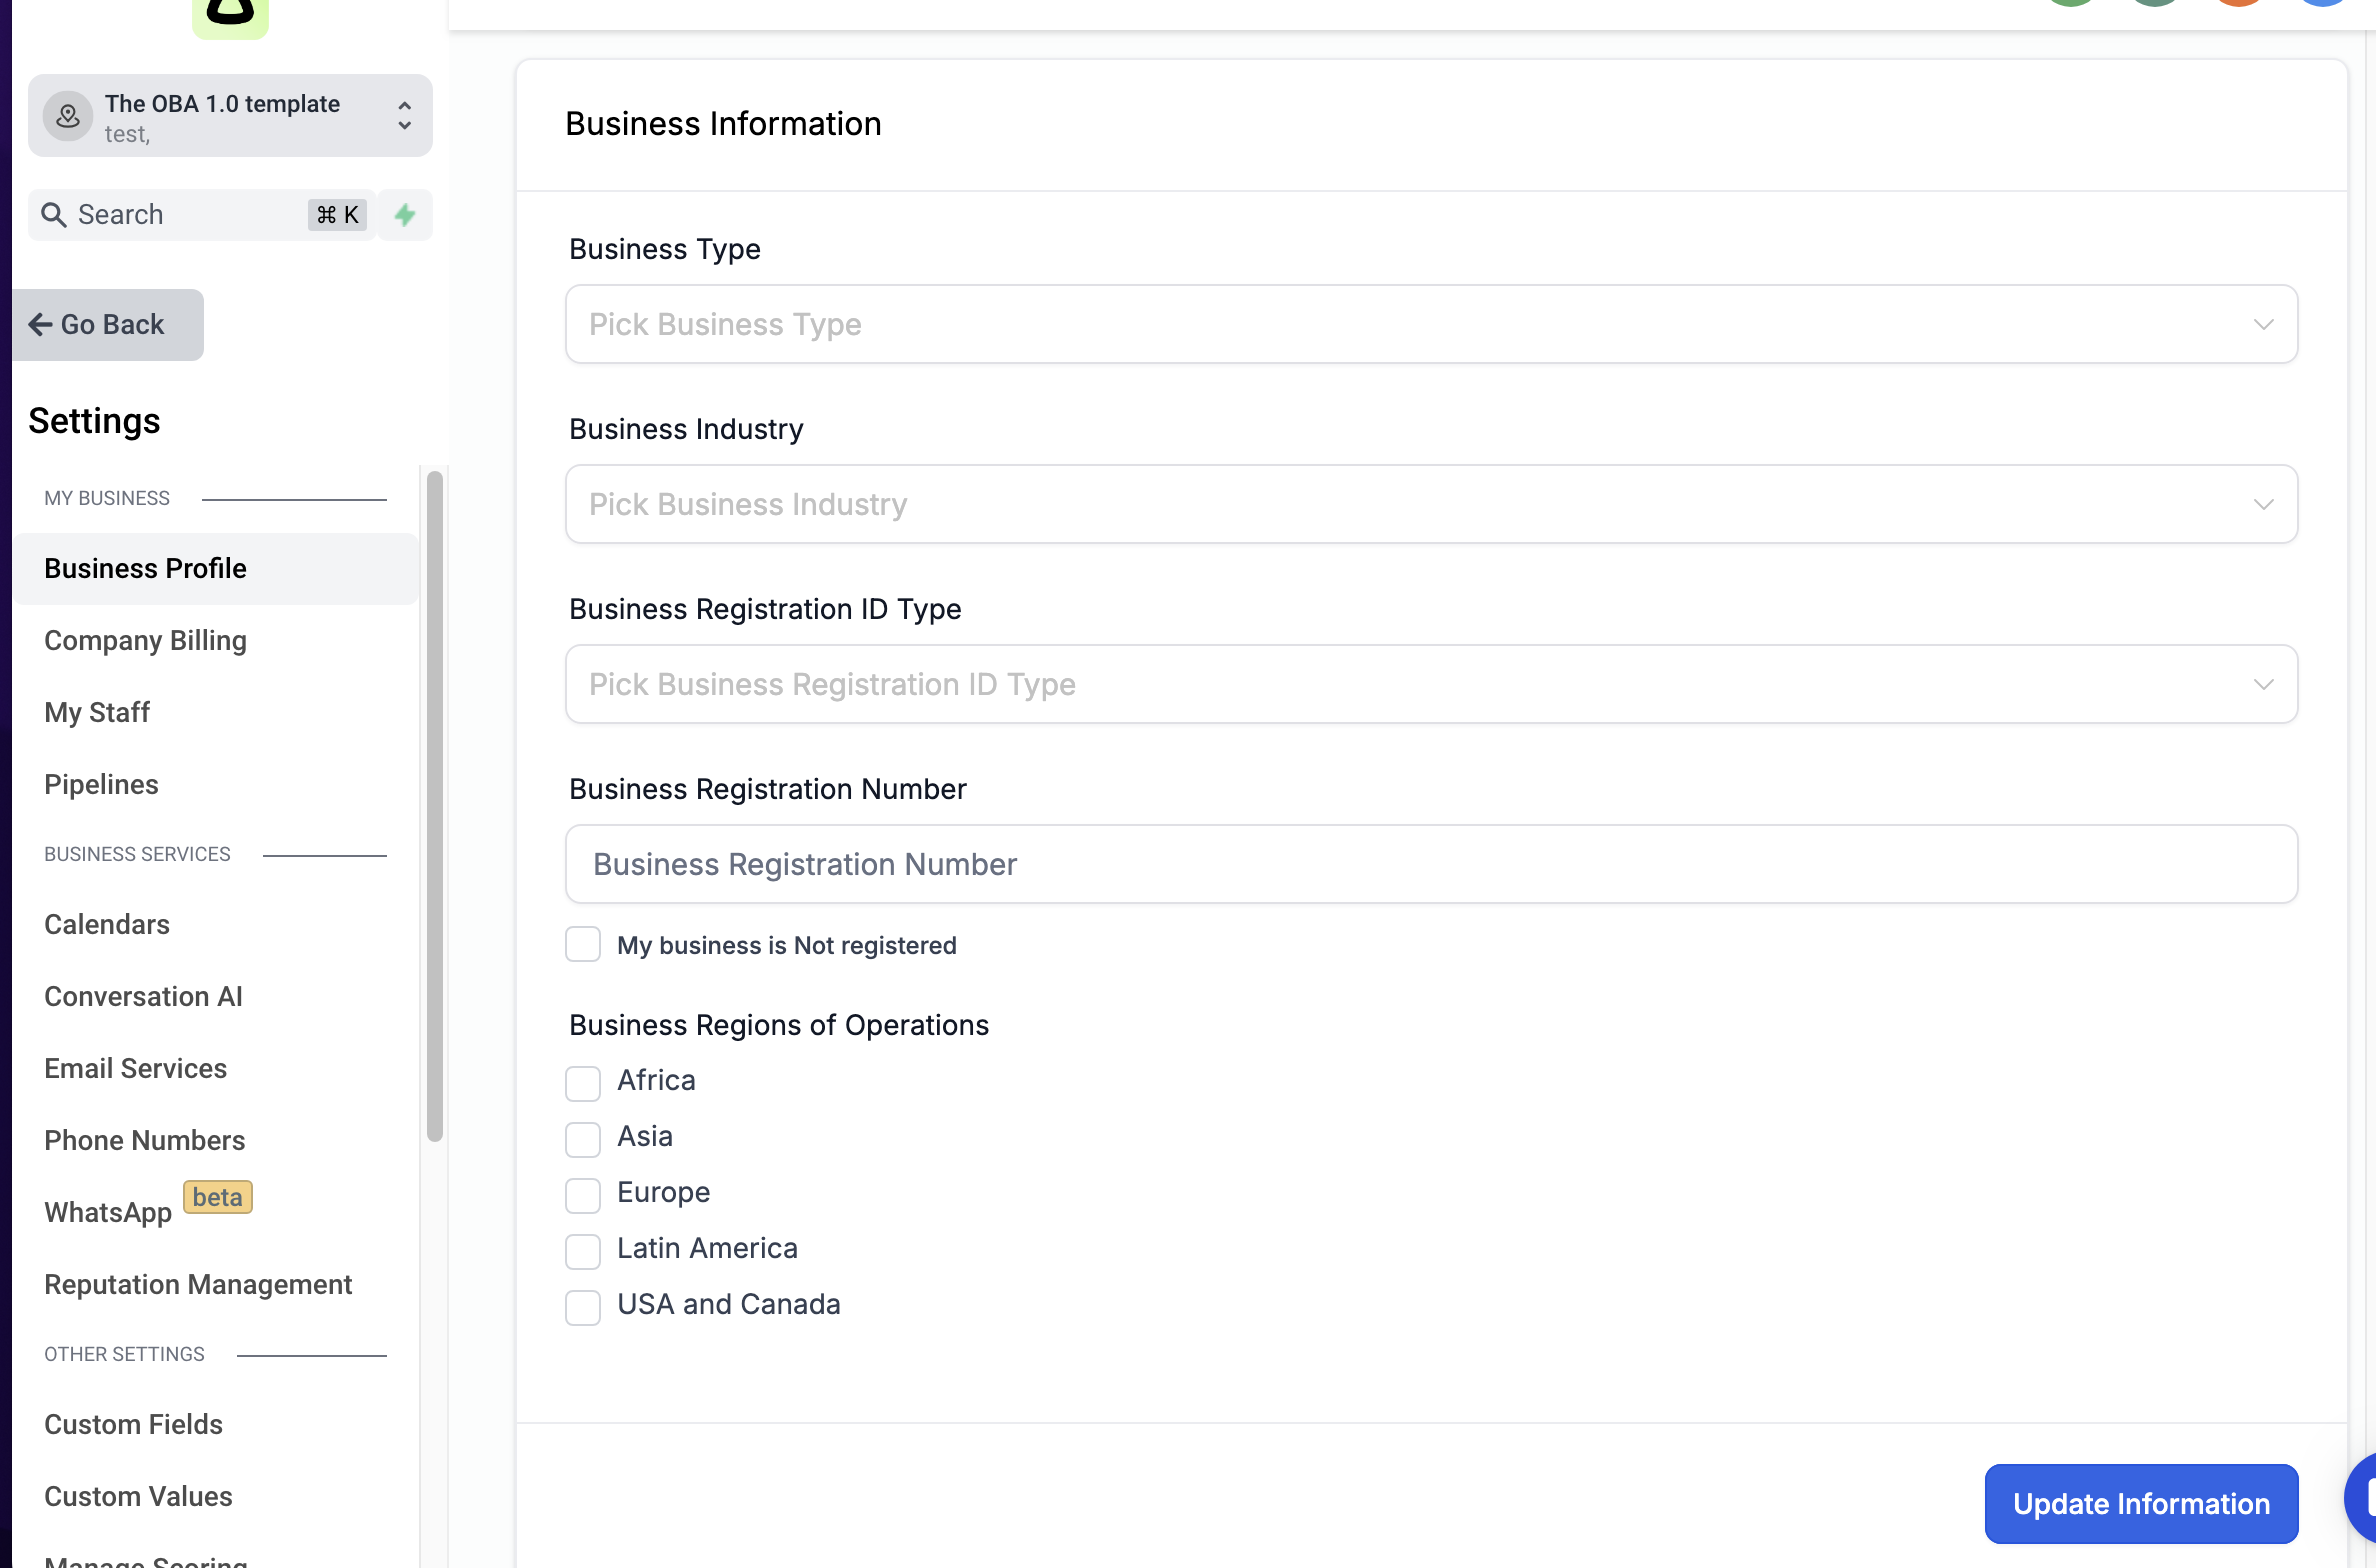
Scroll down and update all of the additional business information including the business EIN, type, industry, and regions of operations, be sure to hit UPDATE INFORMATION to save your settings
Scroll down to business address details and ensure all business details are up to date including the physical address registered with the business EIN- be sure to hit UPDATE INFORMATION to save your settings
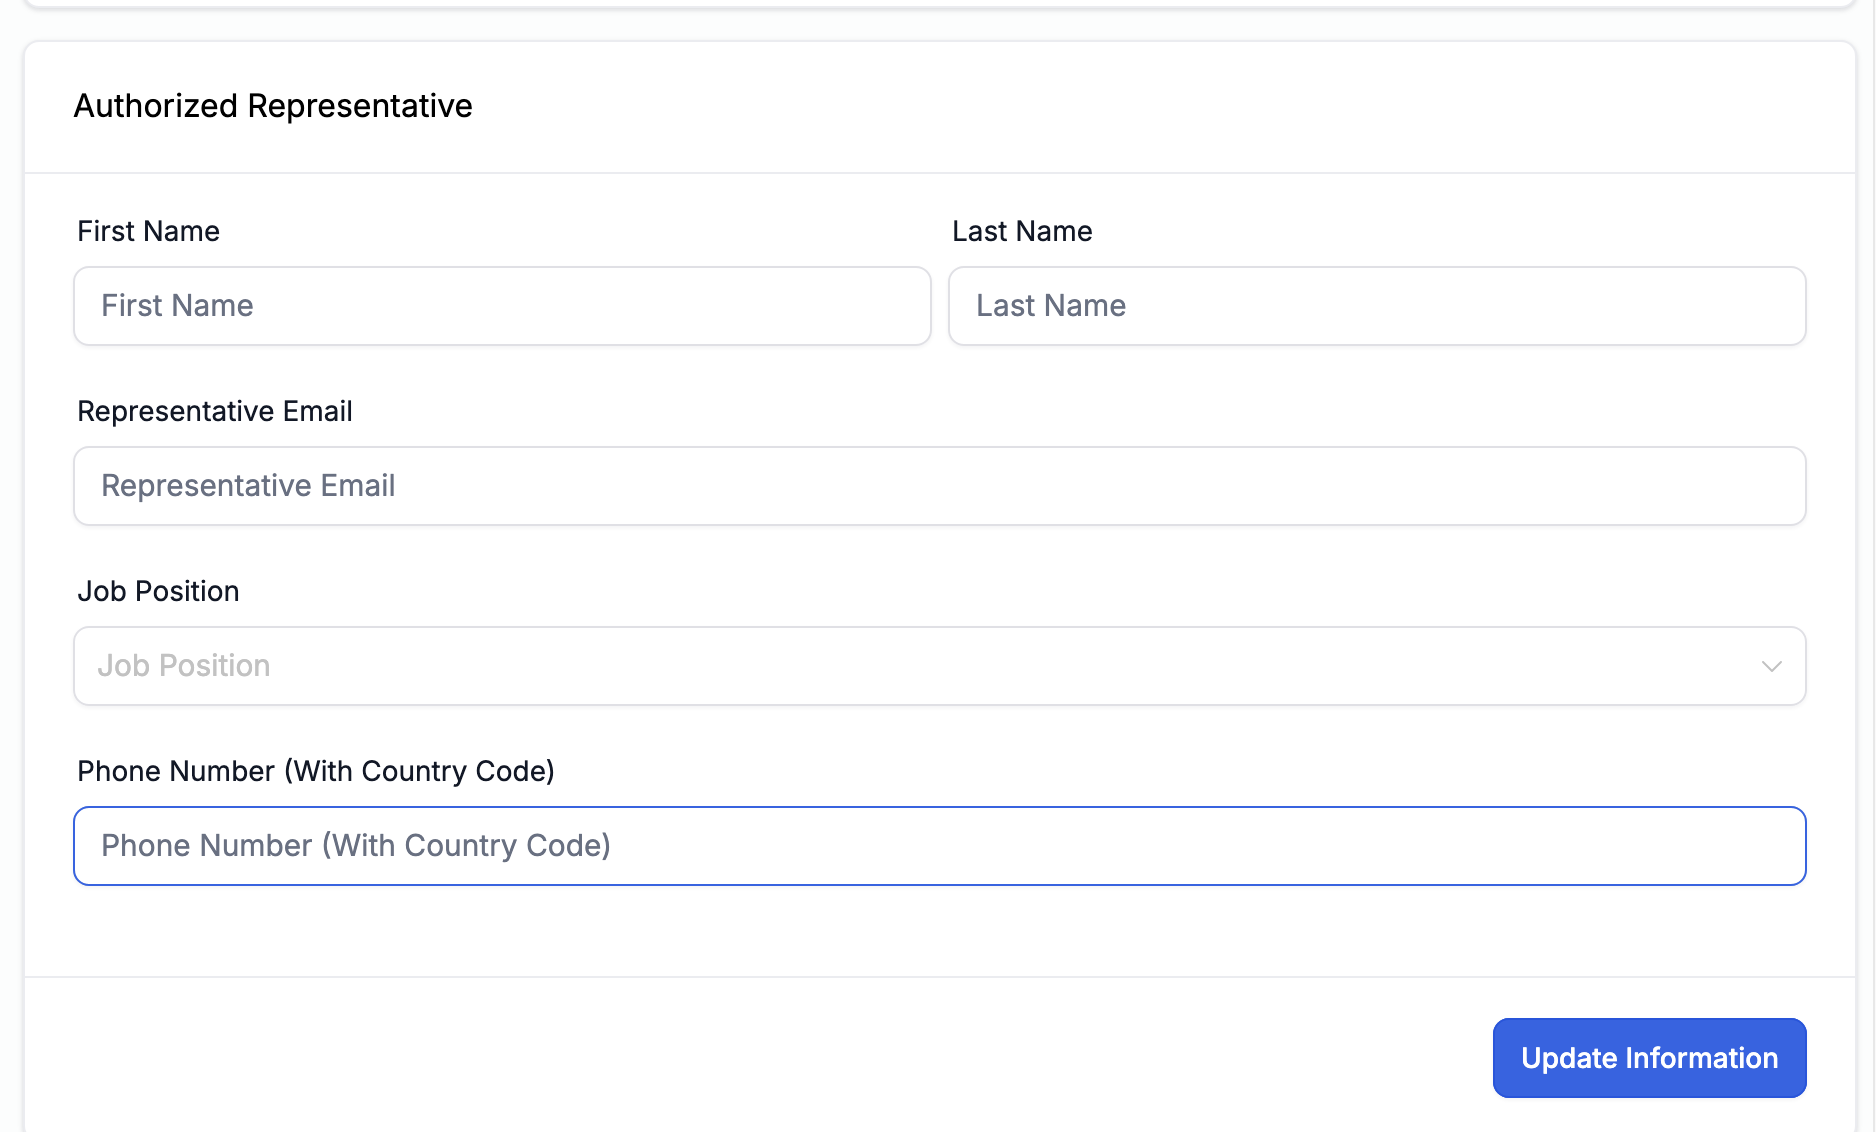
Scroll to the authorized representative section and be sure to update your information here as the authorized representative of the business; be sure to hit UPDATE INFORMATION to save your settings
Before you can begin the registration process, you MUST have an active and up to date terms and conditions and privacy policy on your website that is accessible. If you do NOT have this, stop now and create this on your website with your site domain. Create the URL for yourdomain.com/privacy-policy or yourdomain.com/terms which you'll need to link to in the next step.
Example below:
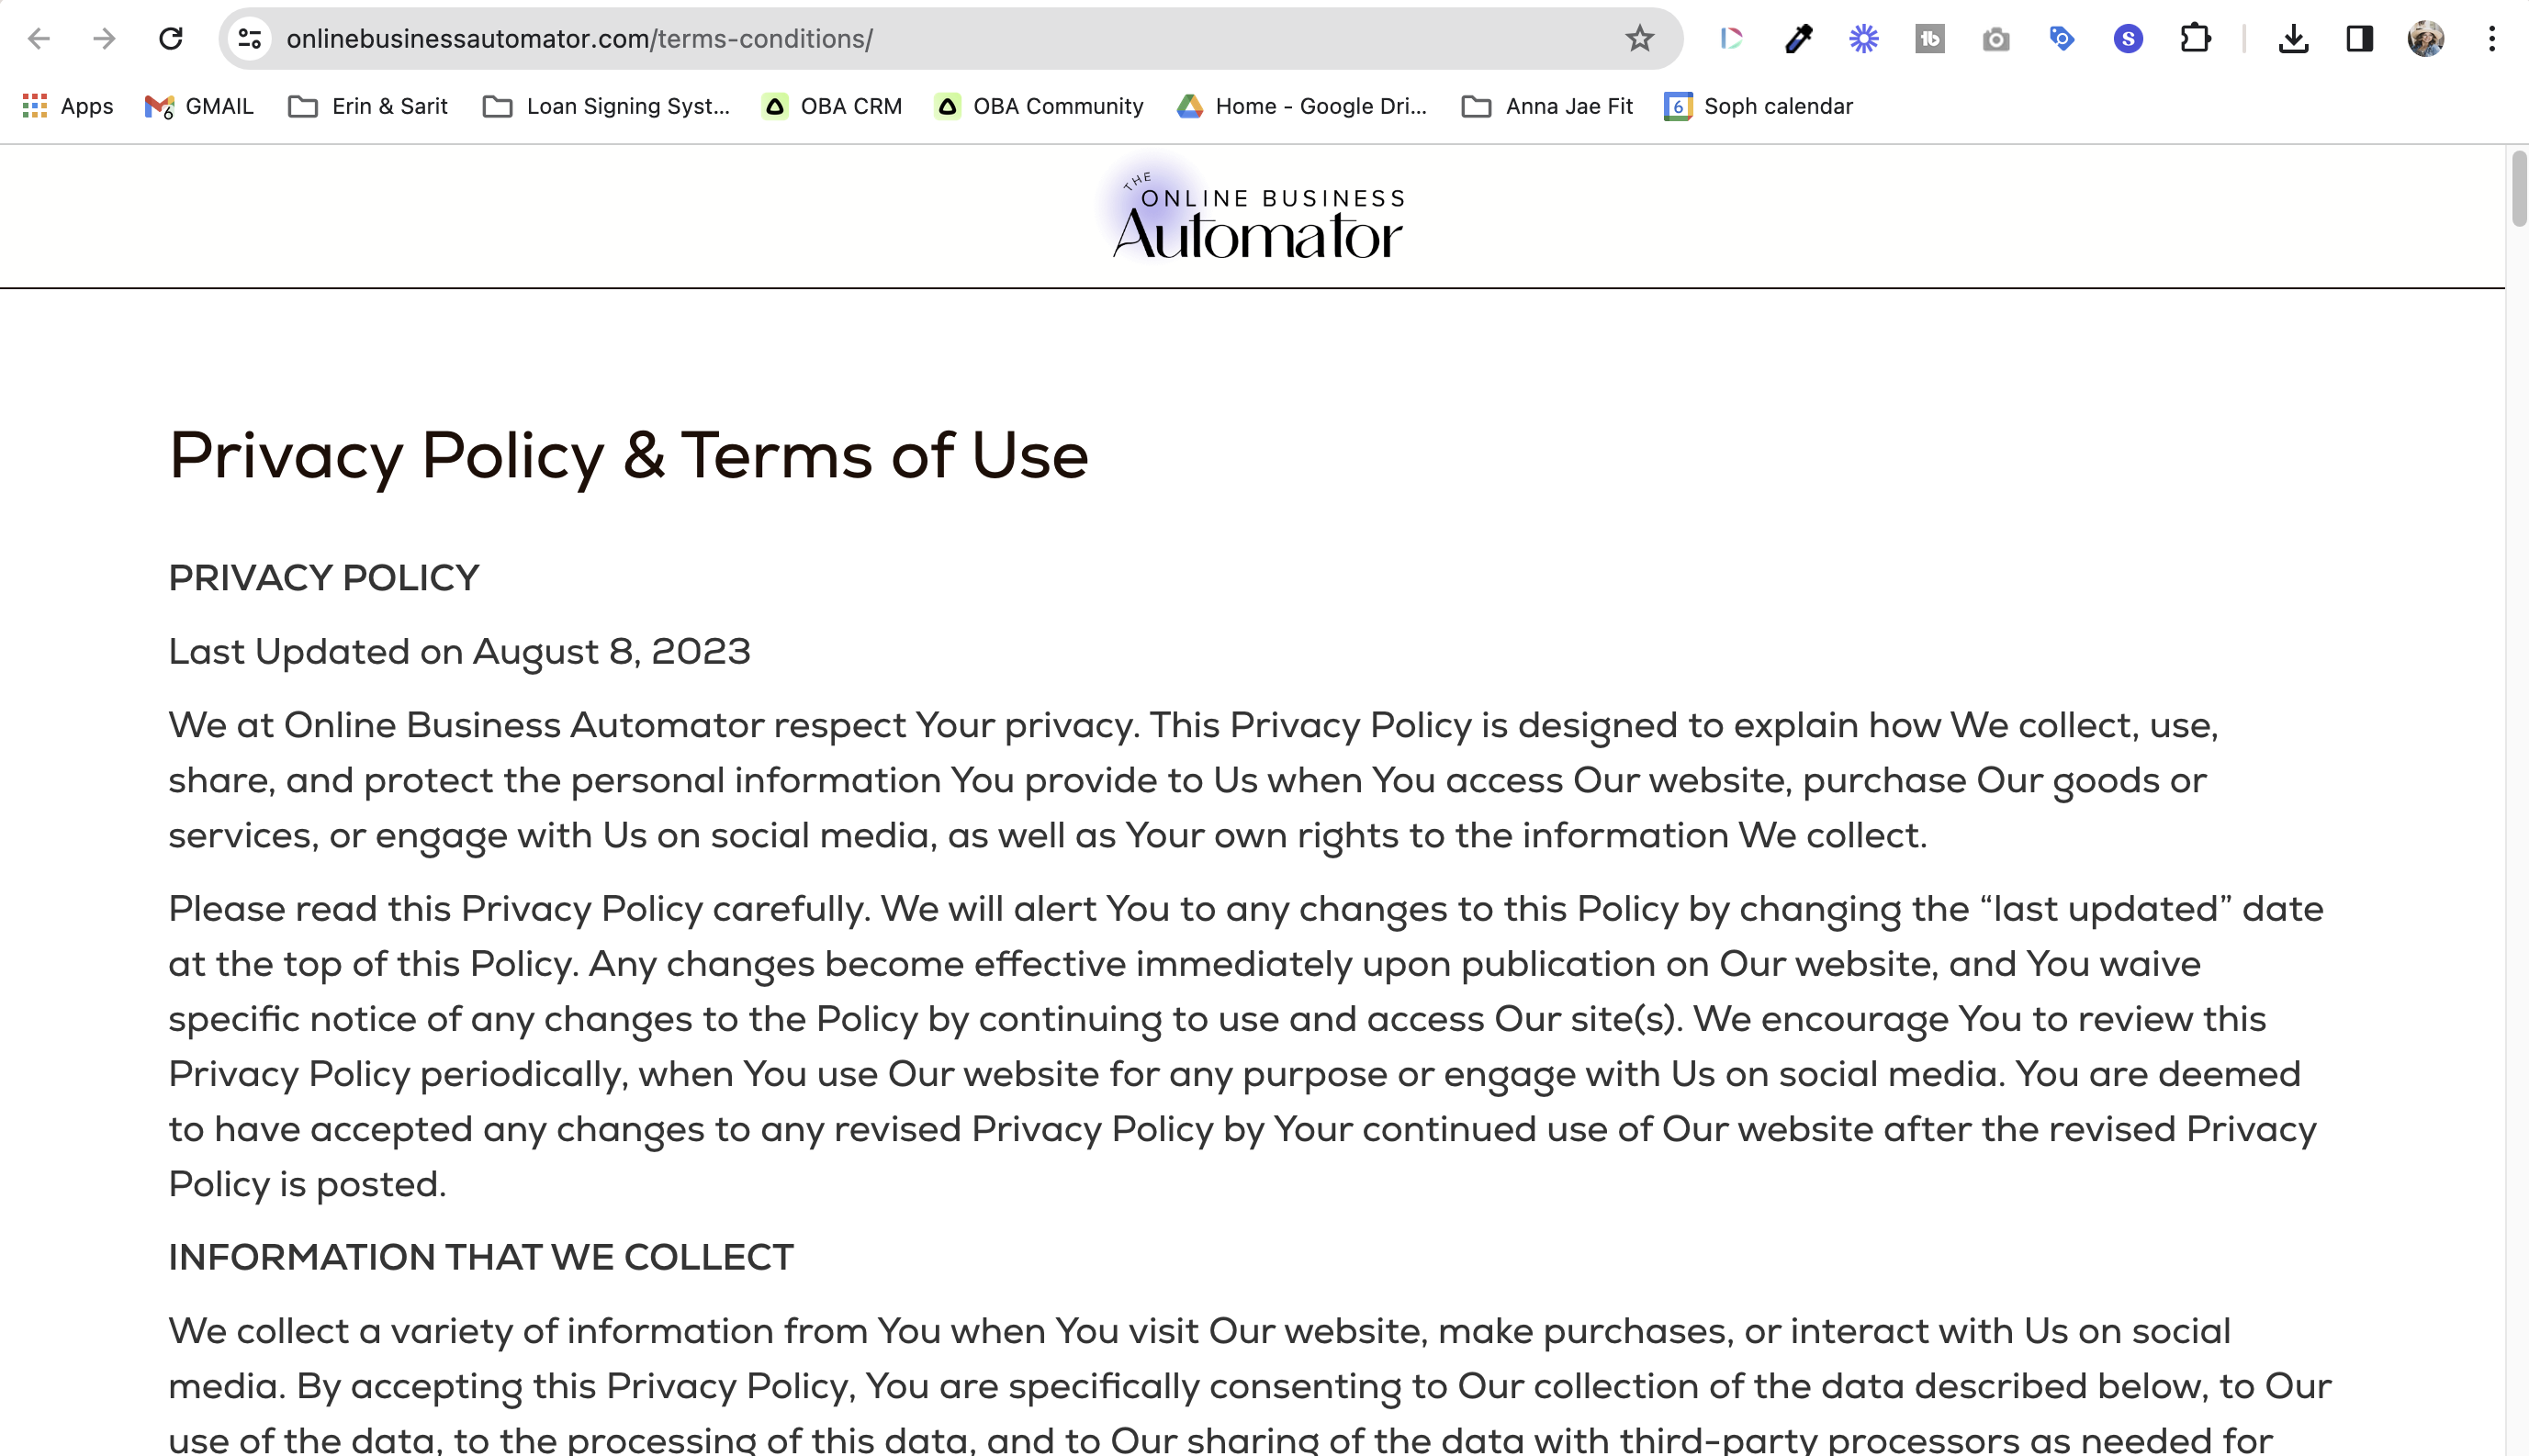
For support on purchasing privacy policies, see the help article here: https://help.onlinebusinessautomator.com/en/articles/900-template-for-privacy-policy-applied-in-usa-and-canada
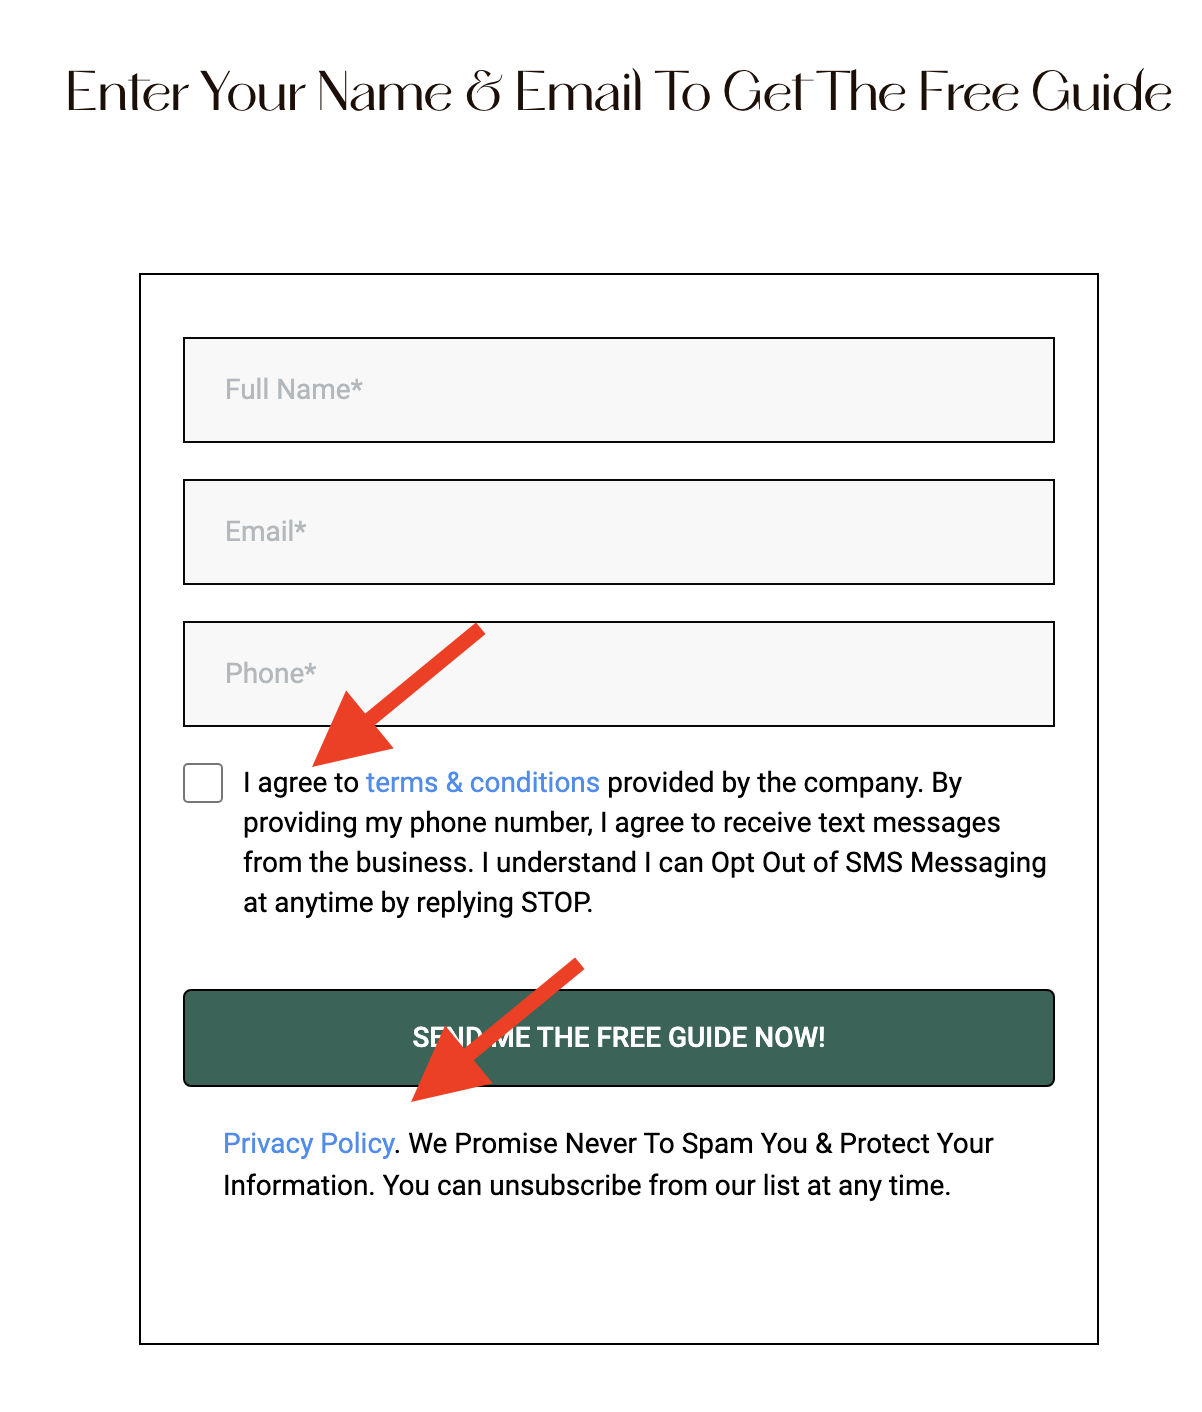
Before you can register, you'll need to provide the details for your consent process which includes ensuring you have setup the proper opt in form with your terms and conditions/privacy policy linked and the check box option available, see the example below:
Example:
How to setup your form in the CRM:
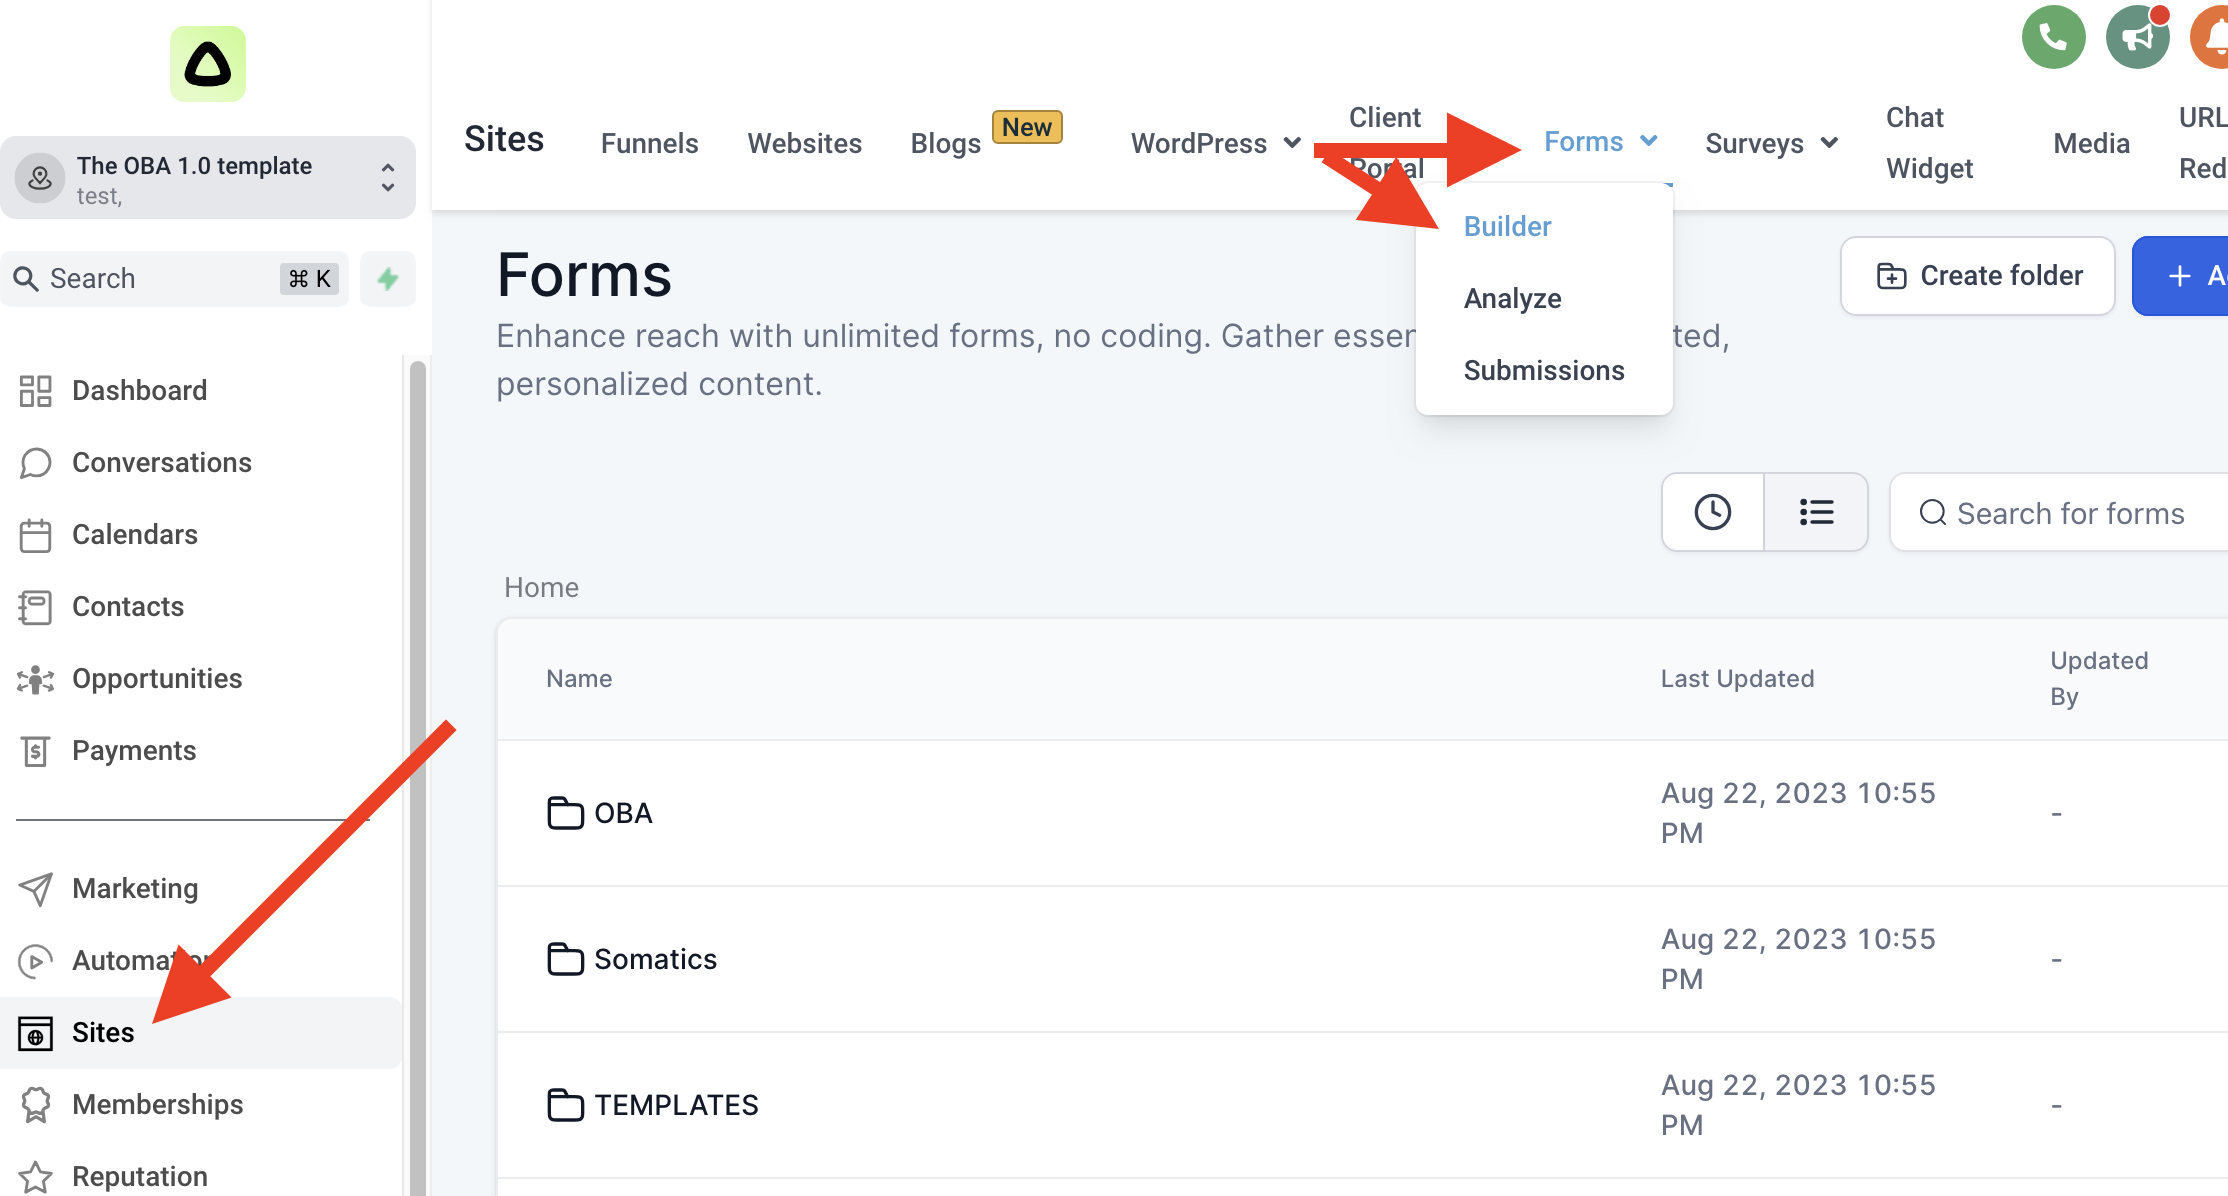
Go to the Sites > Forms > Form builder tab on the CRM
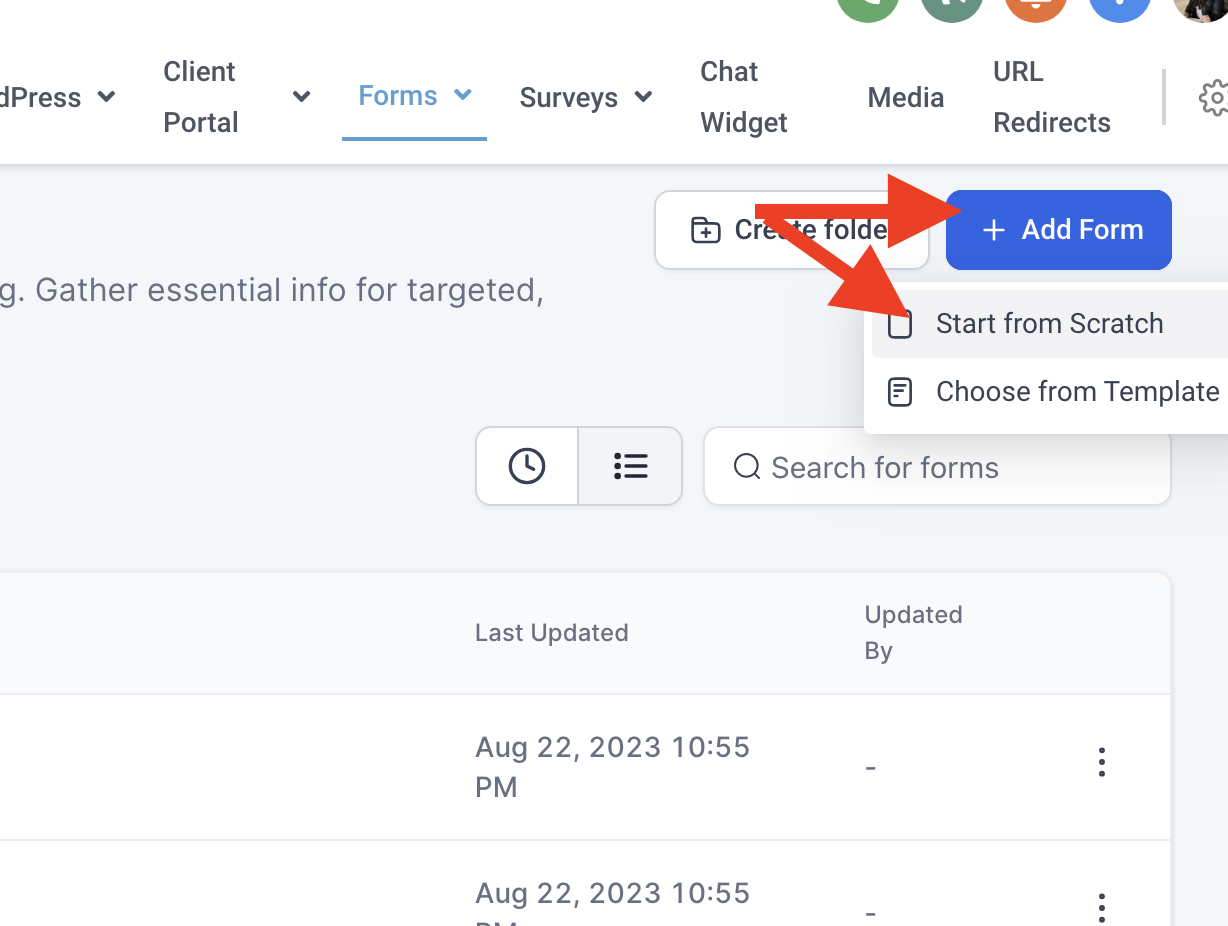
Select the add form button and click start from scratch to create a new form
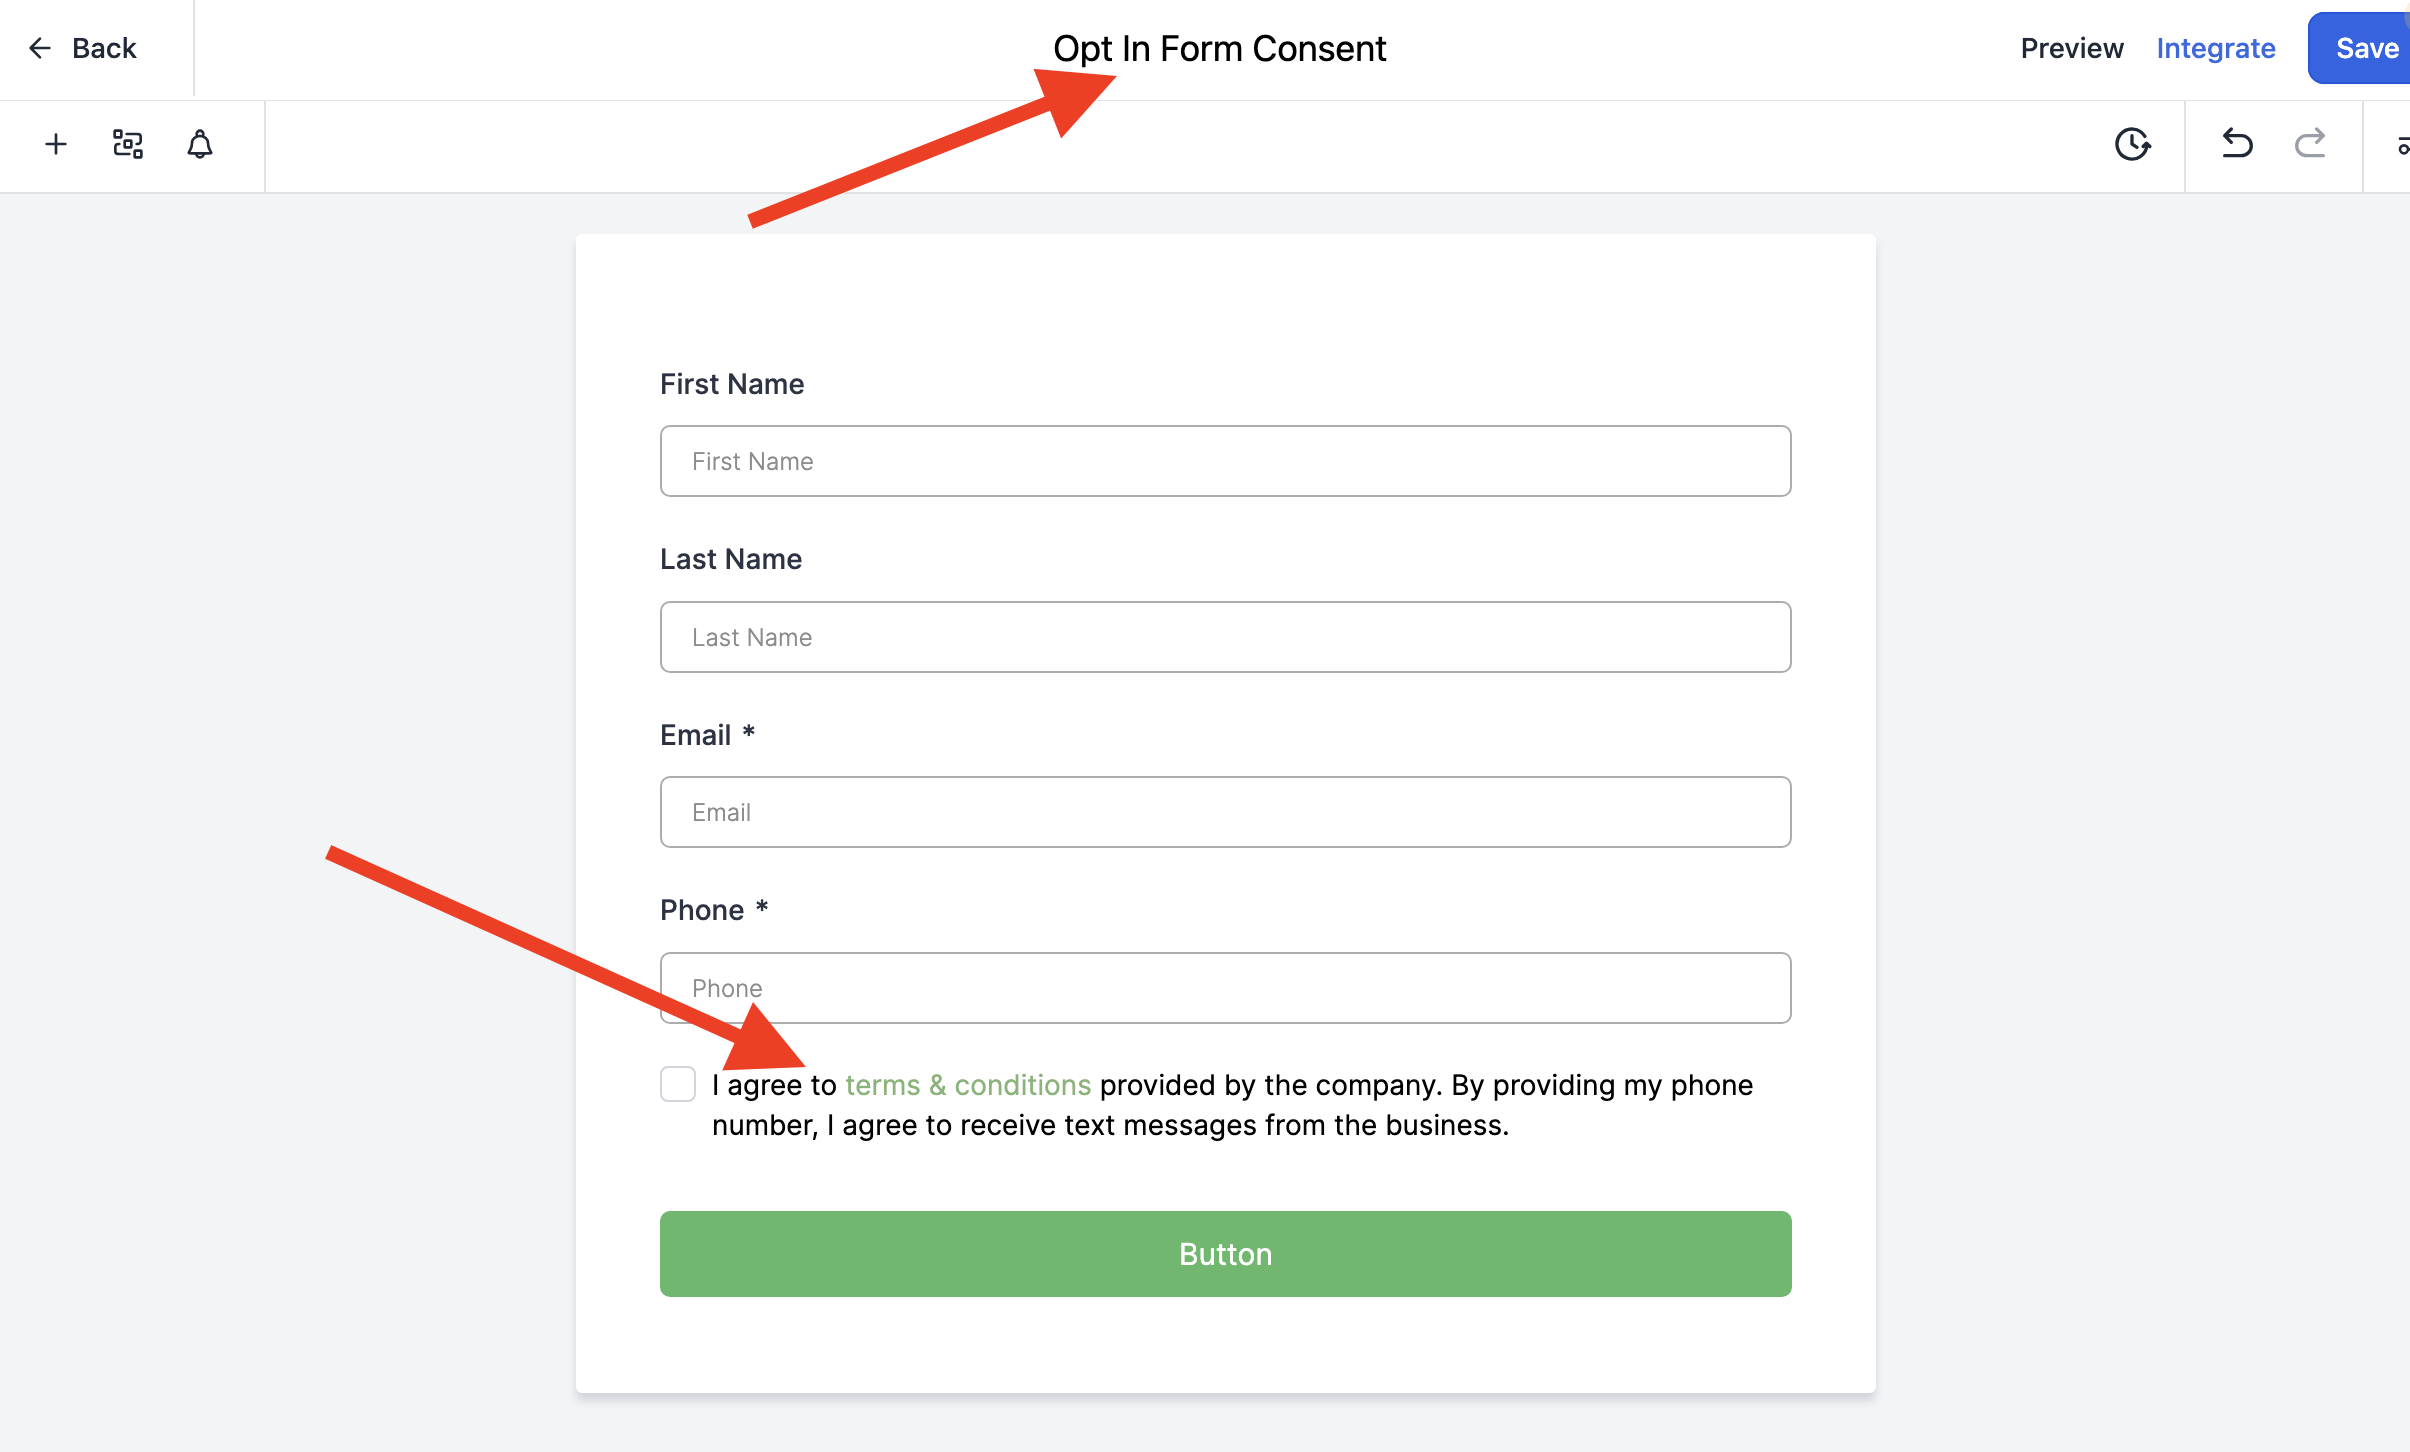
The form builder will open with a new form, be sure to click on the title to update it with a name that is easy to find like "Opt In Form Consent" then click on the checkbox element at the bottom for the terms and conditions
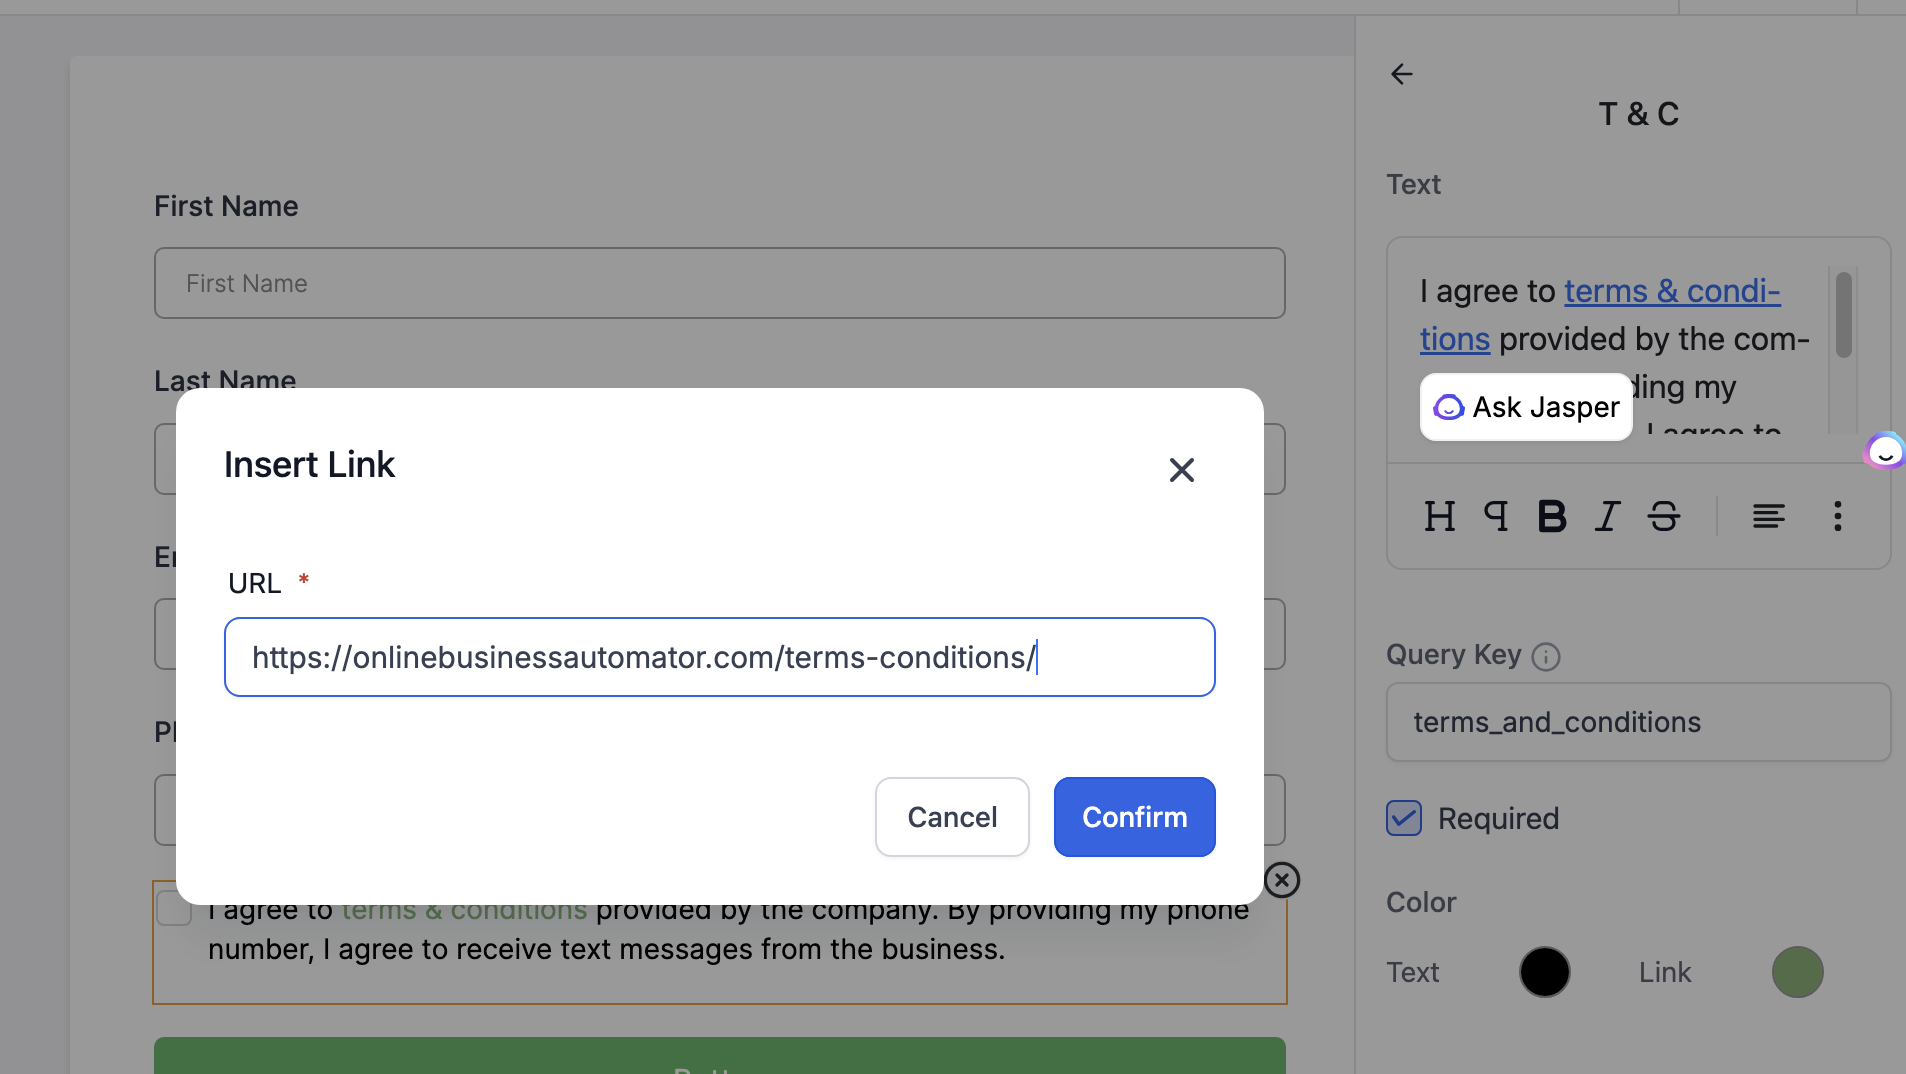
The terms and conditions menu will open up on the right hand side for you to customize, be sure to highlight the terms and conditions text then click on the three dots on the right to open the link options
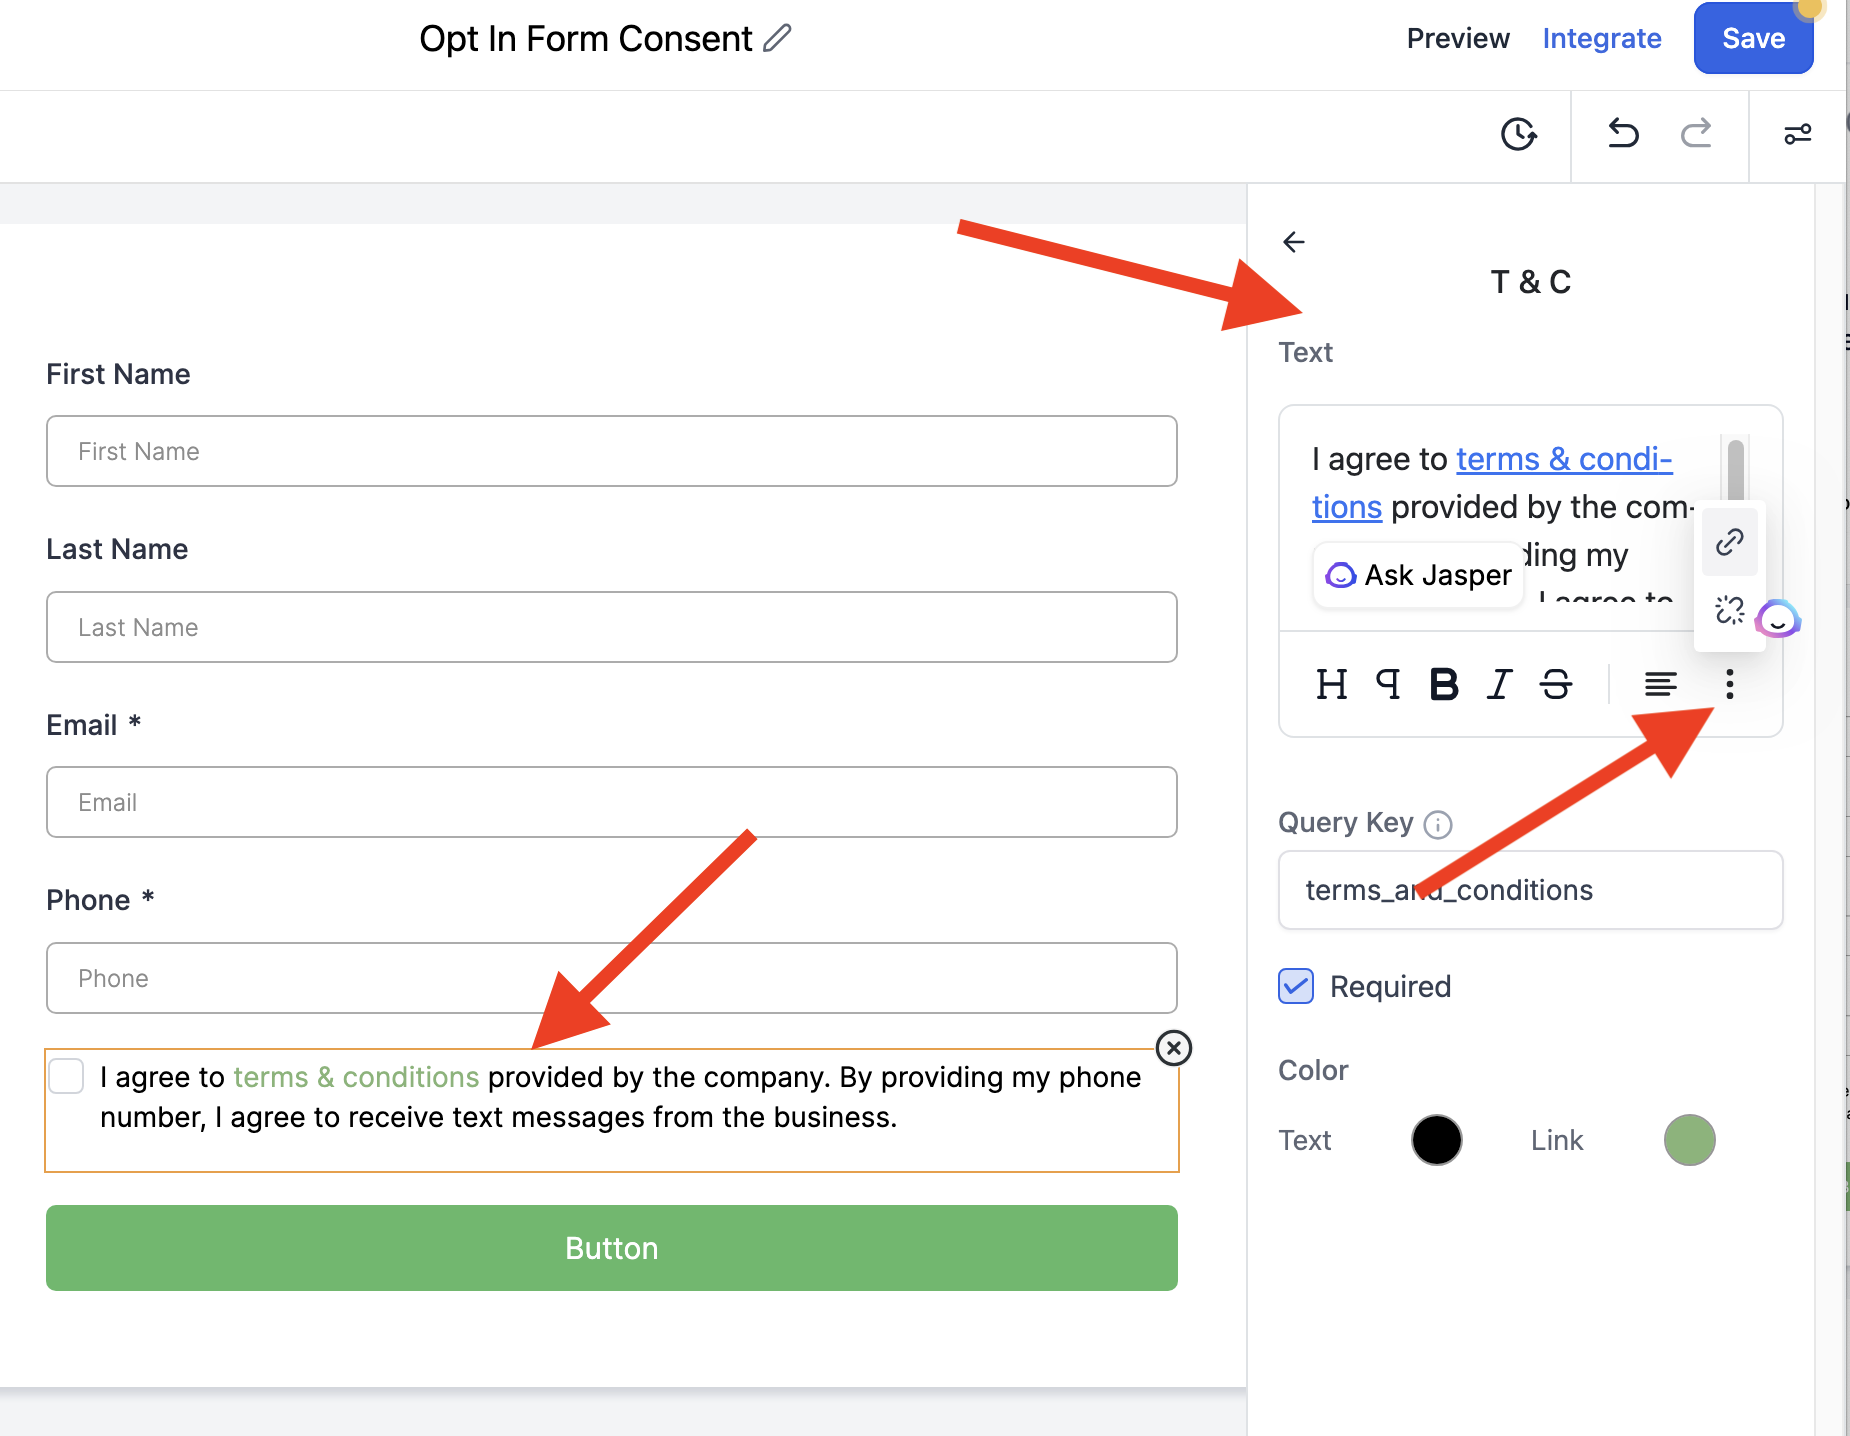
Click on the LINK Icon and the insert link window will pop up with the example place holder link, delete this link and paste YOUR website terms and conditions or privacy policy then hit CONFIRM
Hit SAVE at the top right of your screen to save the changes you've made on your form before going to share or embed it

Now you can integrate your form on your calendar booking system OR on your website so you can share it as part of the A2P compliance process. To do this, click on the "INTEGRATE" option on the top right corner and the integration form window will pop up
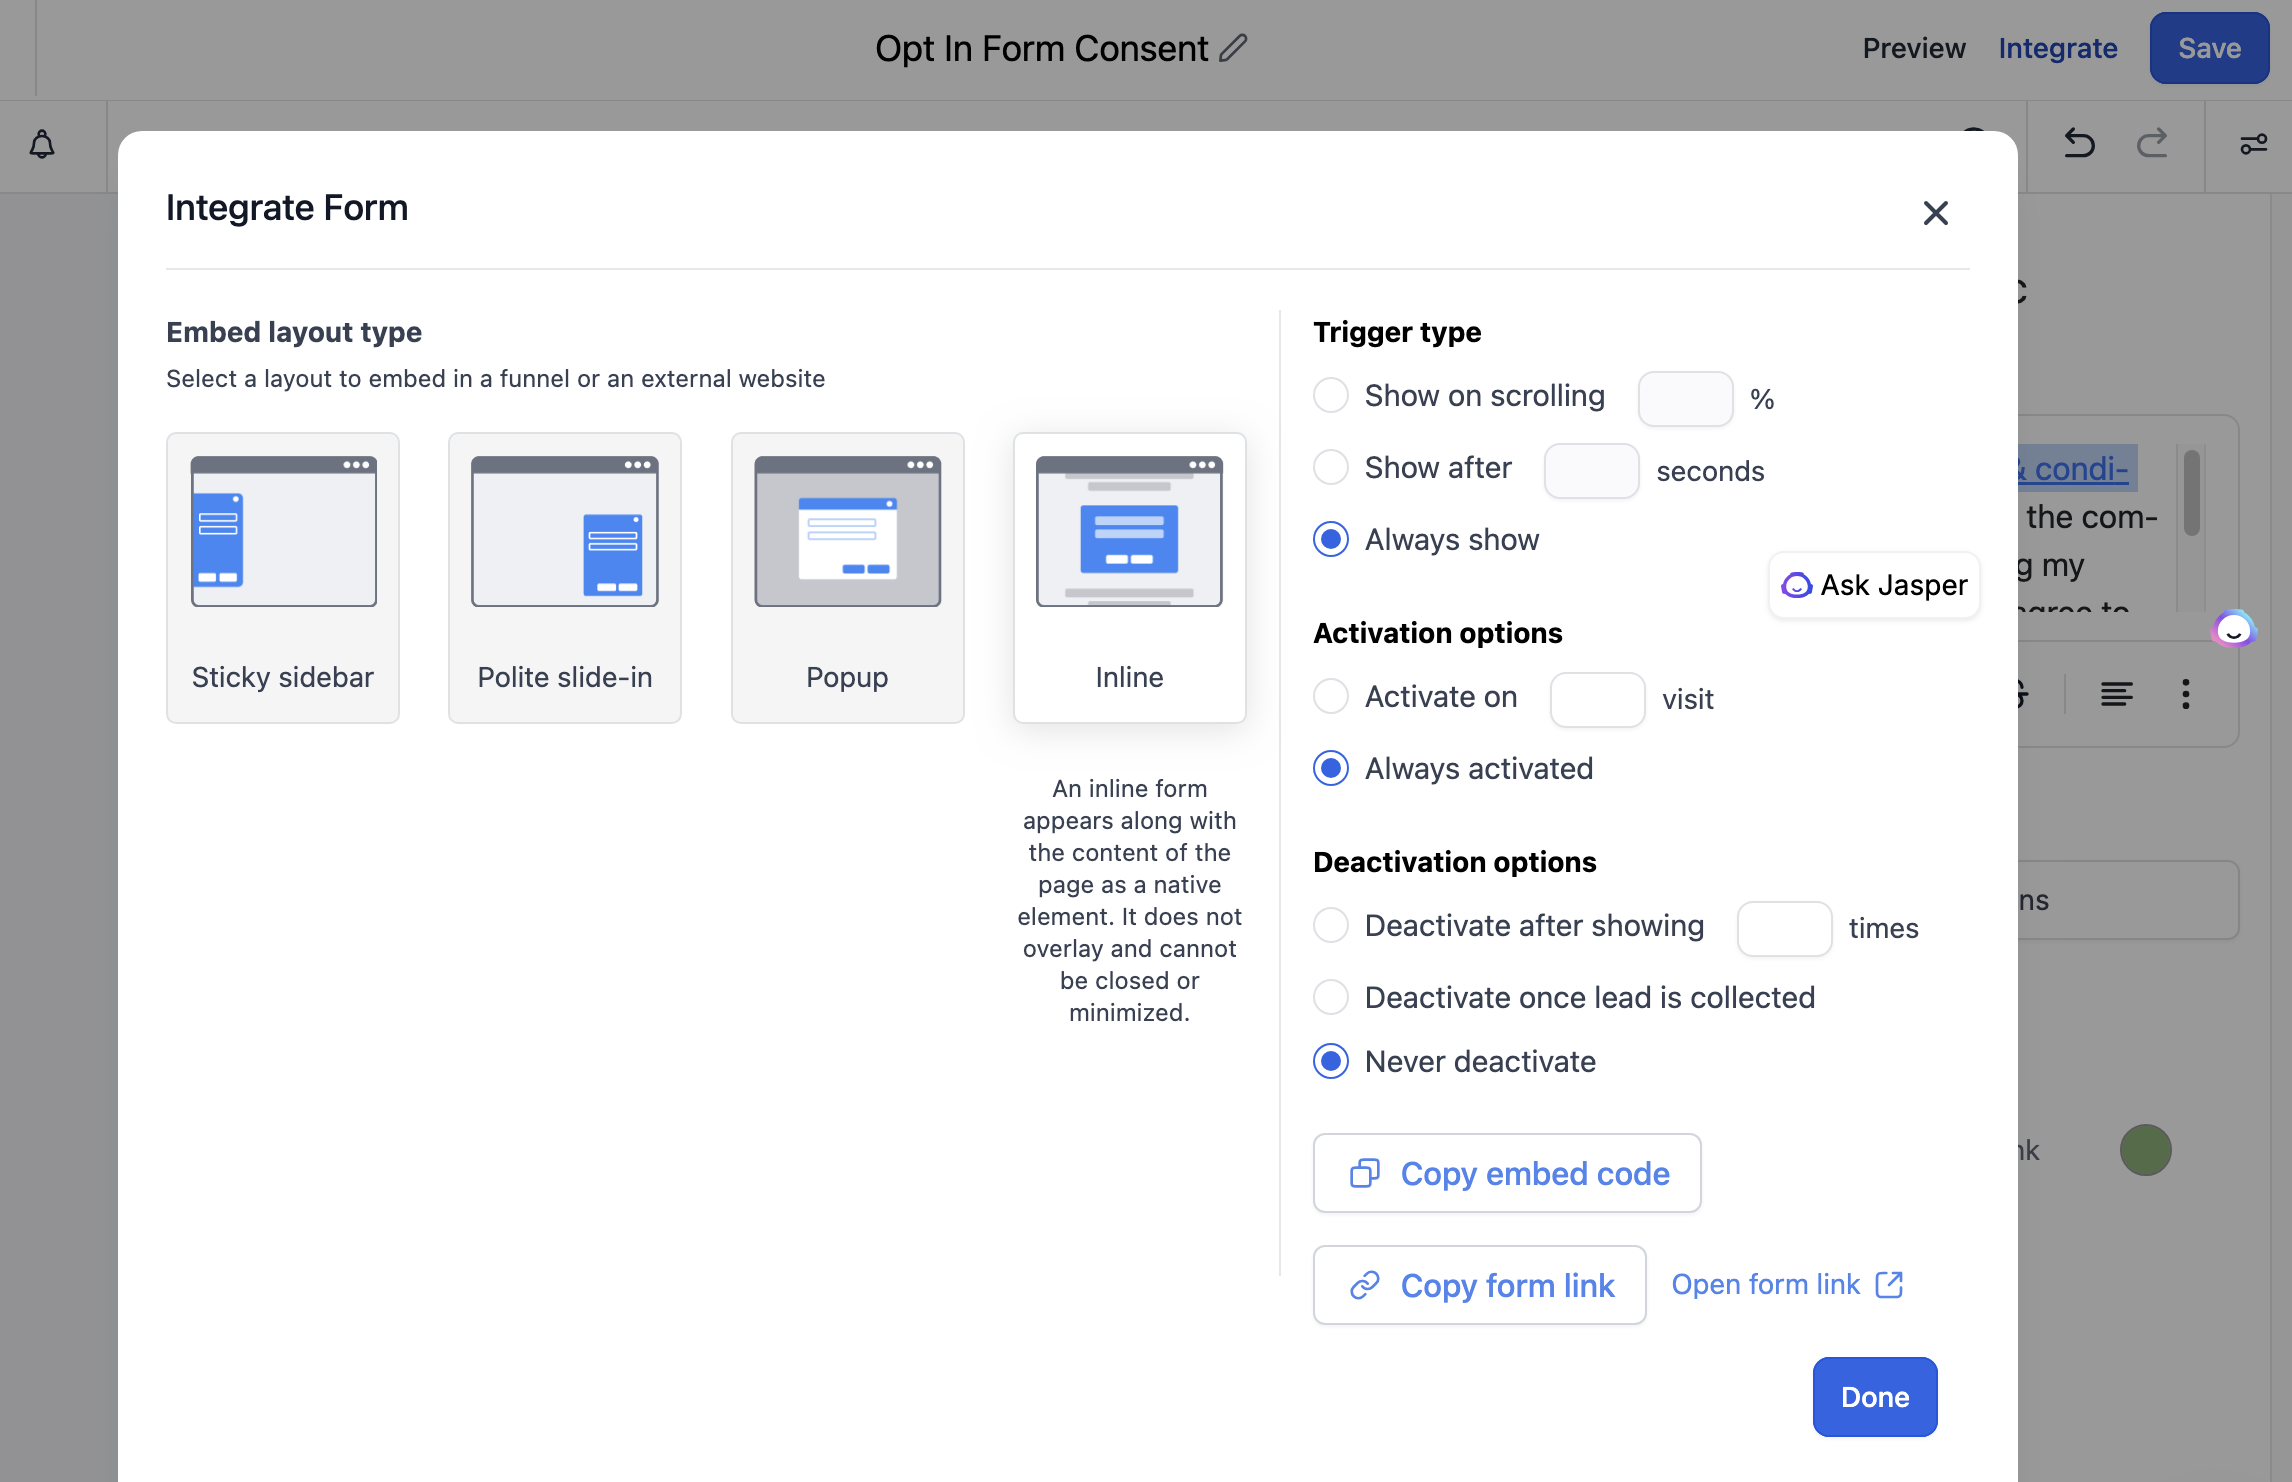
In order for you to be A2P Compliant, this form needs to be easily accessible on your website either in a pop up or on the actual page itself;
if you already have a website, click on the "copy embed code" option to grab the embed code then follow your website tools to embed the code onto your website builder
Alternatively, you can click on the "copy form link" and paste the link onto your site with a button or text that says something along the lines of "JOIN MY LIST"
Build a simple opt in page on the CRM with the Funnel Builder
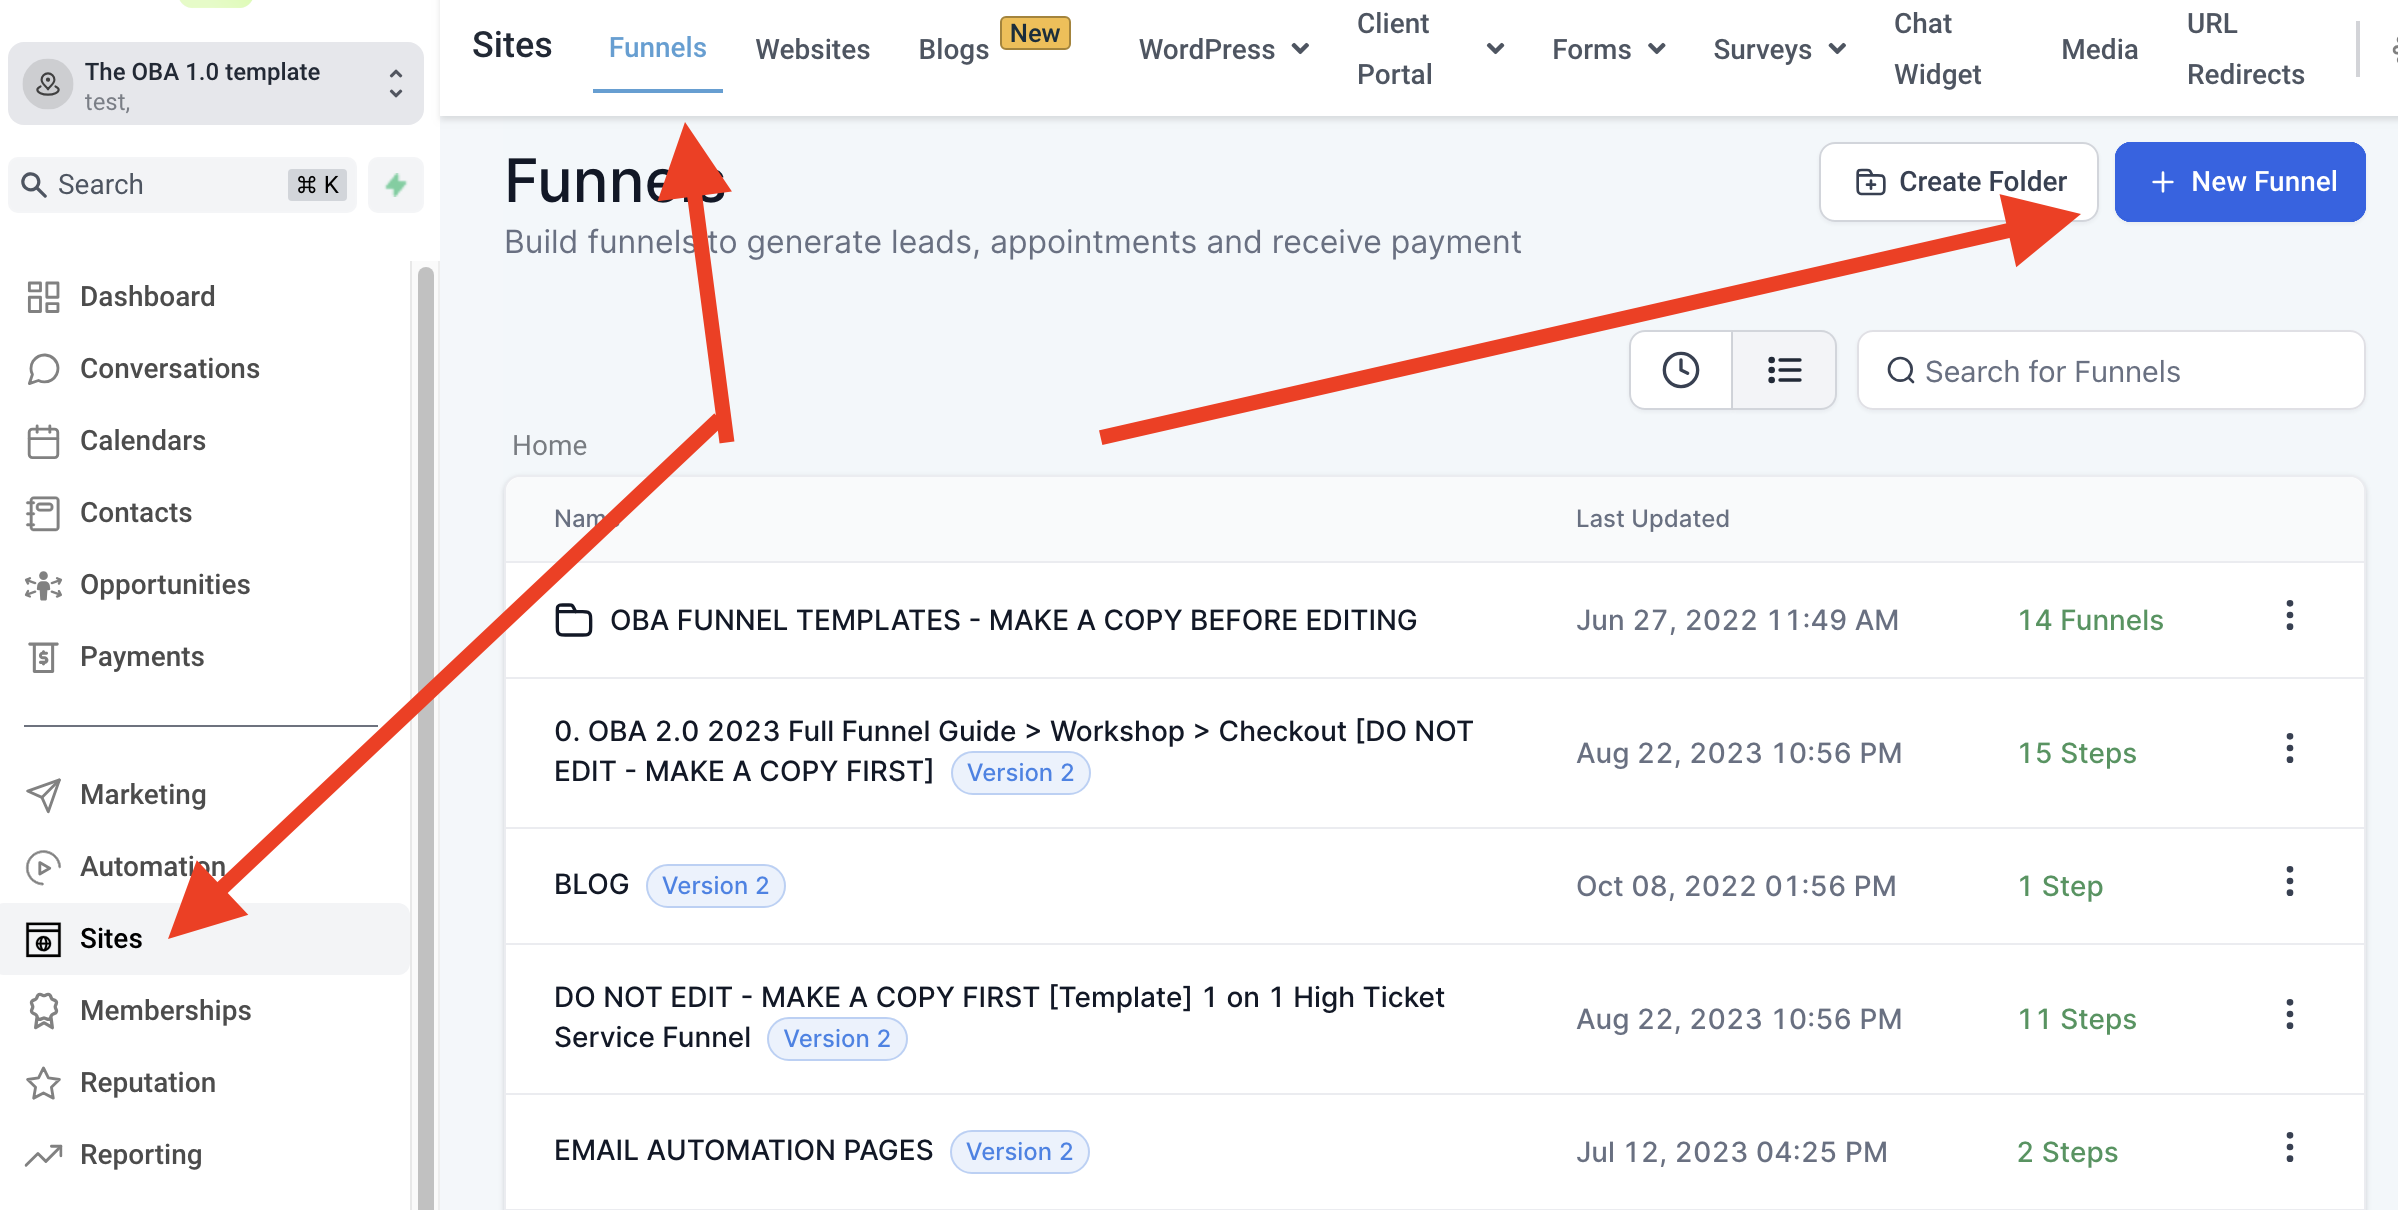
Click on sites > Funnels > Add New Funnel
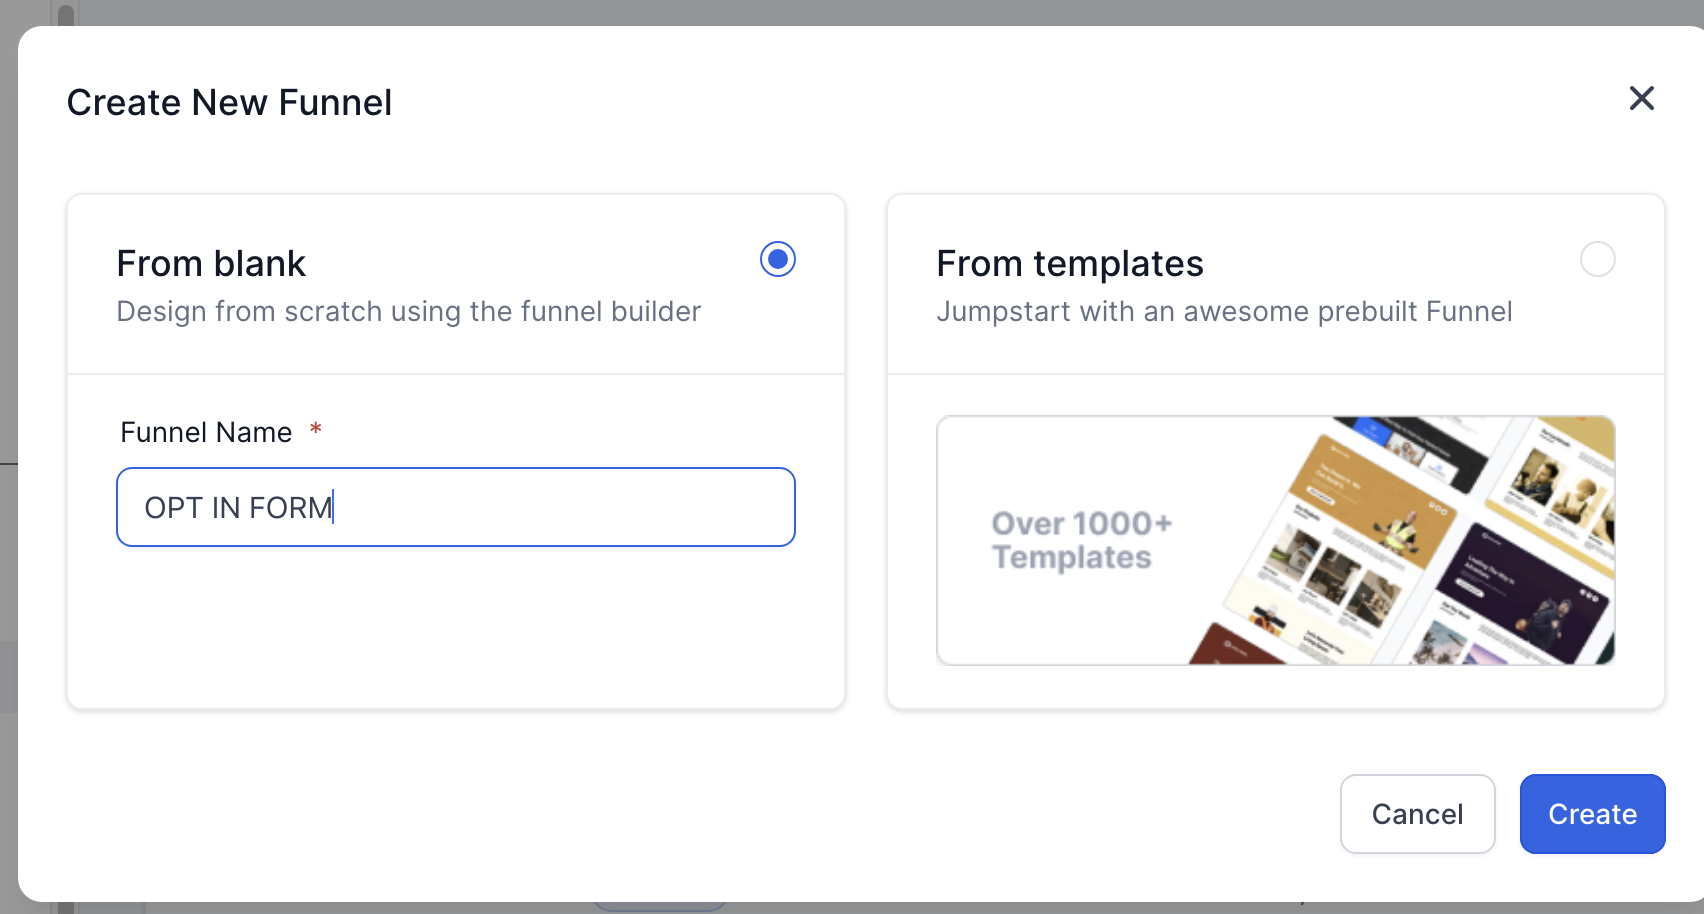
Name the funnel something simple like opt in form and then hit "CREATE"
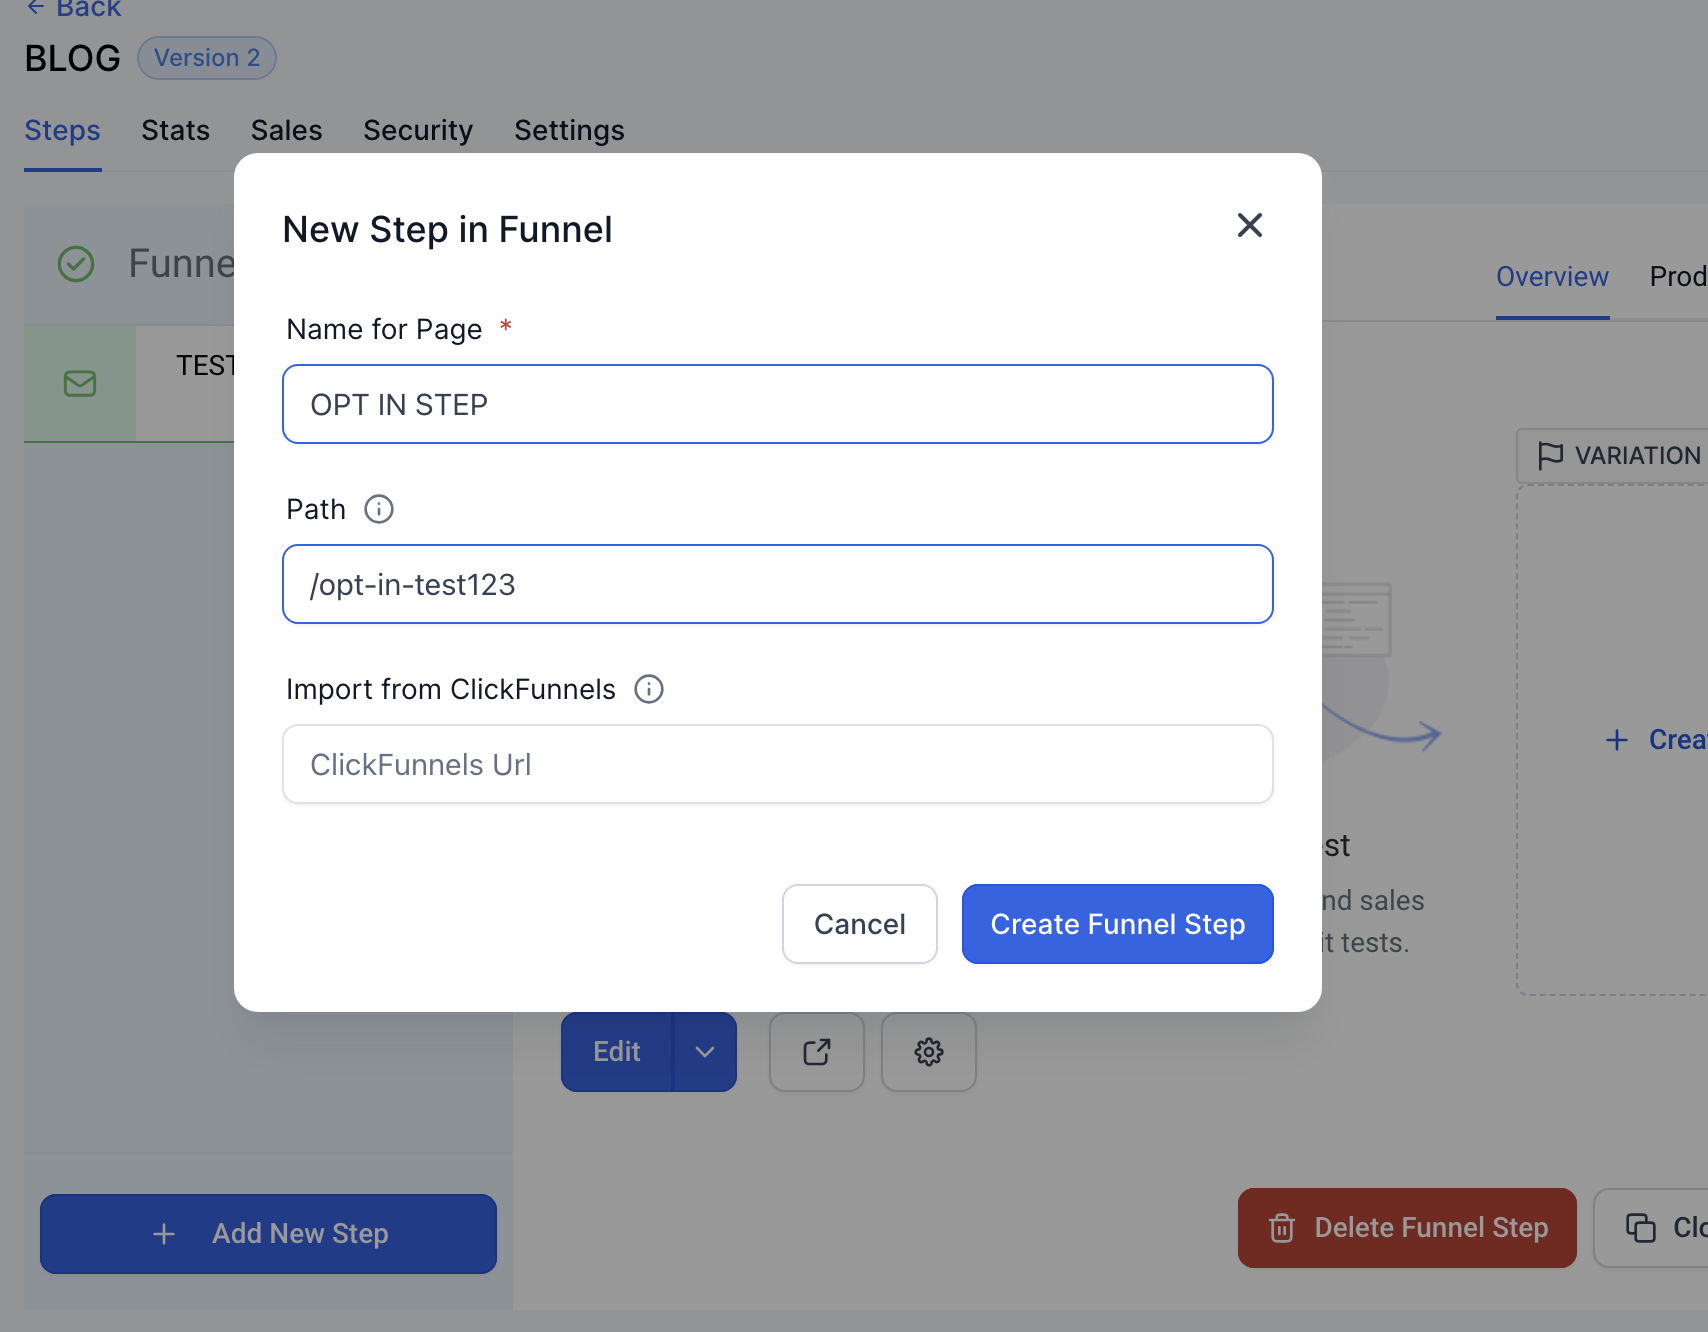
Click "ADD A NEW STEP" and give it a name and path aka the URL slug like /opt-in-page then hit CREATE
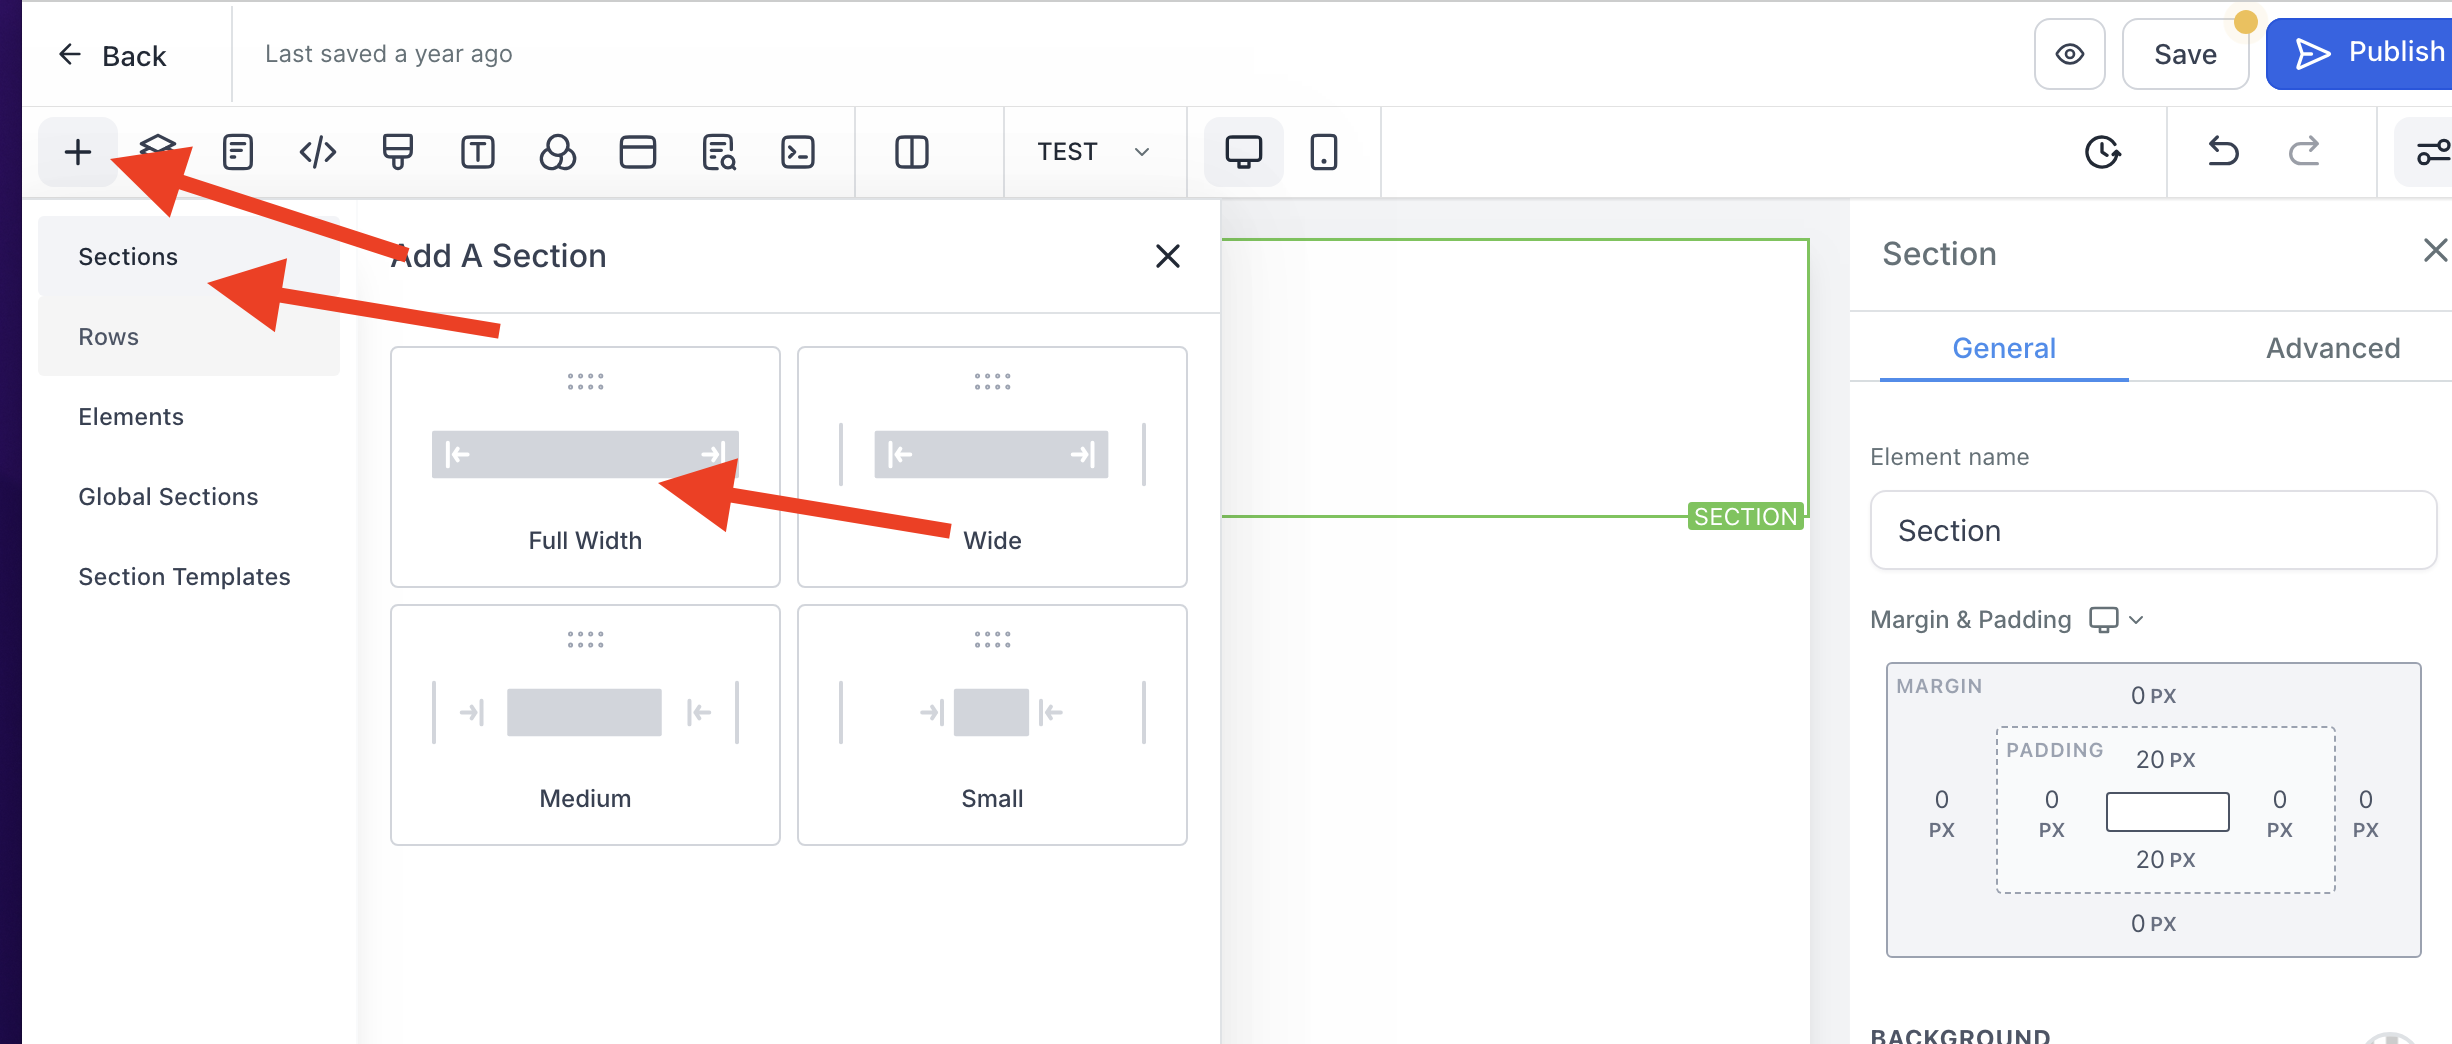
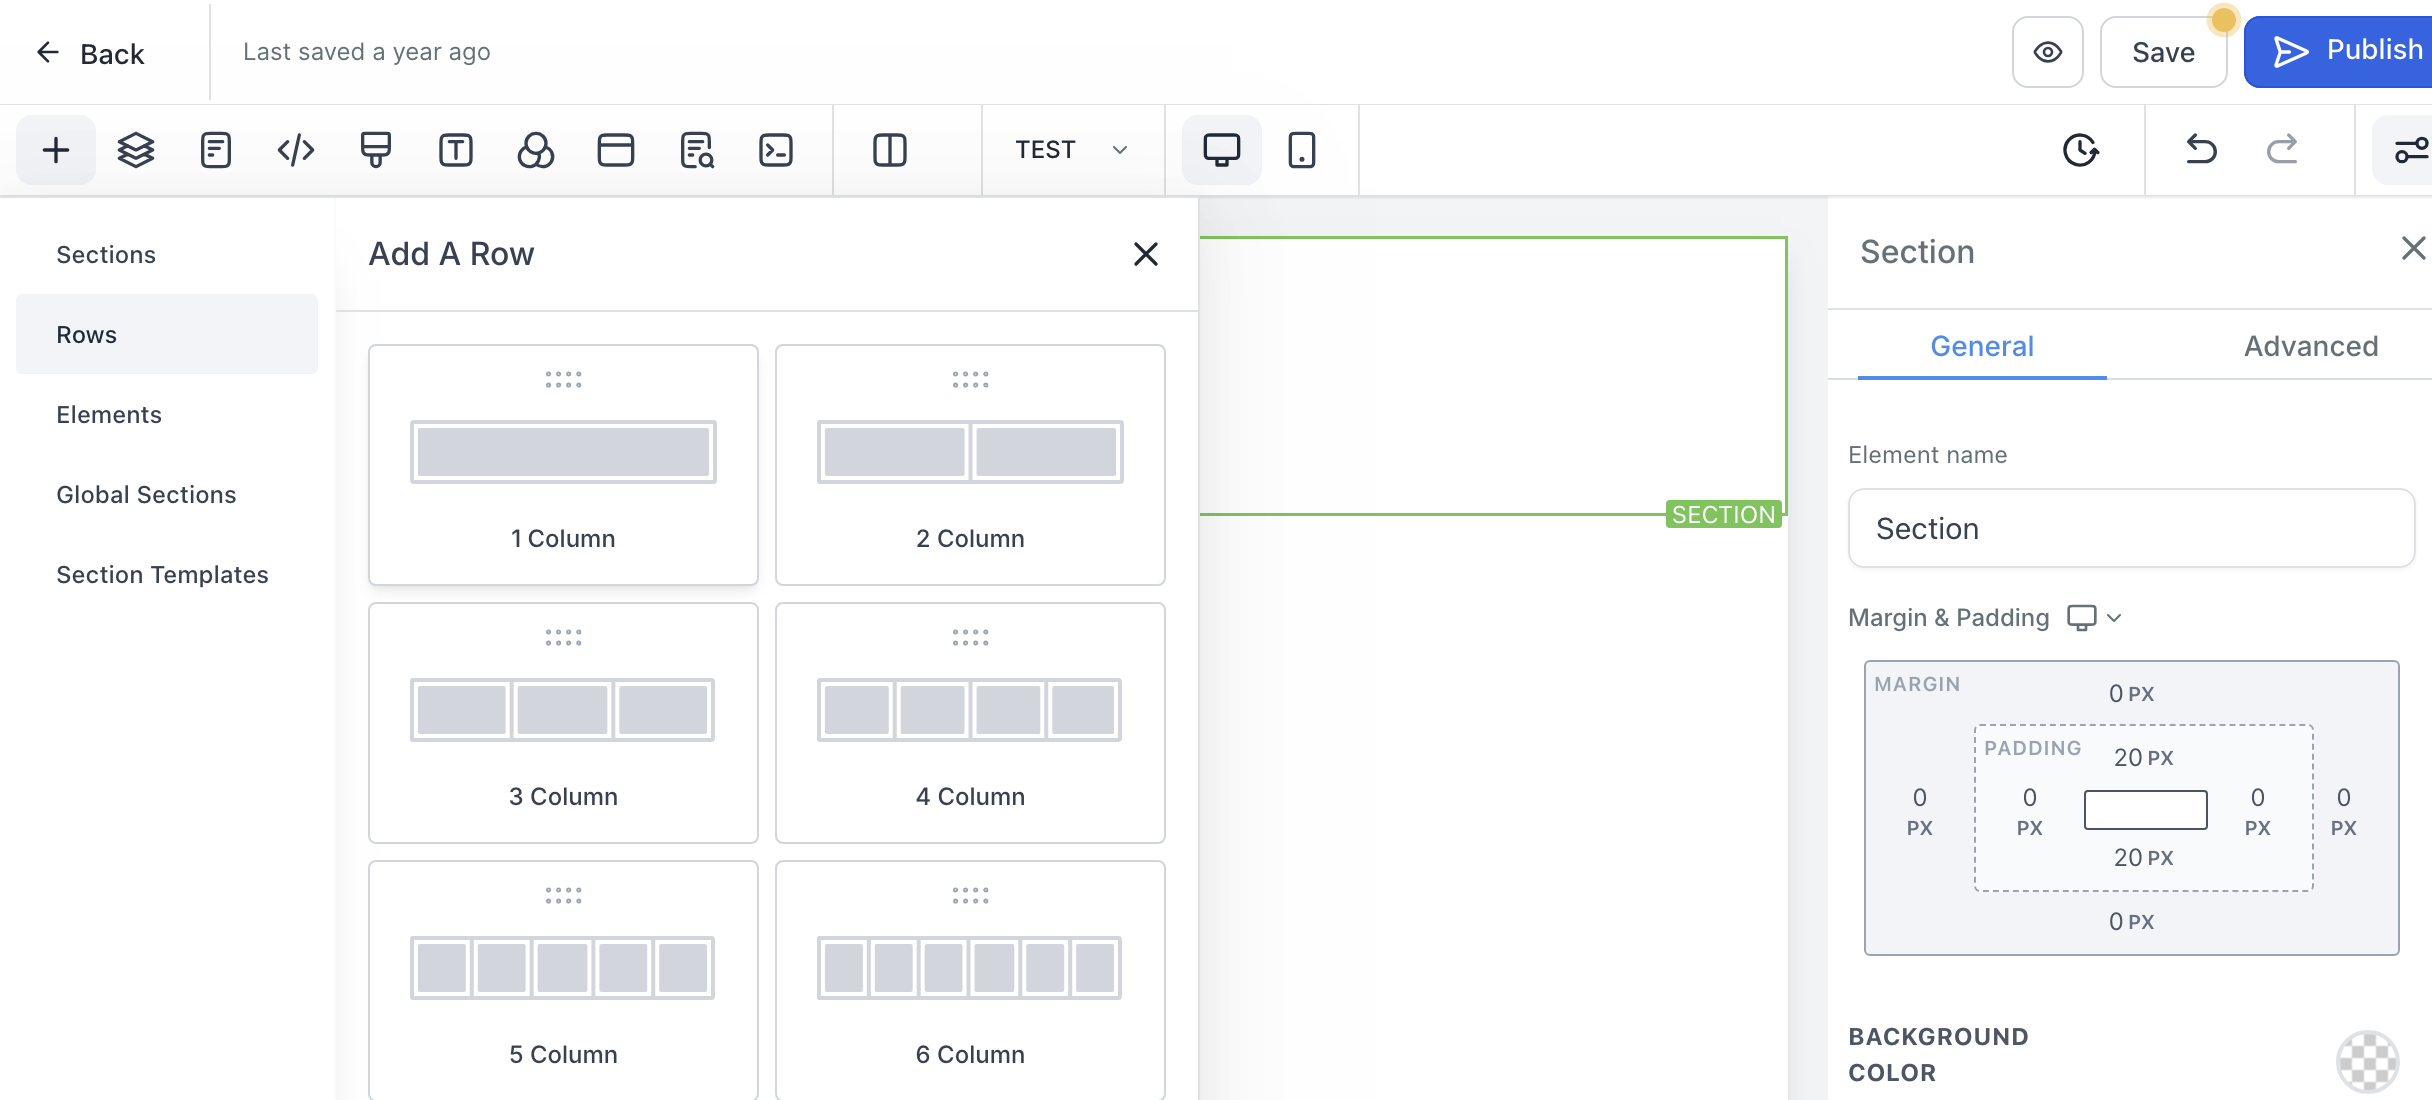
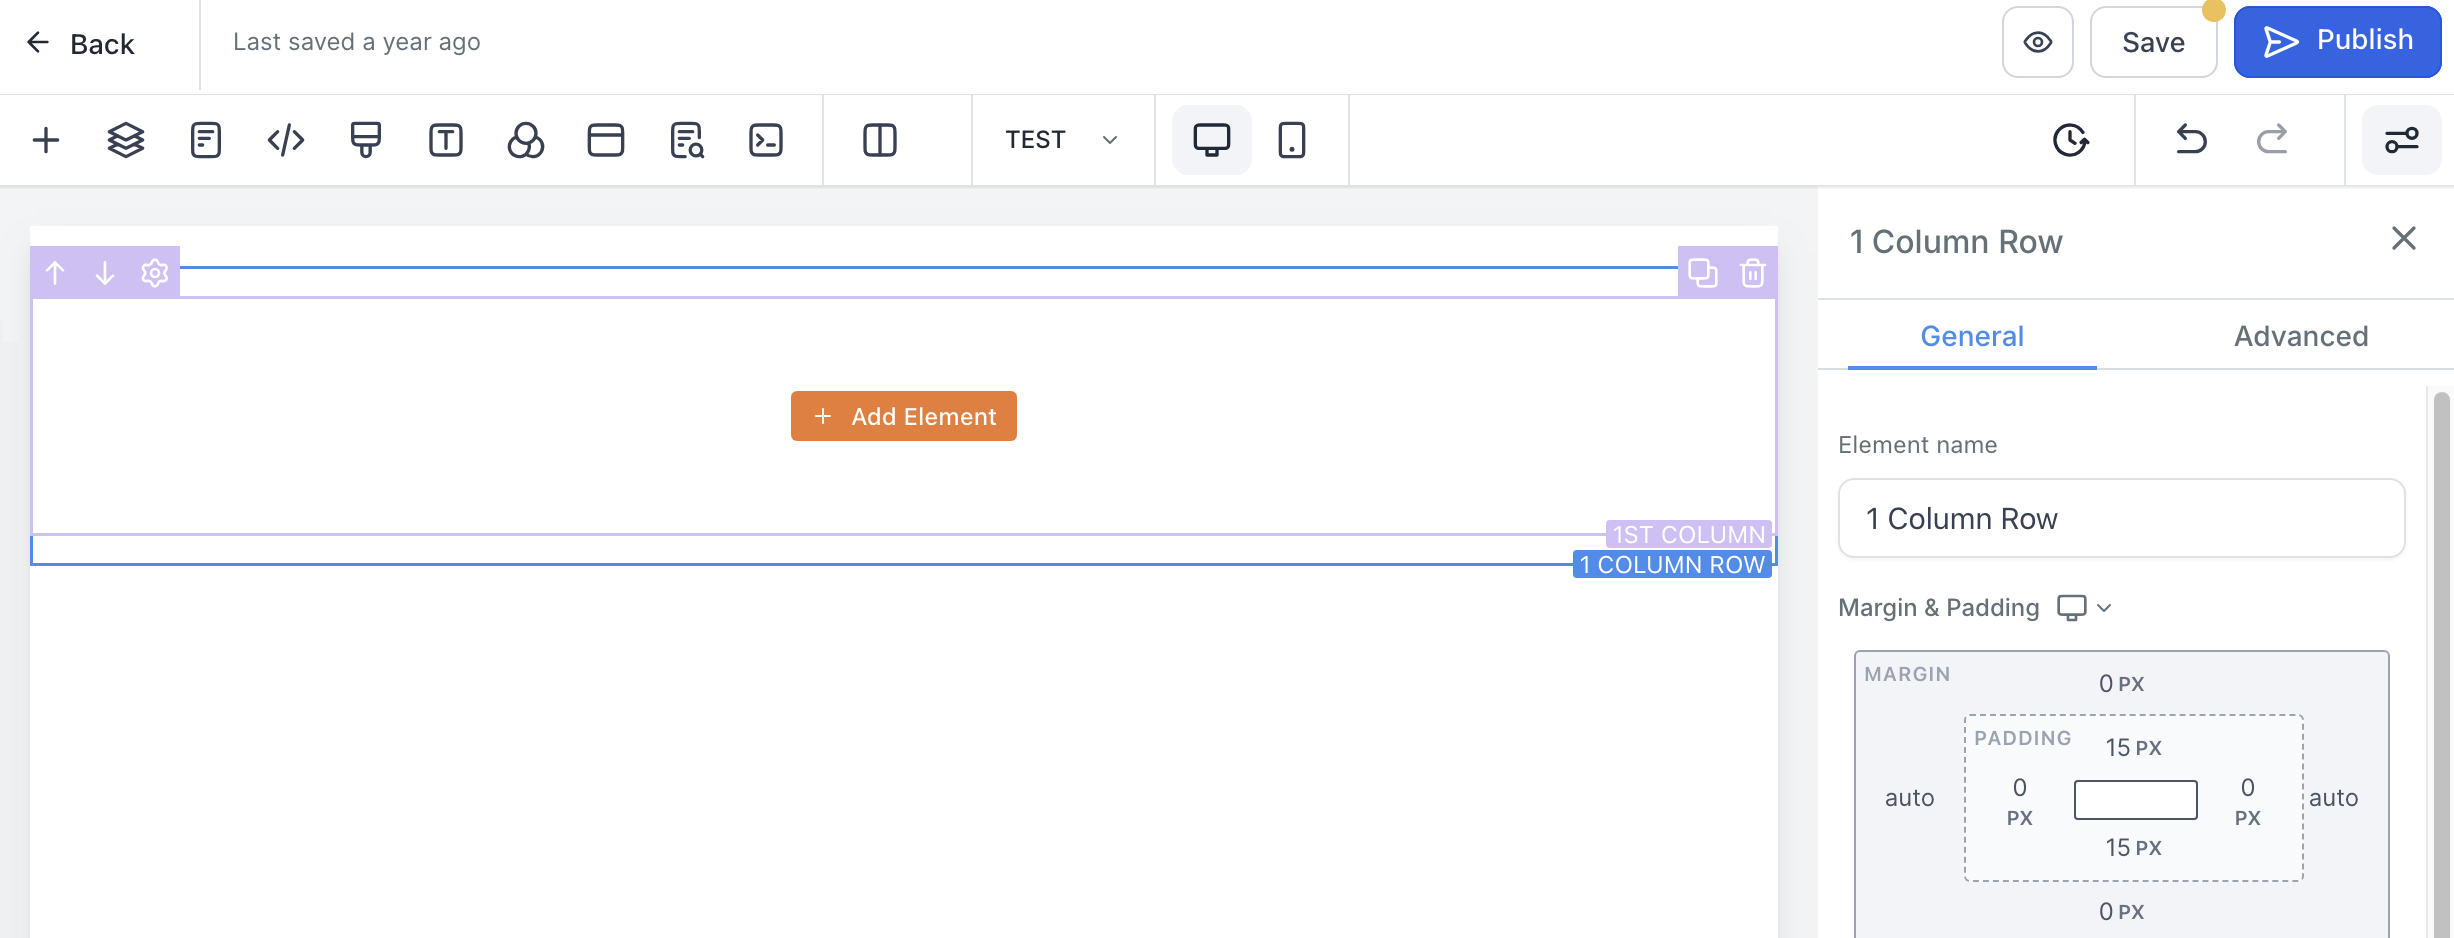
Click EDIT then click on the plus sign to add elements in the funnel builder > Add a section > Add a single Row with ONE Column
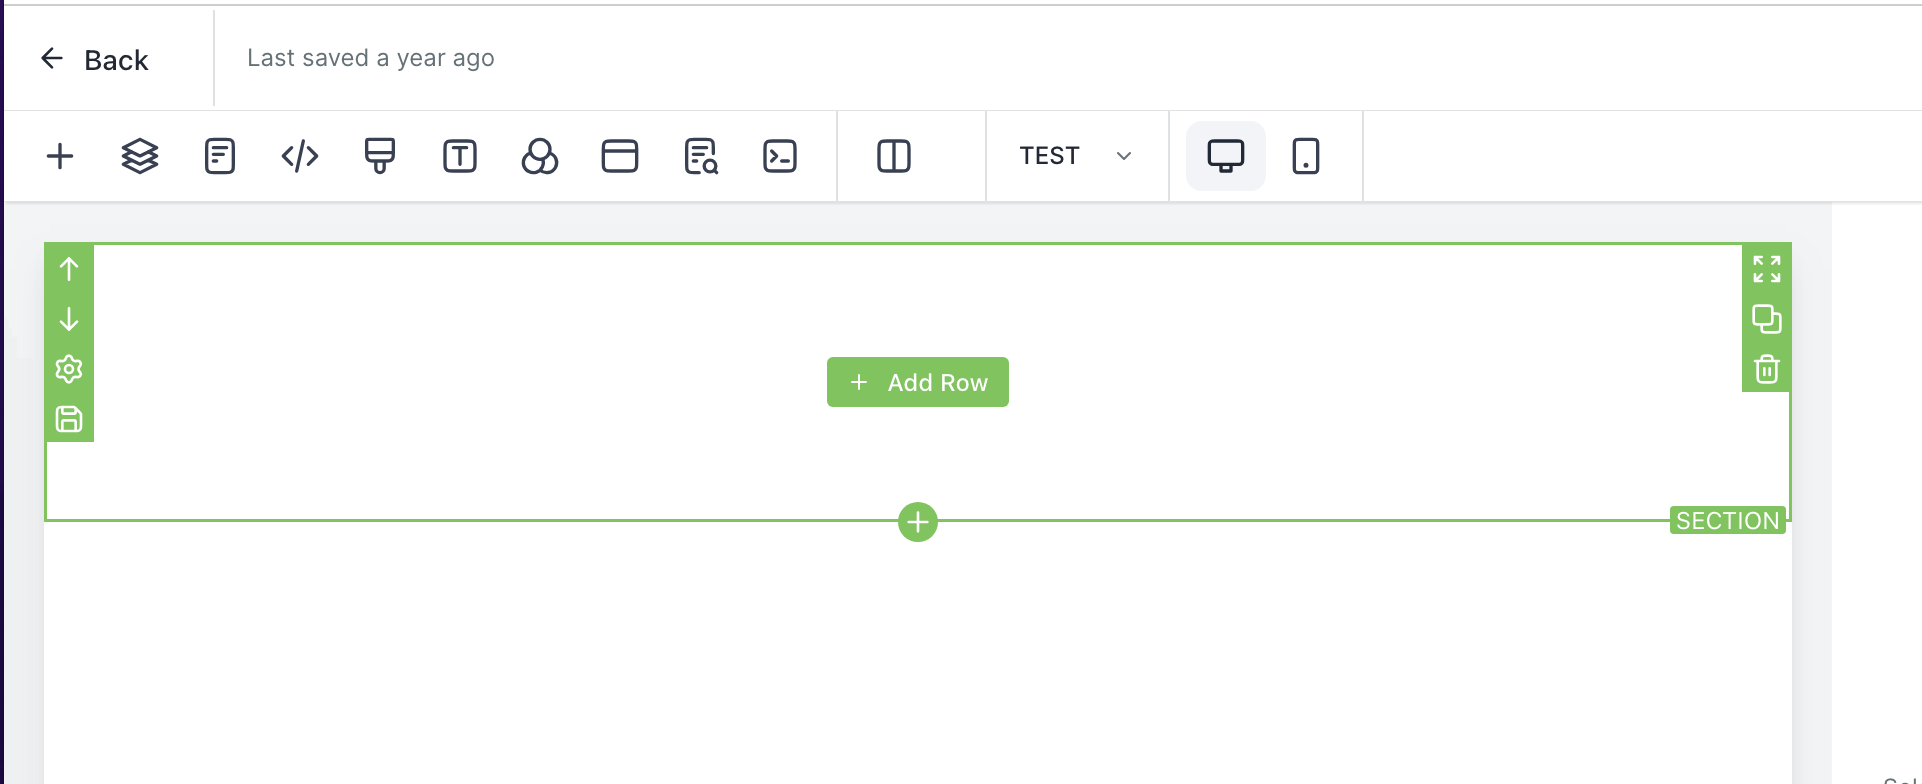
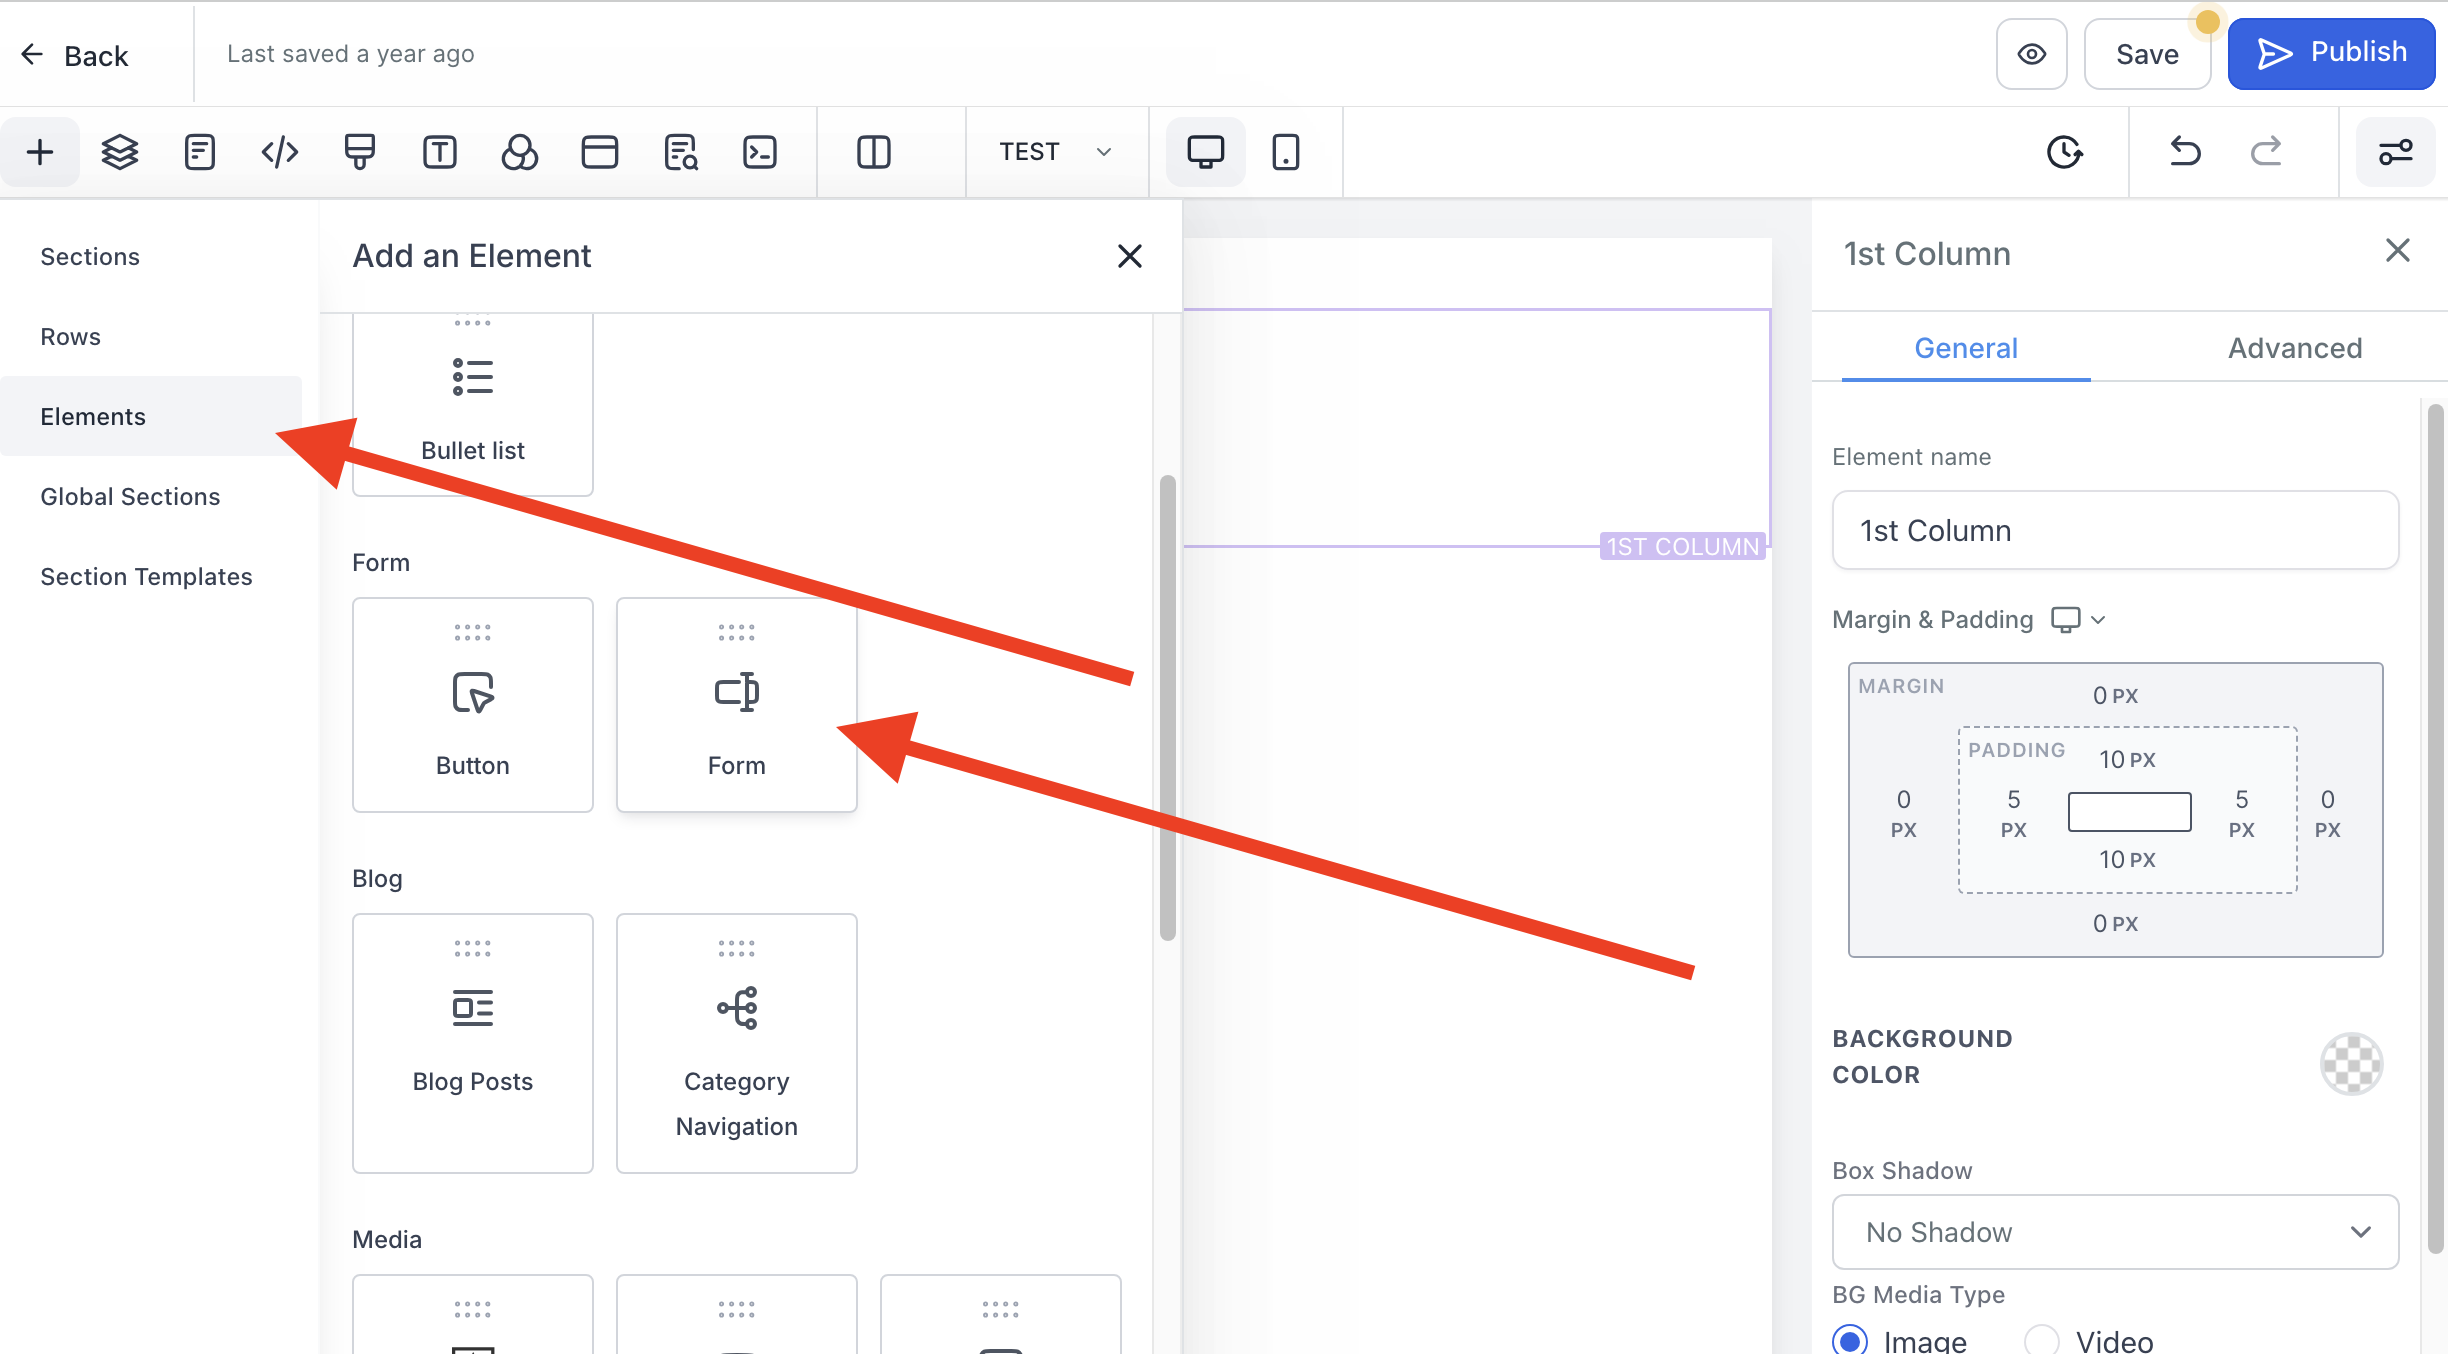
Then click on the ADD ELEMENT button in the center of the column
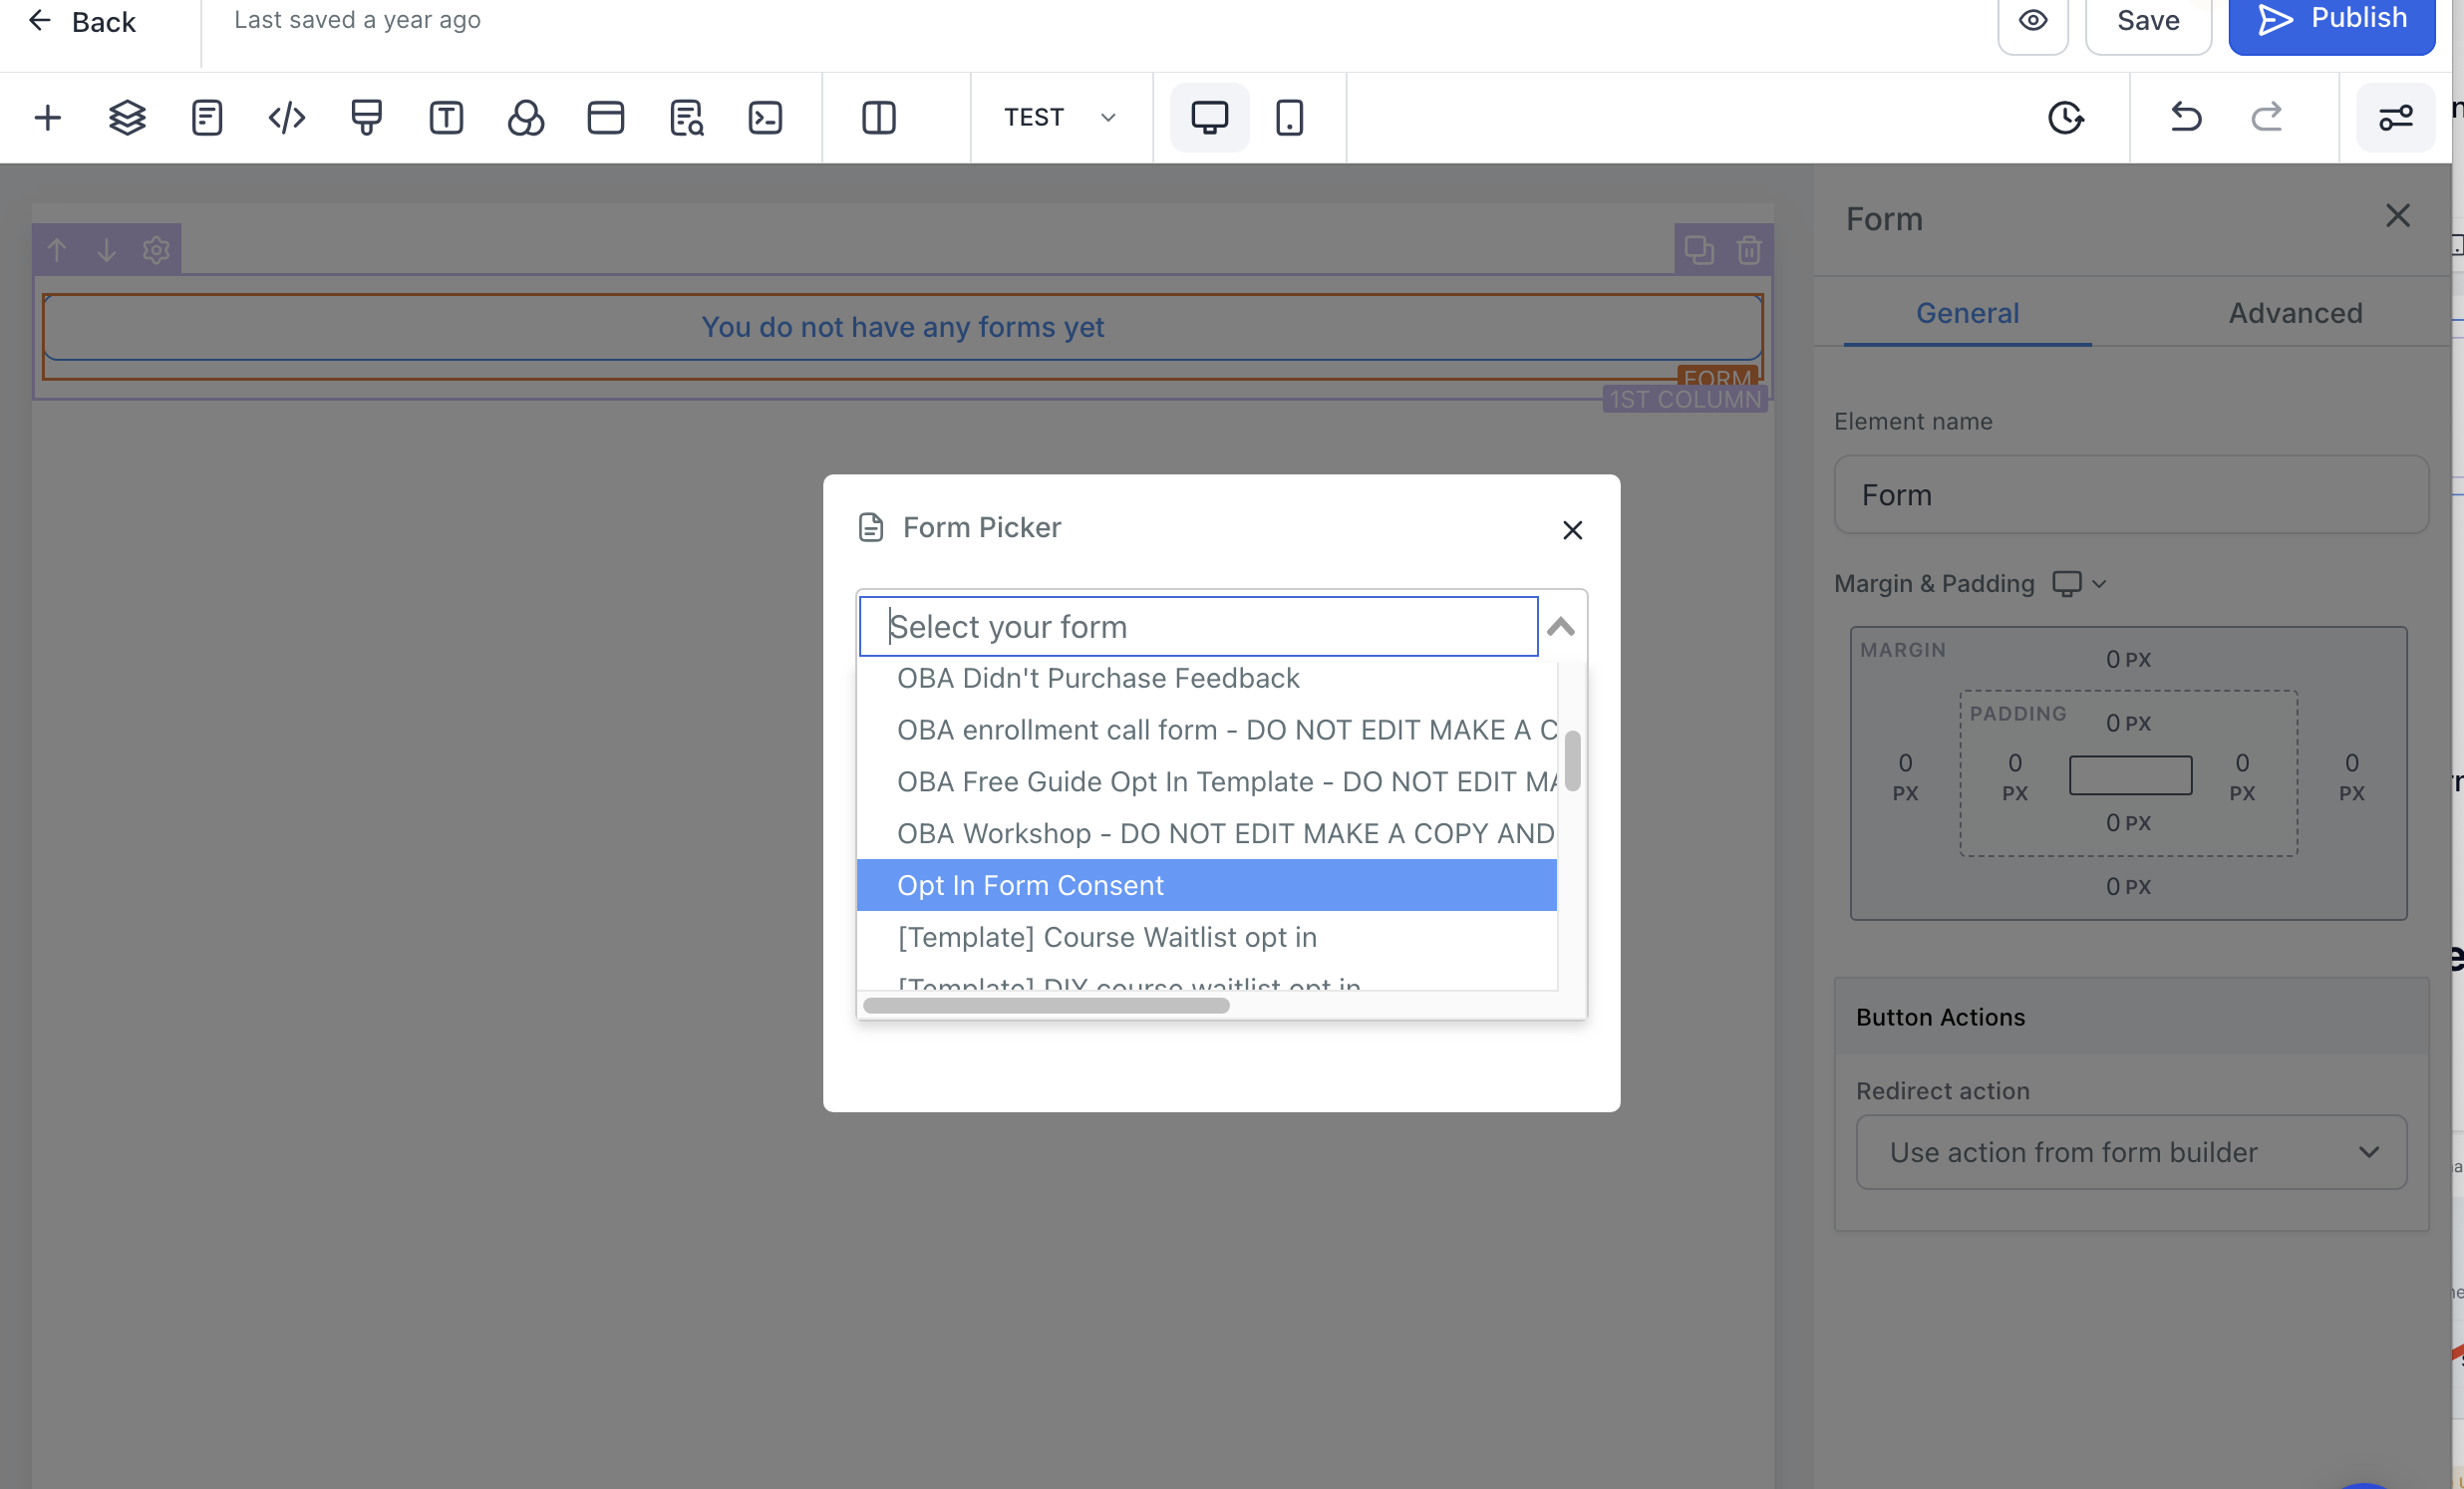
choose the FORM option and select the opt in form we created in the last step
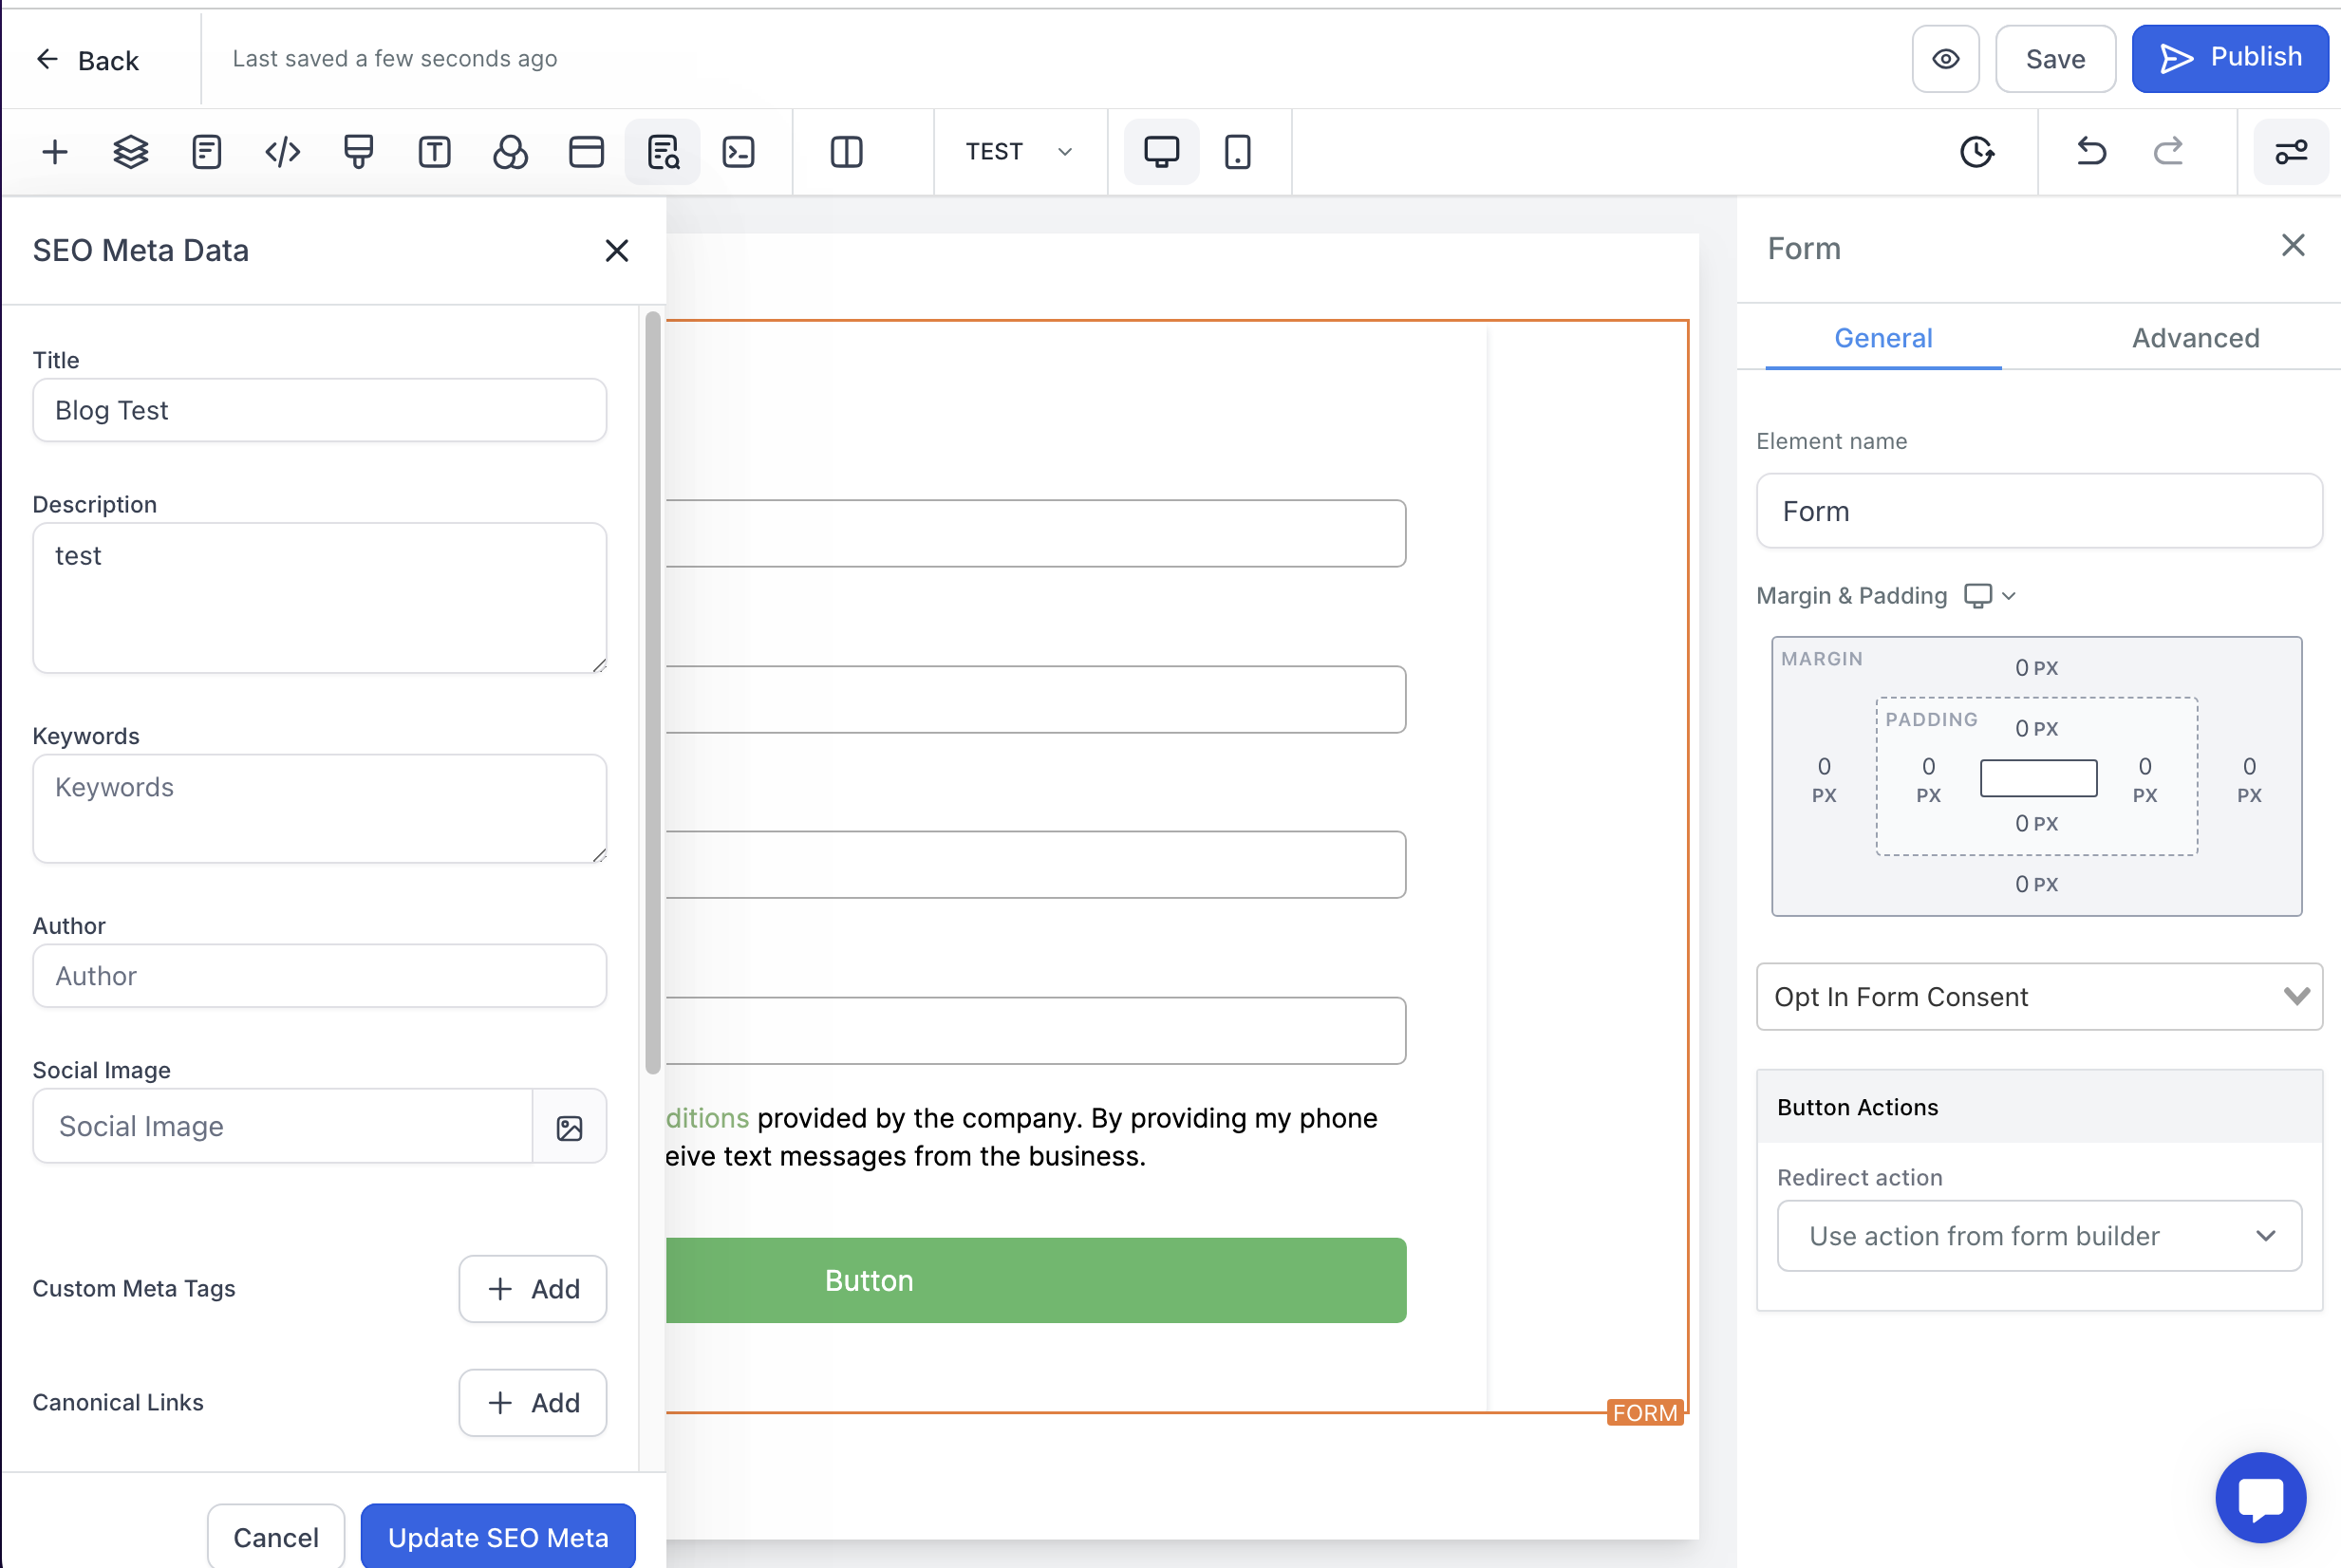
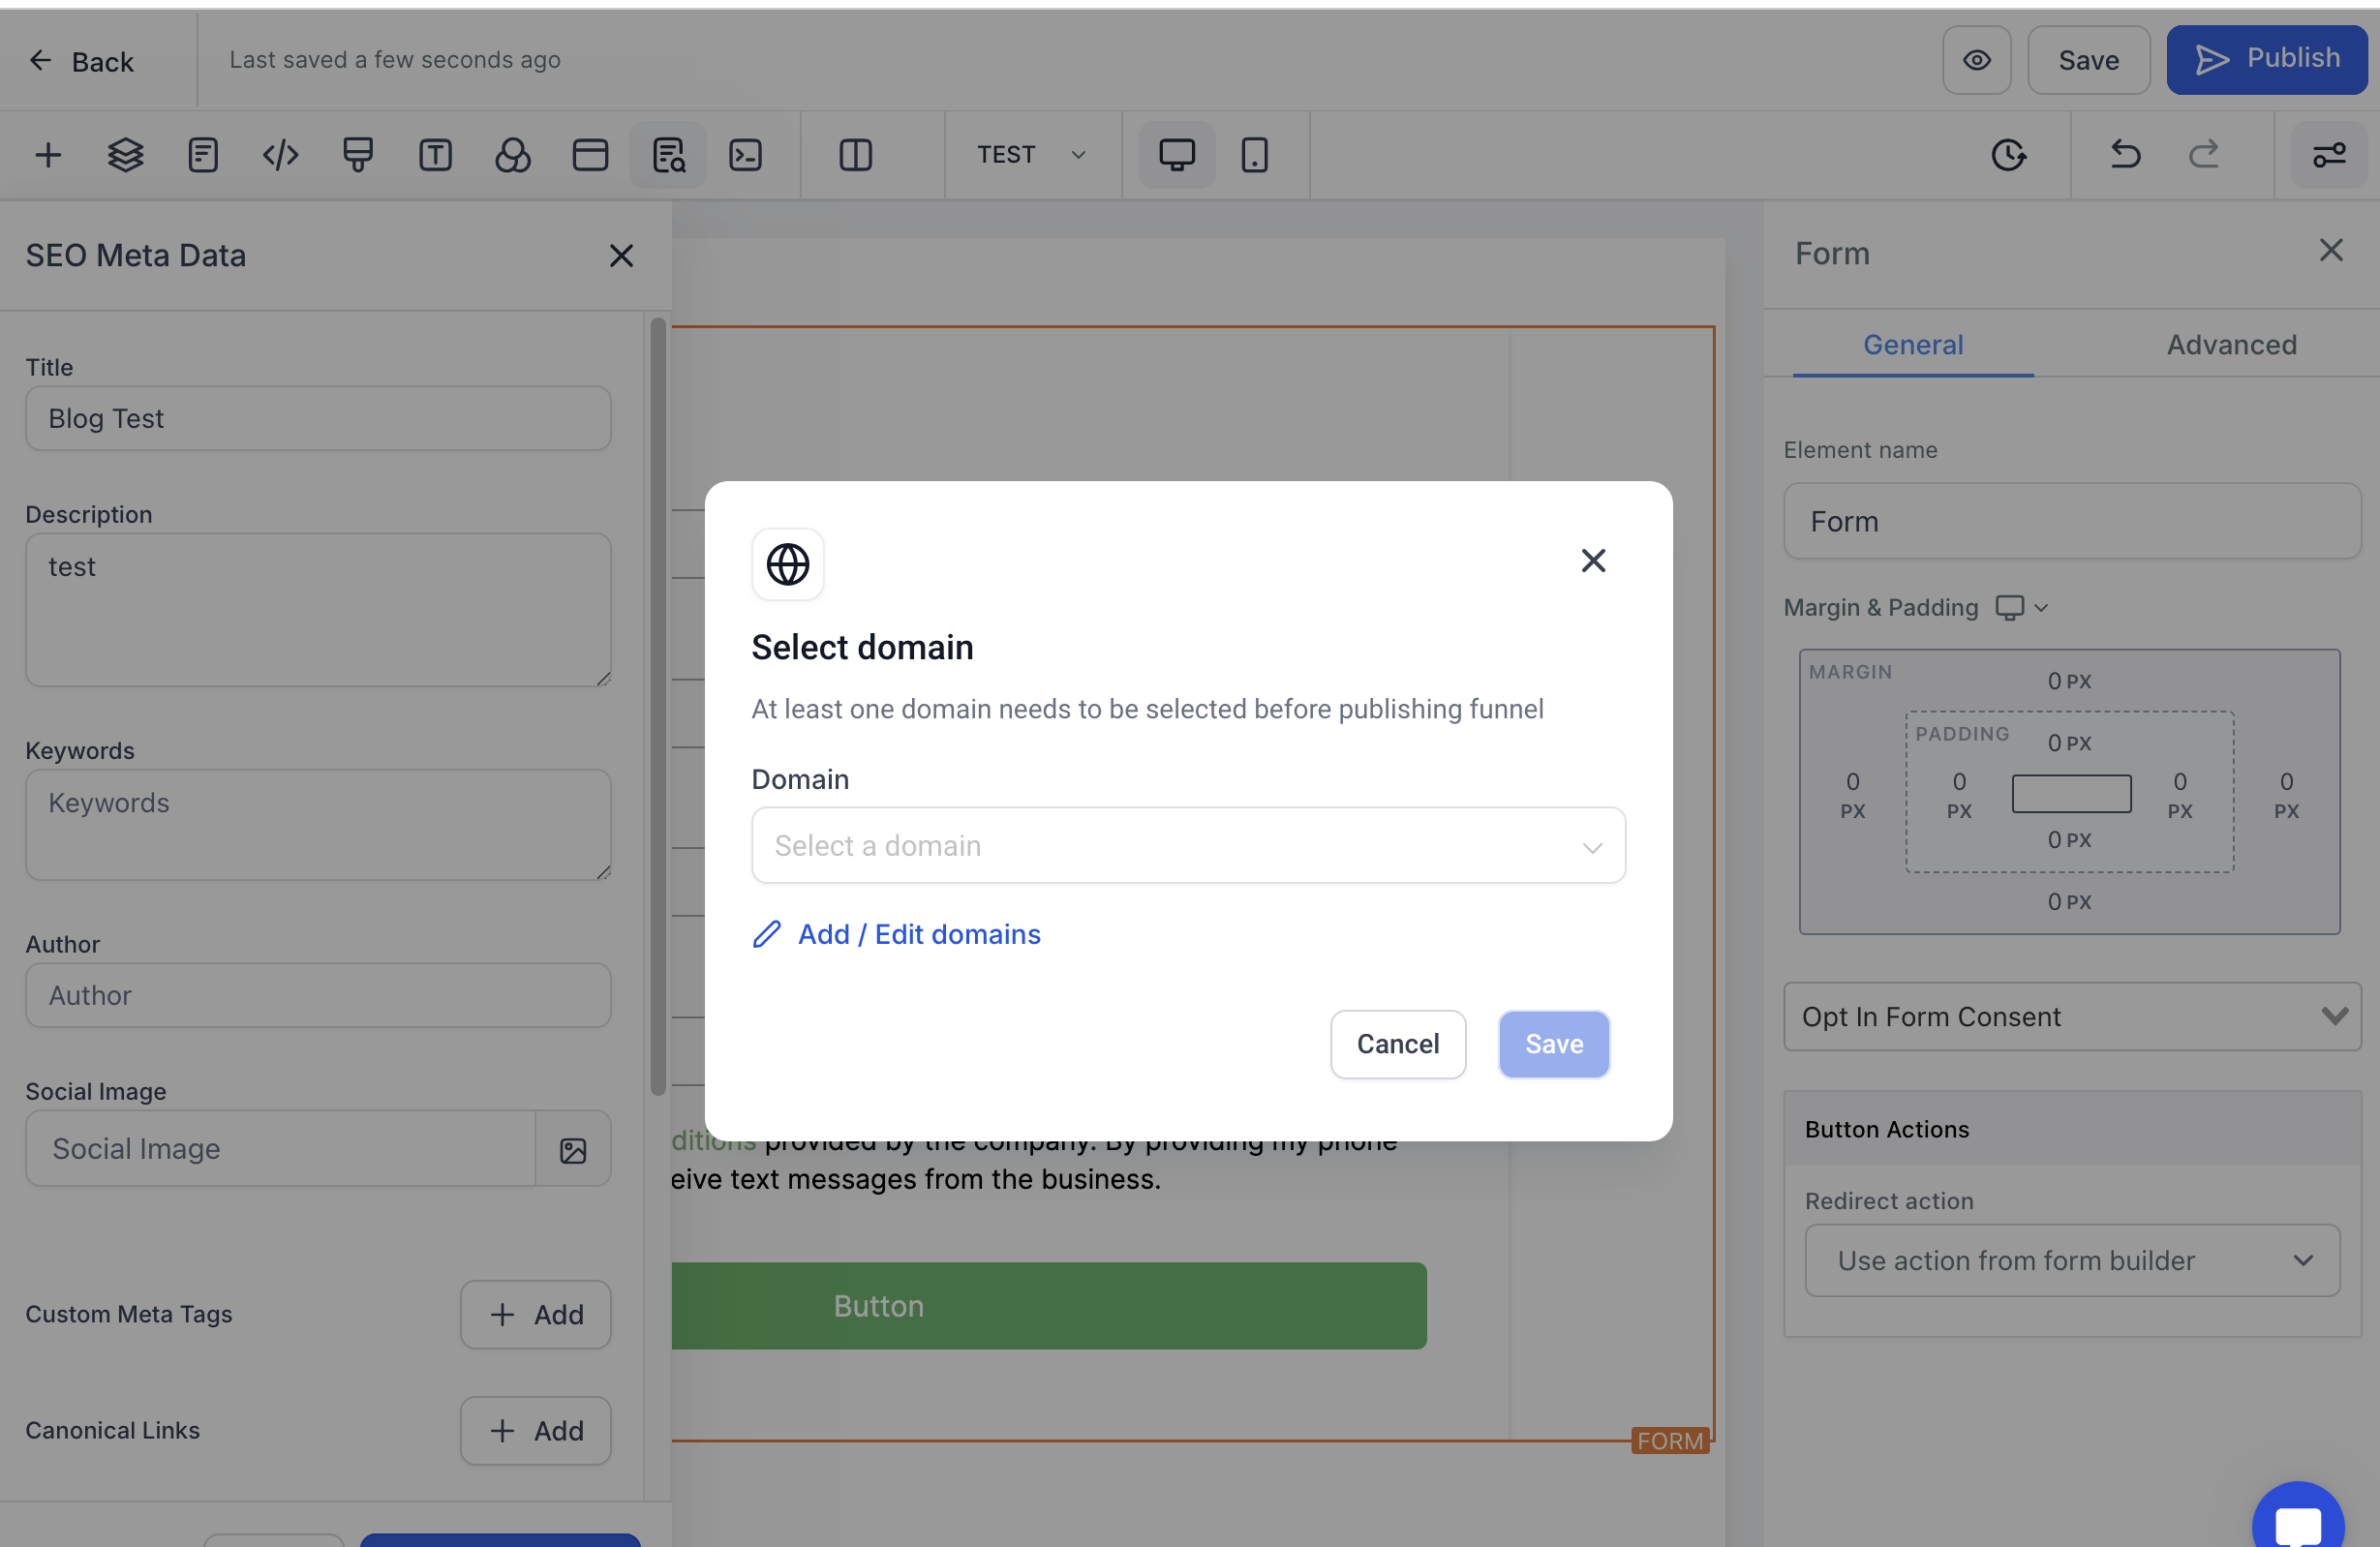
hit SAVE on the top far right and enter the SEO Meta data then hit UPDATE SEO META DATA: typically this is what the url will show when you share it, you can give it a title like OPT IN FORM and description of: opt in to receive updates from our team!
hit PUBLISH and add a domain to the funnel to make it LIVE
Now you're ready for A2P Compliance registration process!!!
Go to the Trust center in the phone settings
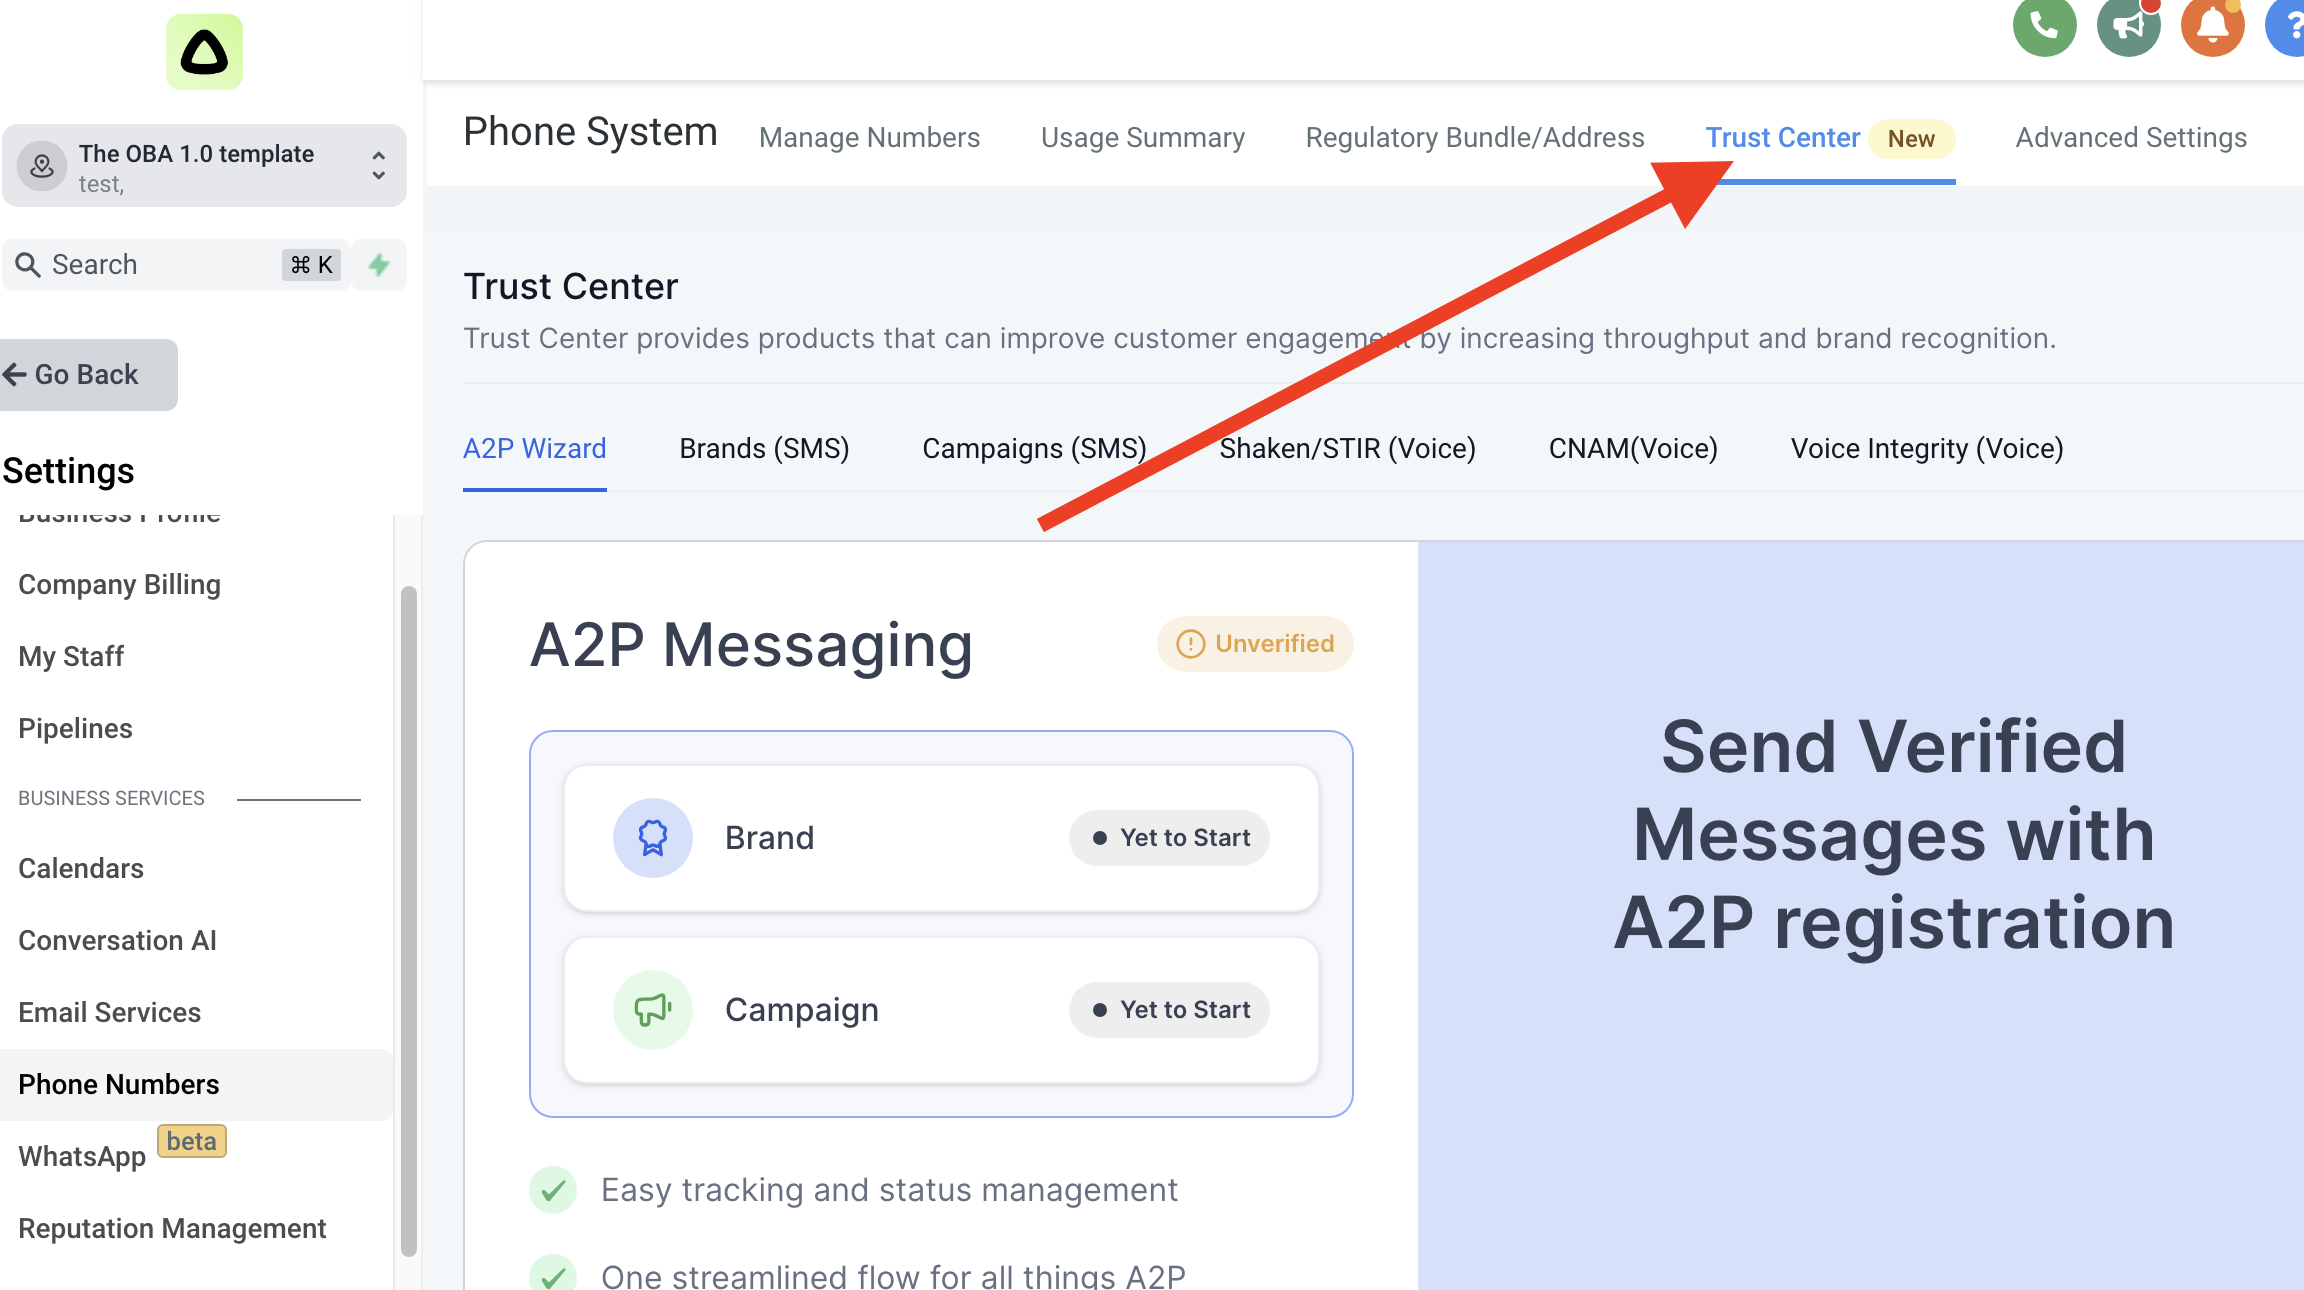
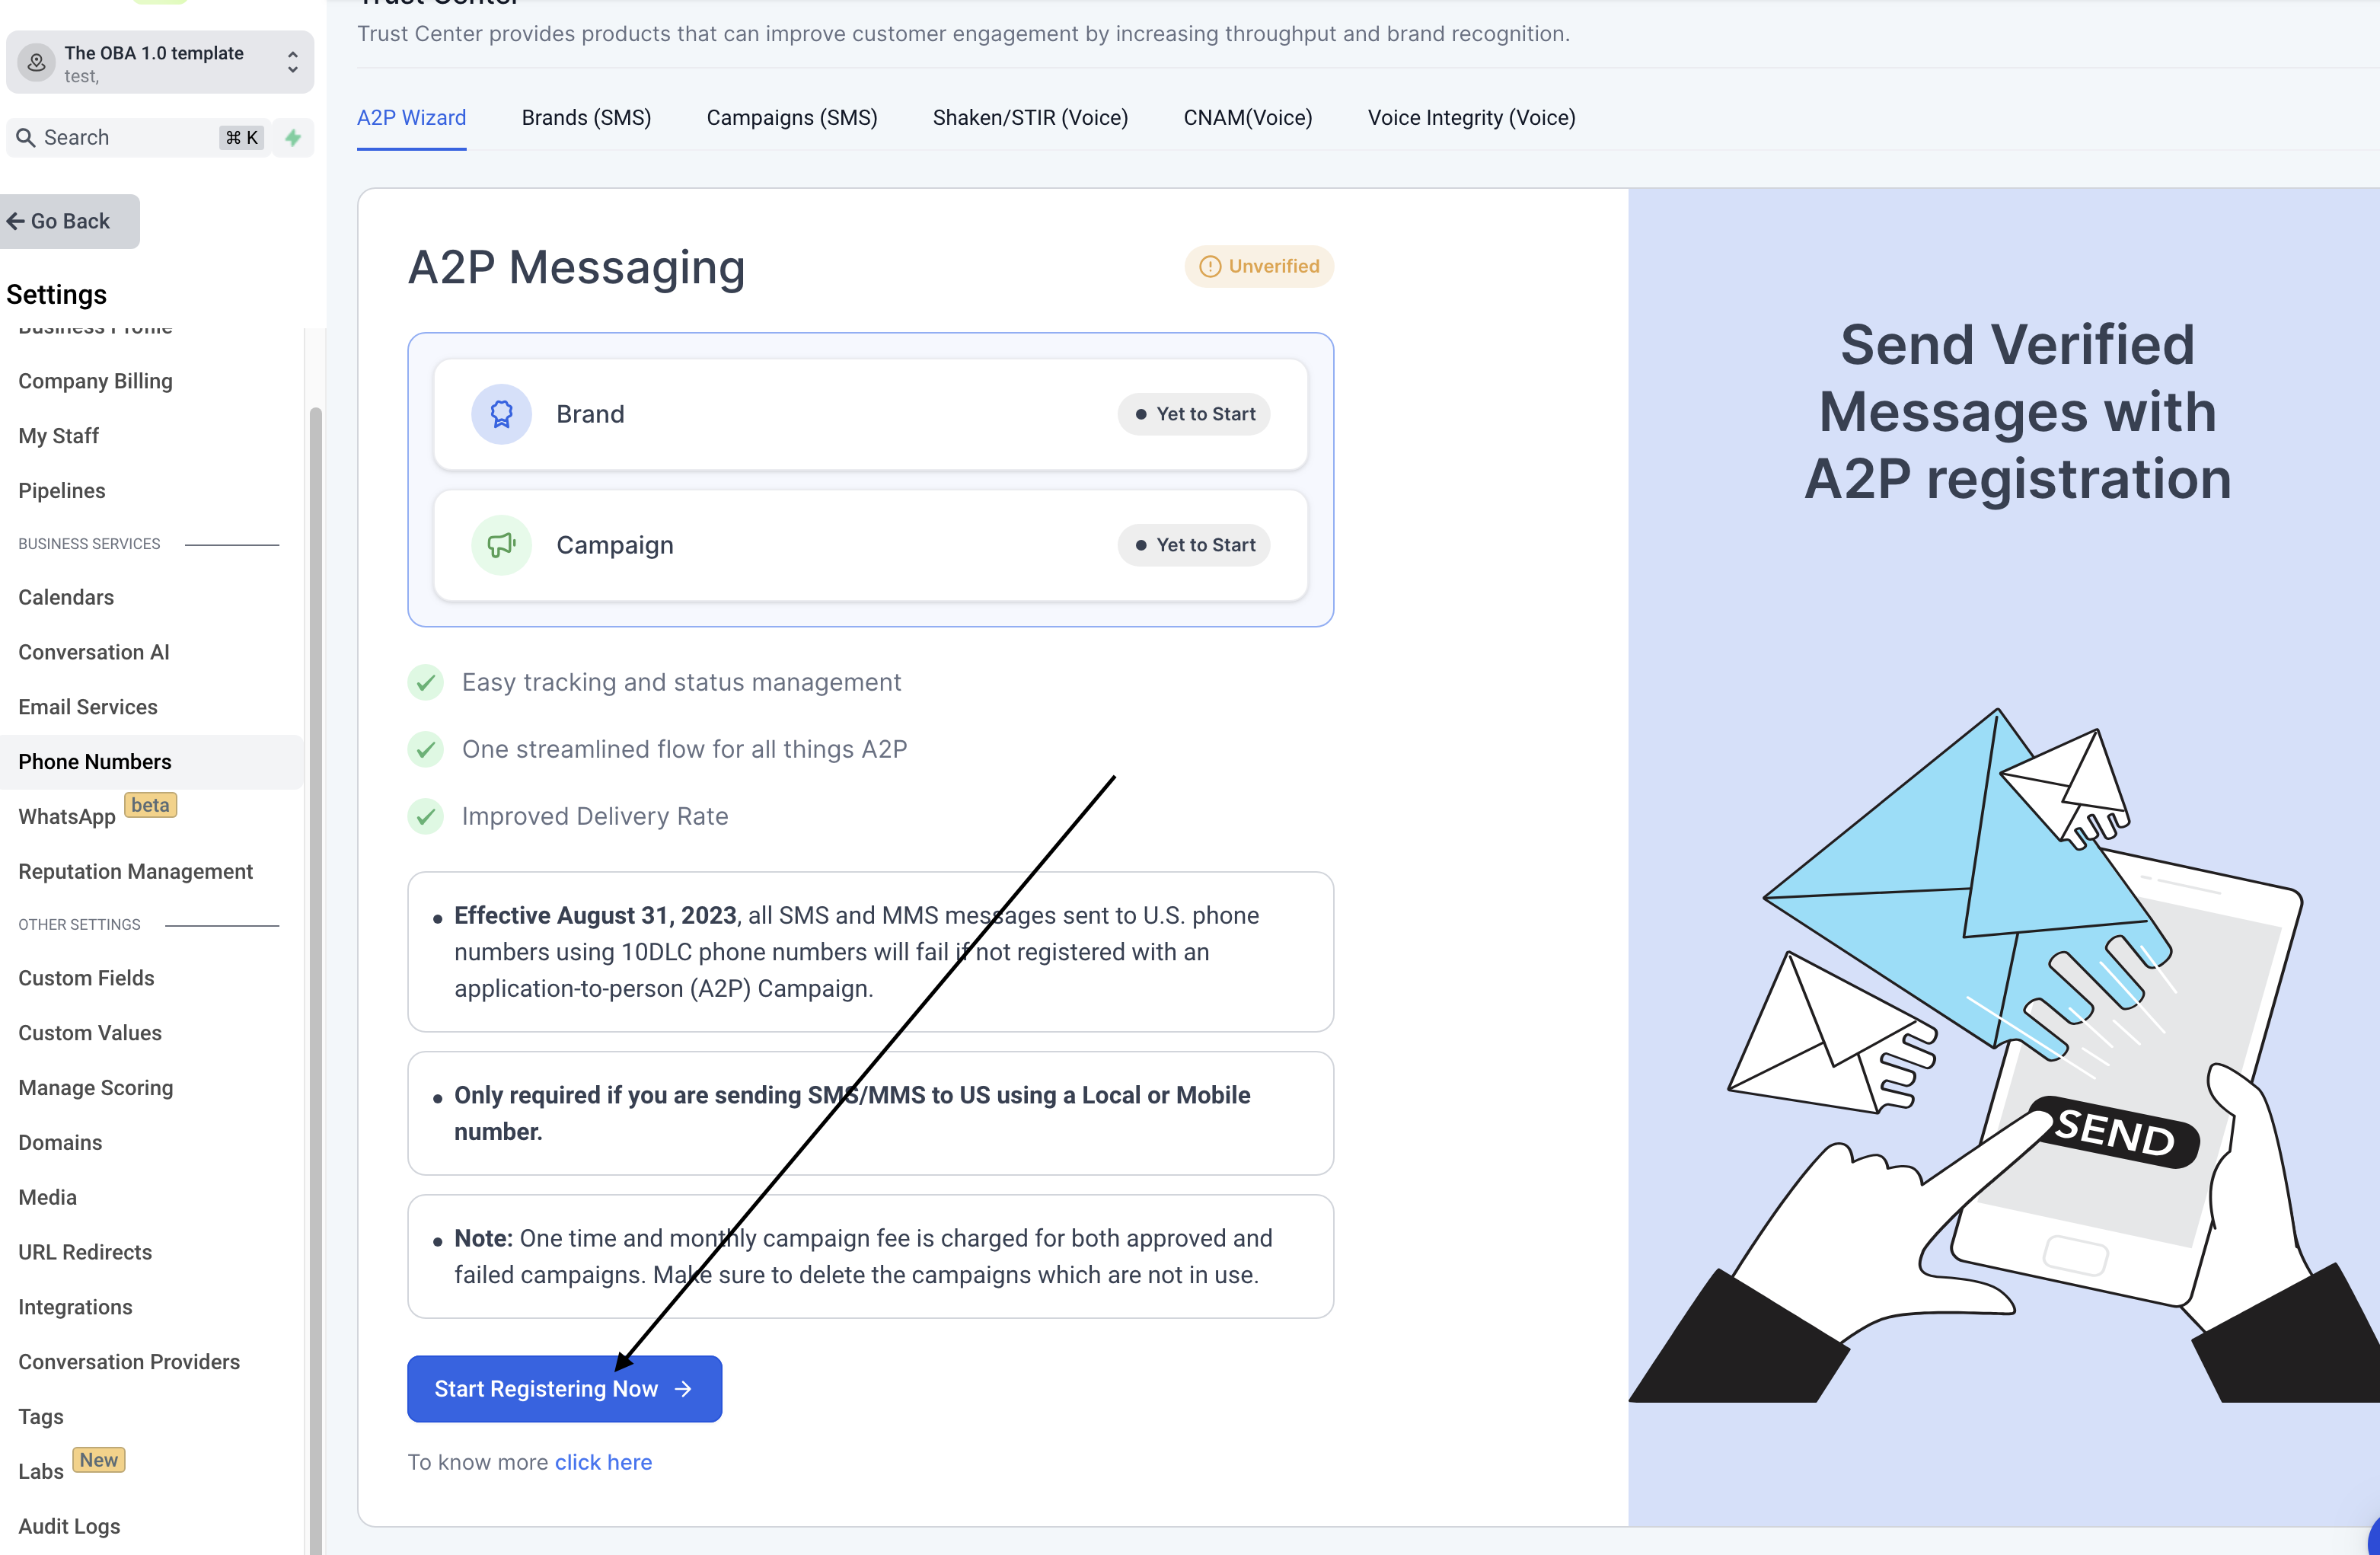
Step 1: Next, you'll be prompted to click "register for A2P" on the bottom right, hit the button and be taken to the A2P messaging wizard then scroll down to the bottom and click the start registering now button
Step 11: Follow the instructions provided in the pop-up window to get A2P registration for your phone number. This usually involves filling out a form and submitting it to a trusted third-party verification provider.
Step 12: Once you have completed the A2P registration process, go back to your CRM platform and navigate to the "Trust Center" section under the "Security" tab.
Step 13: Click on "Add Trusted Phone Number".
Step 14: Enter your newly registered phone number and click on "Verify Number". This step verifies that you are the owner of this phone number.
Step 15: Congratulations, you have now successfully purchased and registered a phone number inside of your CRM platform! You can now use this phone number for all of your communication needs within your business.
